Water keeps you alive this week; food keeps you alive this year. This chapter is how to grow it so it never stops coming, how to raise it, how to take it from the wild, and how to put it up so a full summer feeds you through a hard winter. The goal is not one big harvest. The goal is to never be hungry.
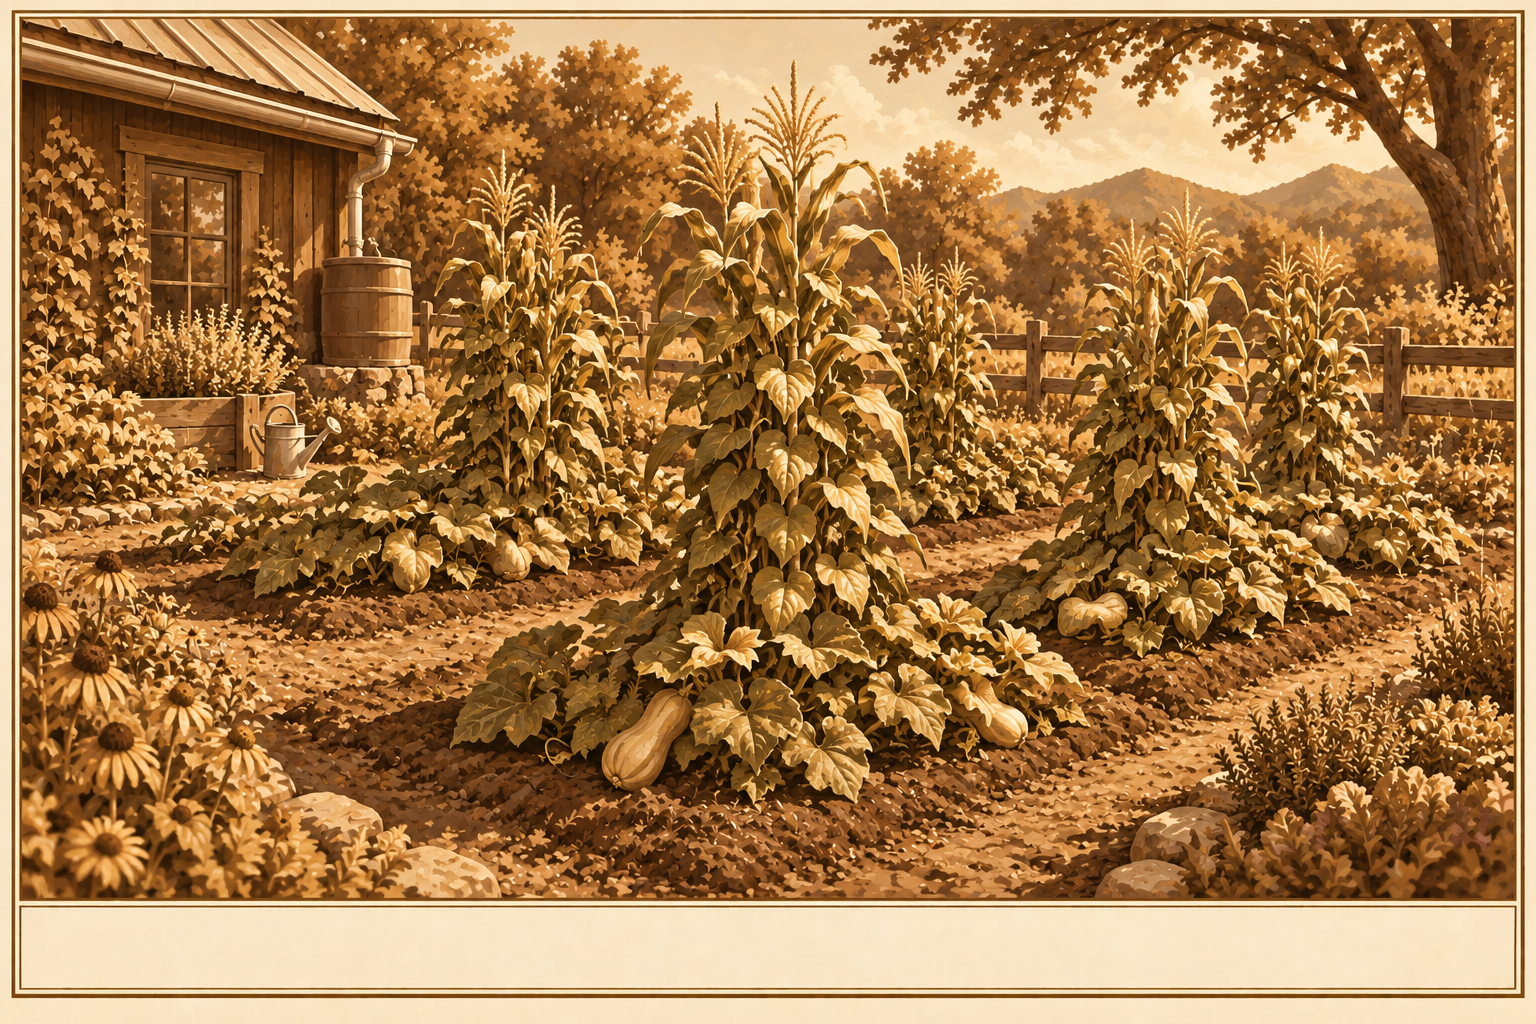
Food · GrowingRows & Three Sisters
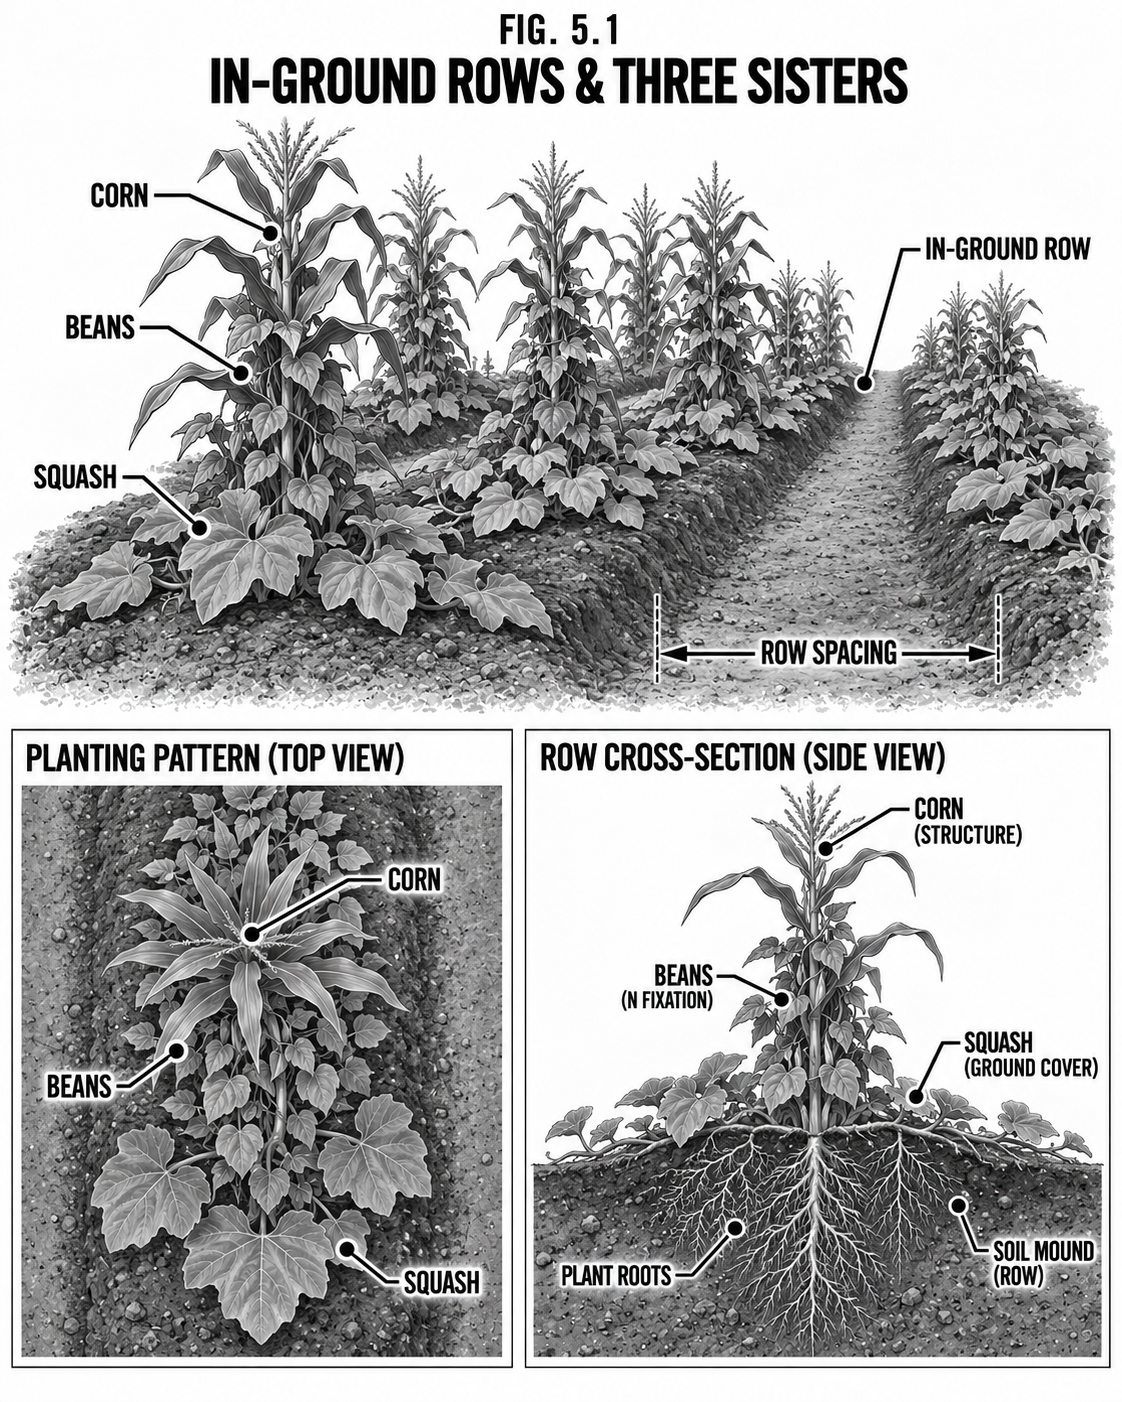
In-Ground Rows & Three Sisters
The oldest garden there is, and still the one that feeds the most people.
DifficultyBeginner
TimeSeason
CostLow
SkillsBasic
Why it is worth it
Open-ground rows need no lumber and scale to feed a family. The Three Sisters (corn, beans, squash) is the classic guild: corn gives the beans a pole, beans fix nitrogen for the corn, and squash shades out weeds and holds moisture. Together they yield more on the same ground than any one alone.
Step by step
Work compost into loose, drained soil.
Plant corn in blocks (for pollination), not single rows.
When corn is knee-high, sow pole beans at its base and squash between hills.
Keep weeded until the squash canopy closes, then let it ride.
Tips & variations Rotate where heavy feeders go each year so the soil never gets mined.
Food · GrowingRaised Beds
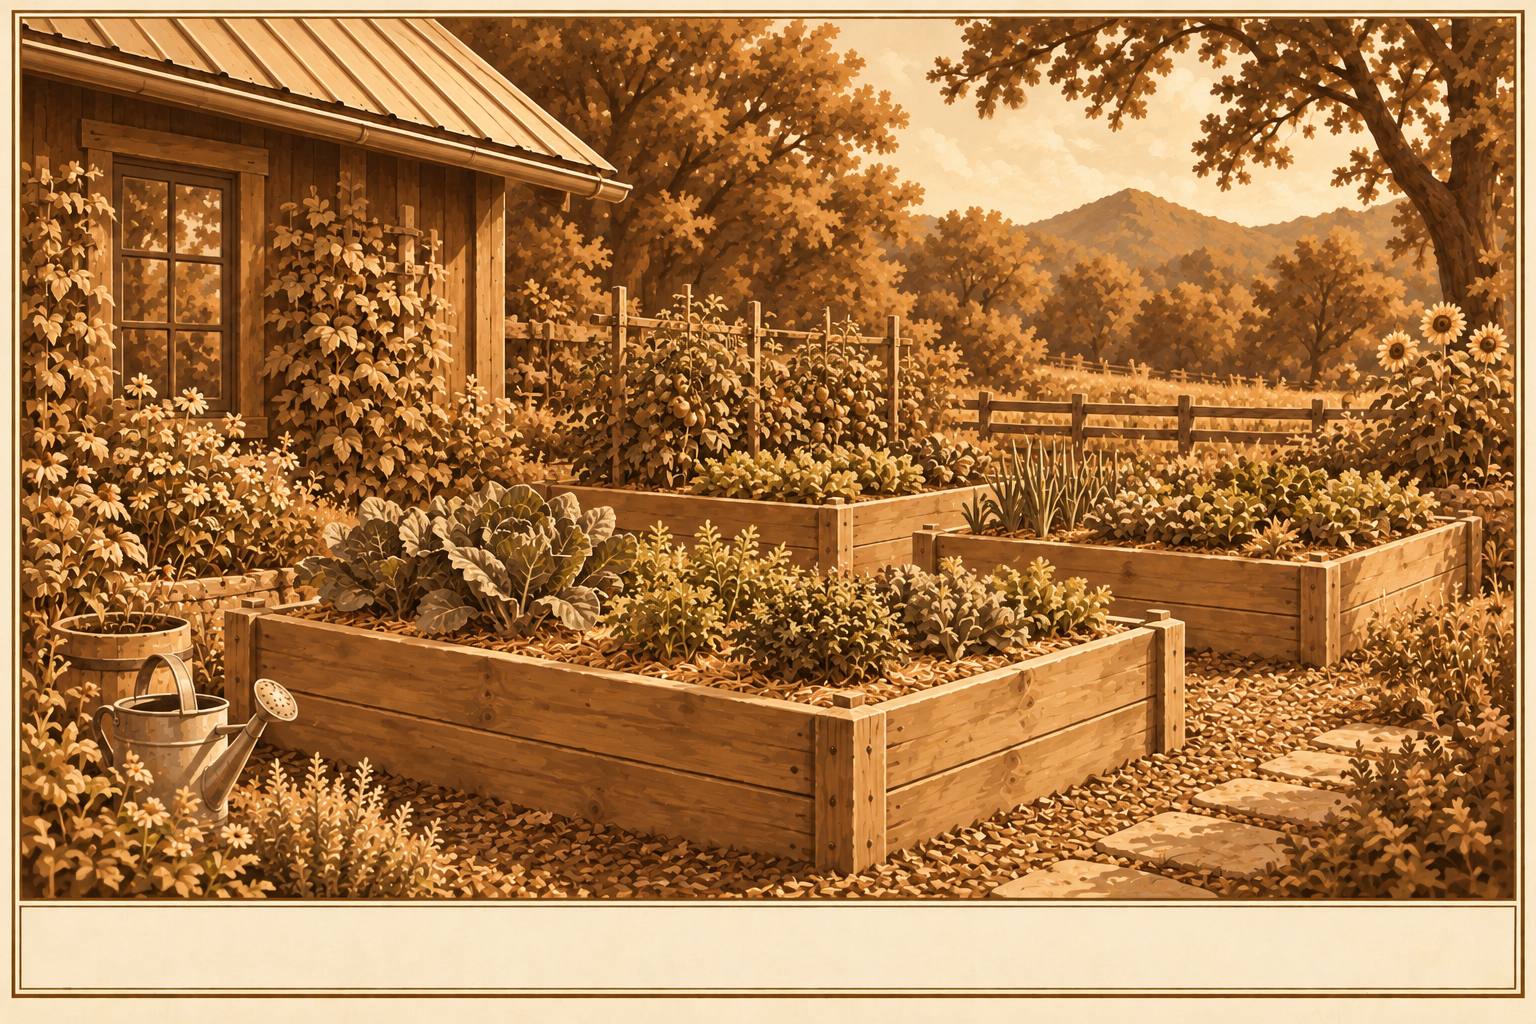
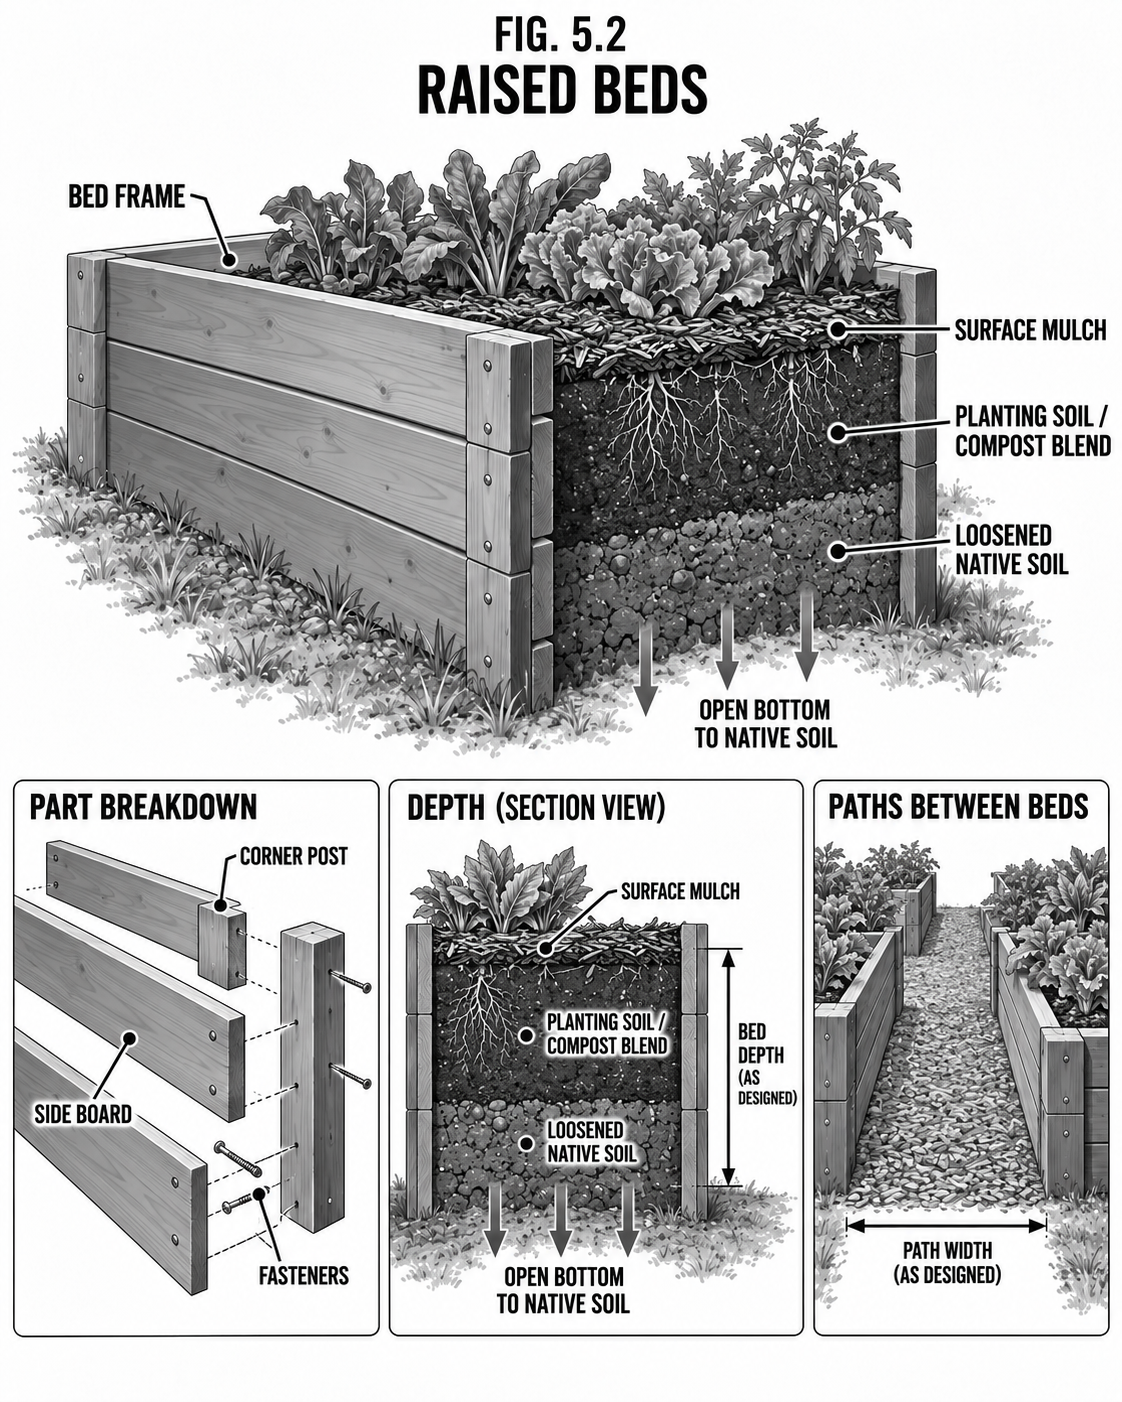
Raised Beds
Better soil, better drainage, less bending, fewer weeds.
DifficultyBeginner
TimeA day
CostLow–Med
SkillsBasic build
Why it is worth it
A framed bed of good soil warms earlier, drains better, and packs more plants into less space than open ground. On poor or rocky ground it lets you garden anywhere. Keep beds narrow enough to reach the middle without stepping in (about 4 ft wide).
Step by step
Build a bottomless frame ~4 ft wide, any length, 10–18 in deep.
Fill with a compost-rich soil mix.
Plant intensively; mulch the surface.
Tips & variations Hoops over the bed turn it into a mini greenhouse or shade house in a minute.
Food · GrowingHugelkultur
Hugelkultur Beds
Bury rotting wood and build a bed that waters and feeds itself for years.
DifficultyIntermediate
TimeA day
CostFree material
SkillsDigging
Why it is worth it
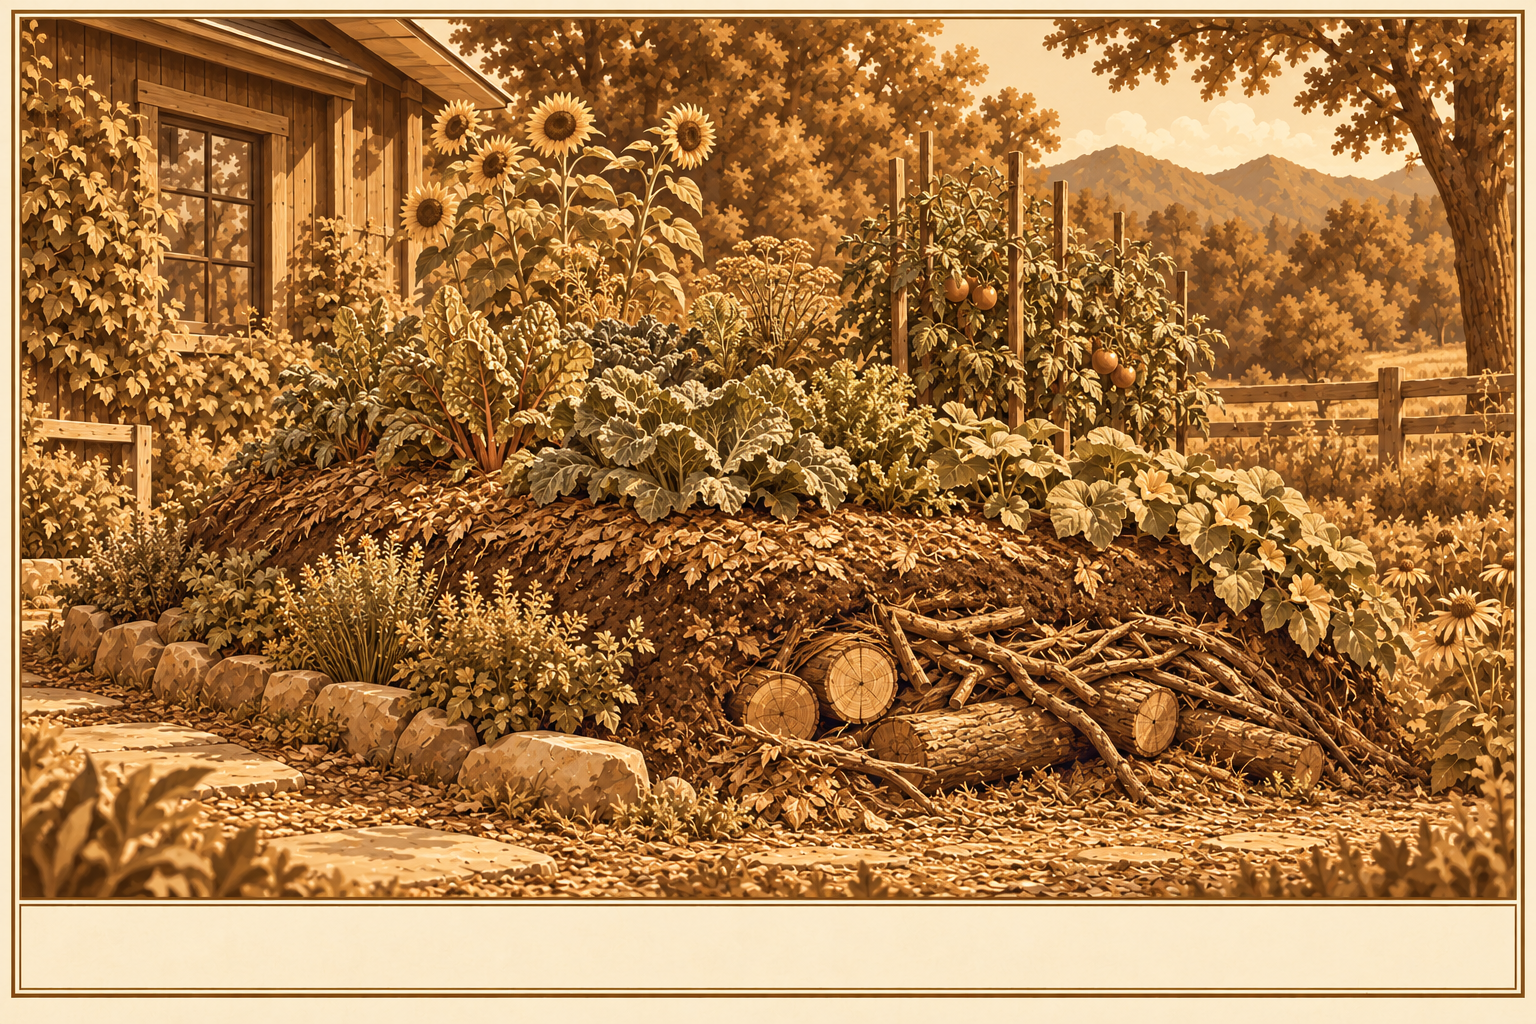
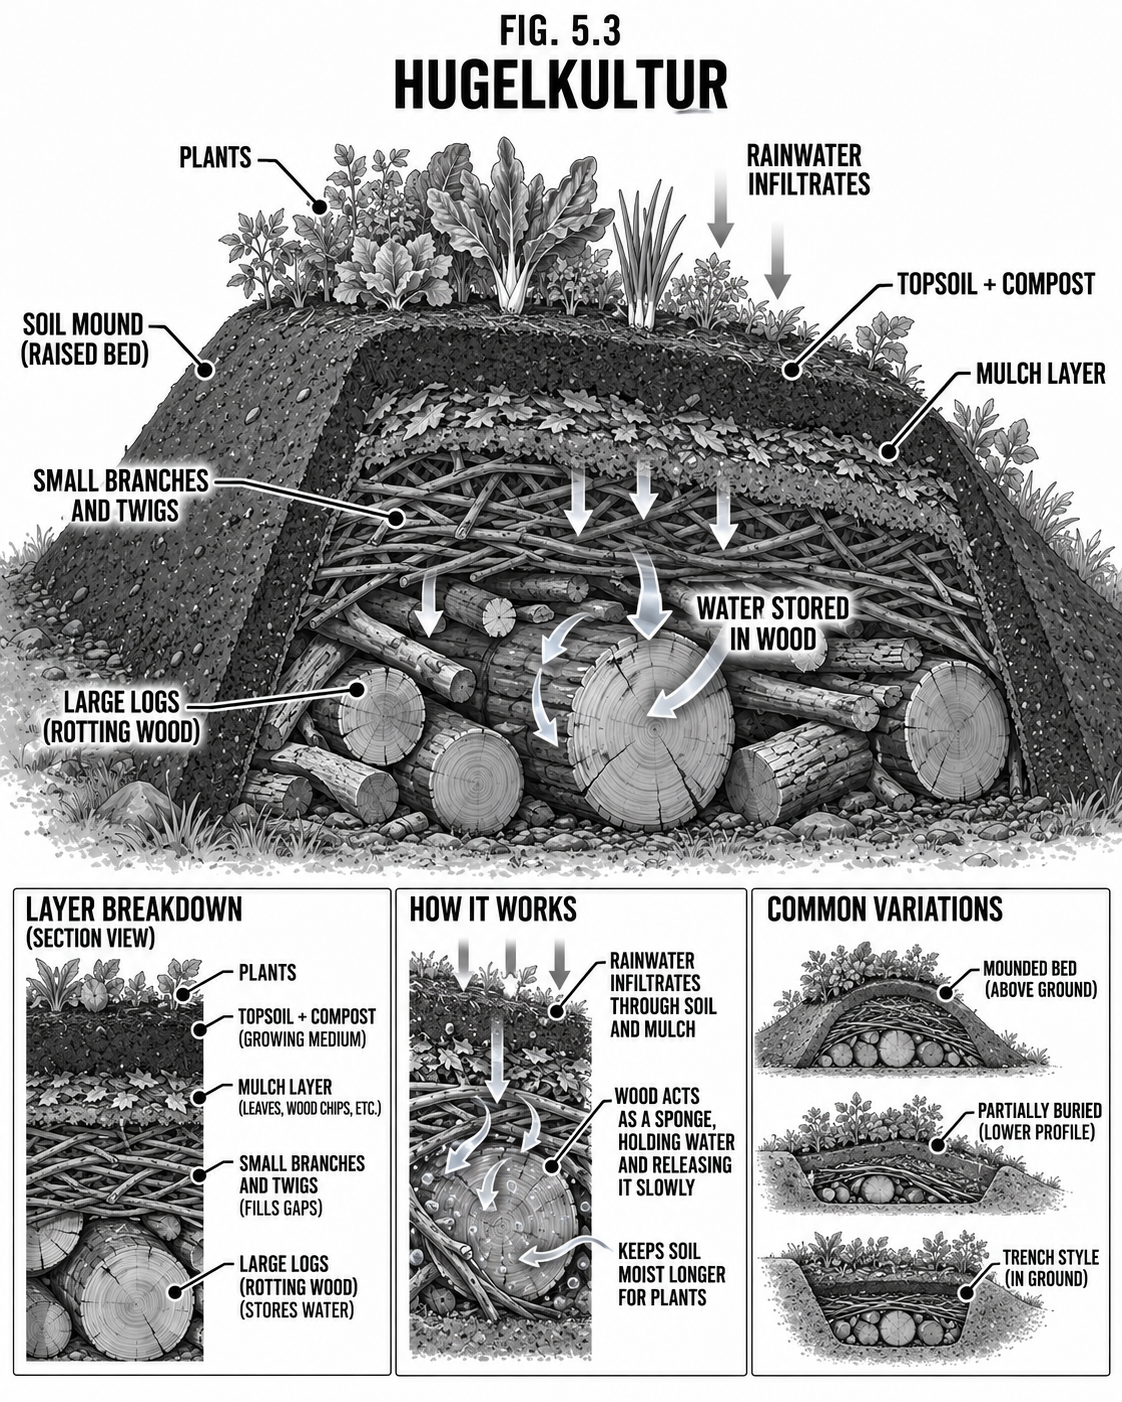
Logs and brush buried under a mound soak up water like a sponge and slowly rot into rich soil, so a hugel bed needs little watering and feeds itself for a decade. It turns a brush pile into a raised garden.
Step by step
Pile logs and brush, biggest at the bottom.
Cover with turned sod, then compost and soil, mounded high.
Plant the mound; it settles as the wood breaks down.
Tips & variations Use well-rotted or hardwood; fresh conifer can tie up nitrogen the first year, so compost the top heavily.
Food · GrowingKeyhole & Vertical
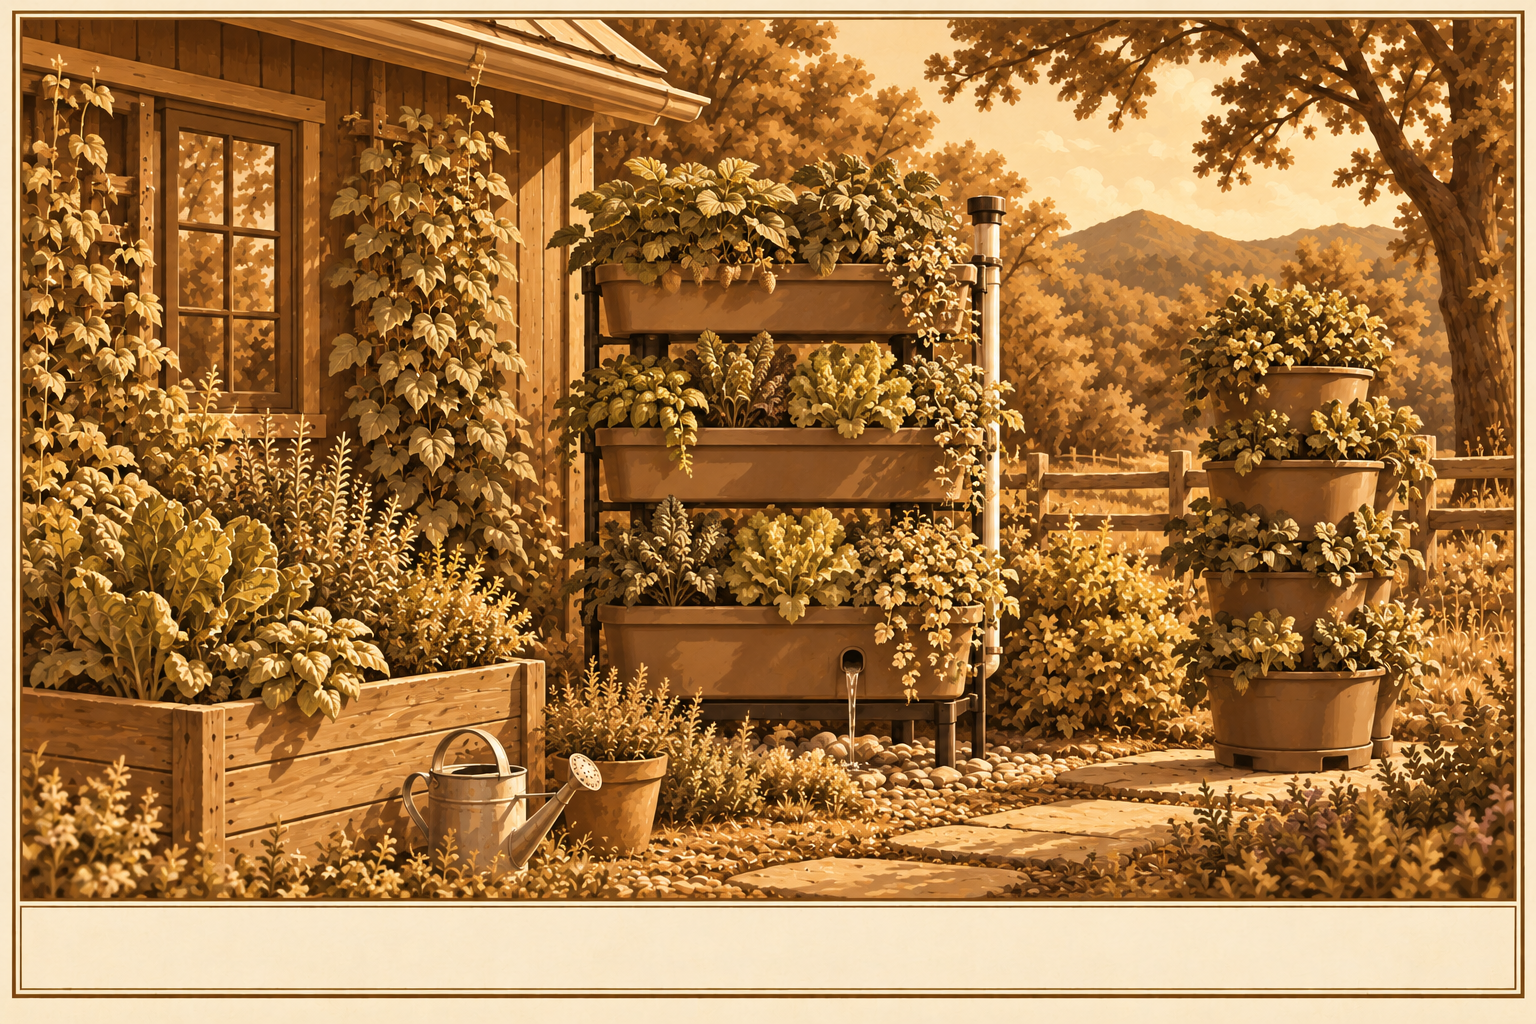
Keyhole, Container & Vertical Growing
Grow more in less space, on a porch, a wall, or a patch of bad ground.
DifficultyBeginner
TimeHours
CostLow
SkillsBasic
Why it is worth it
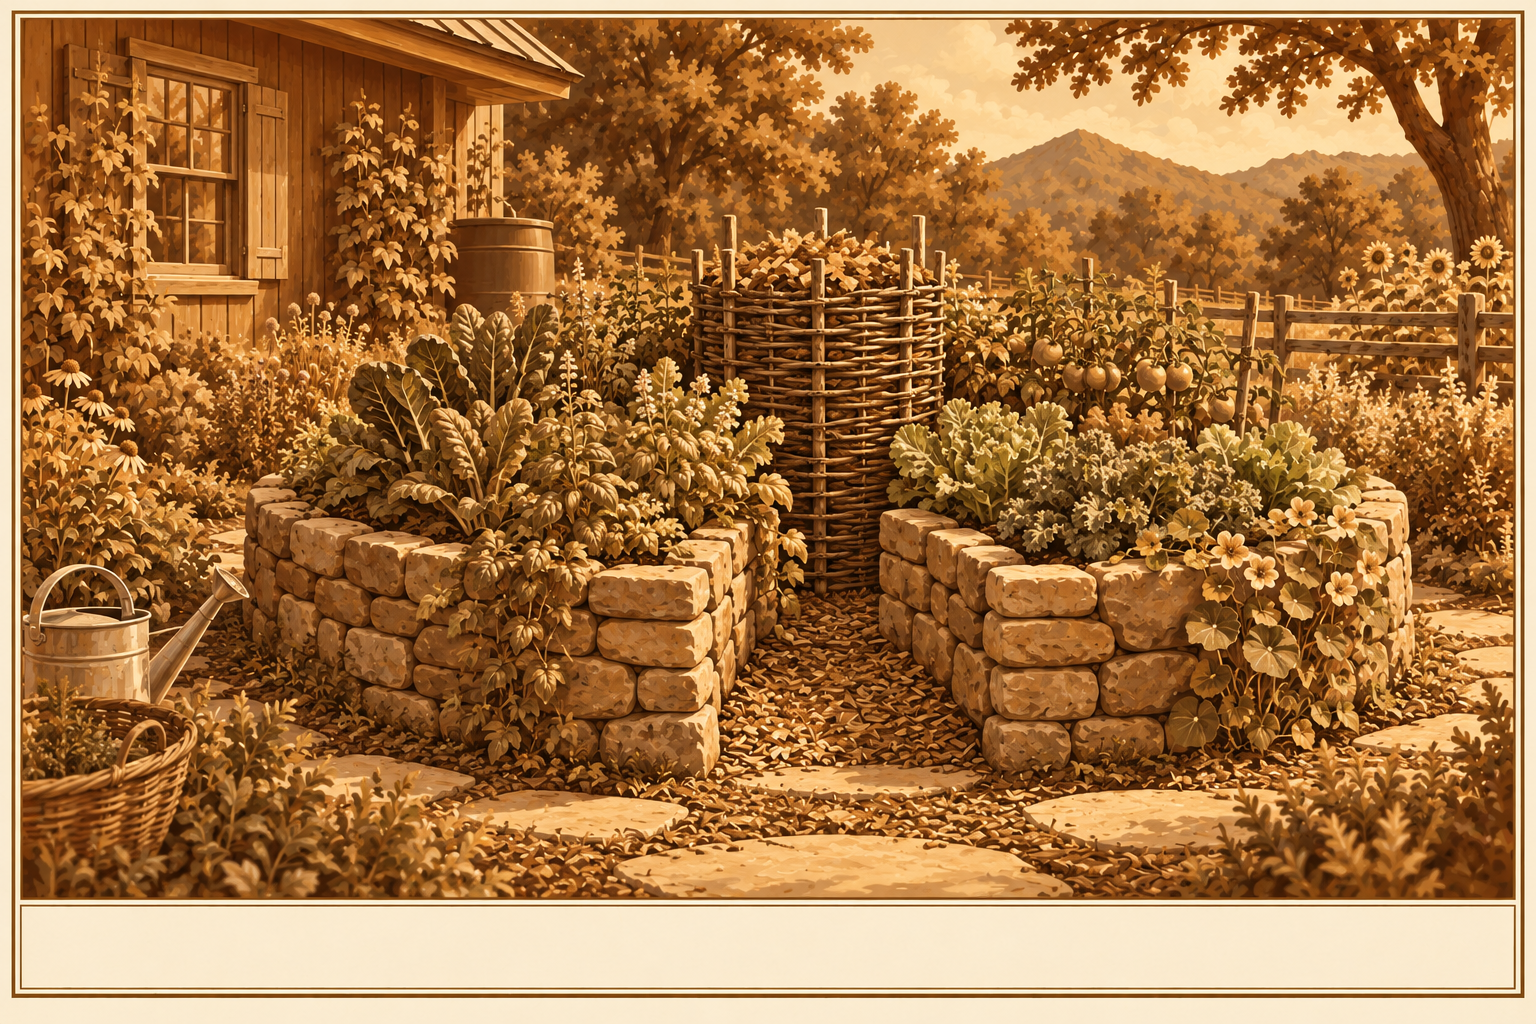
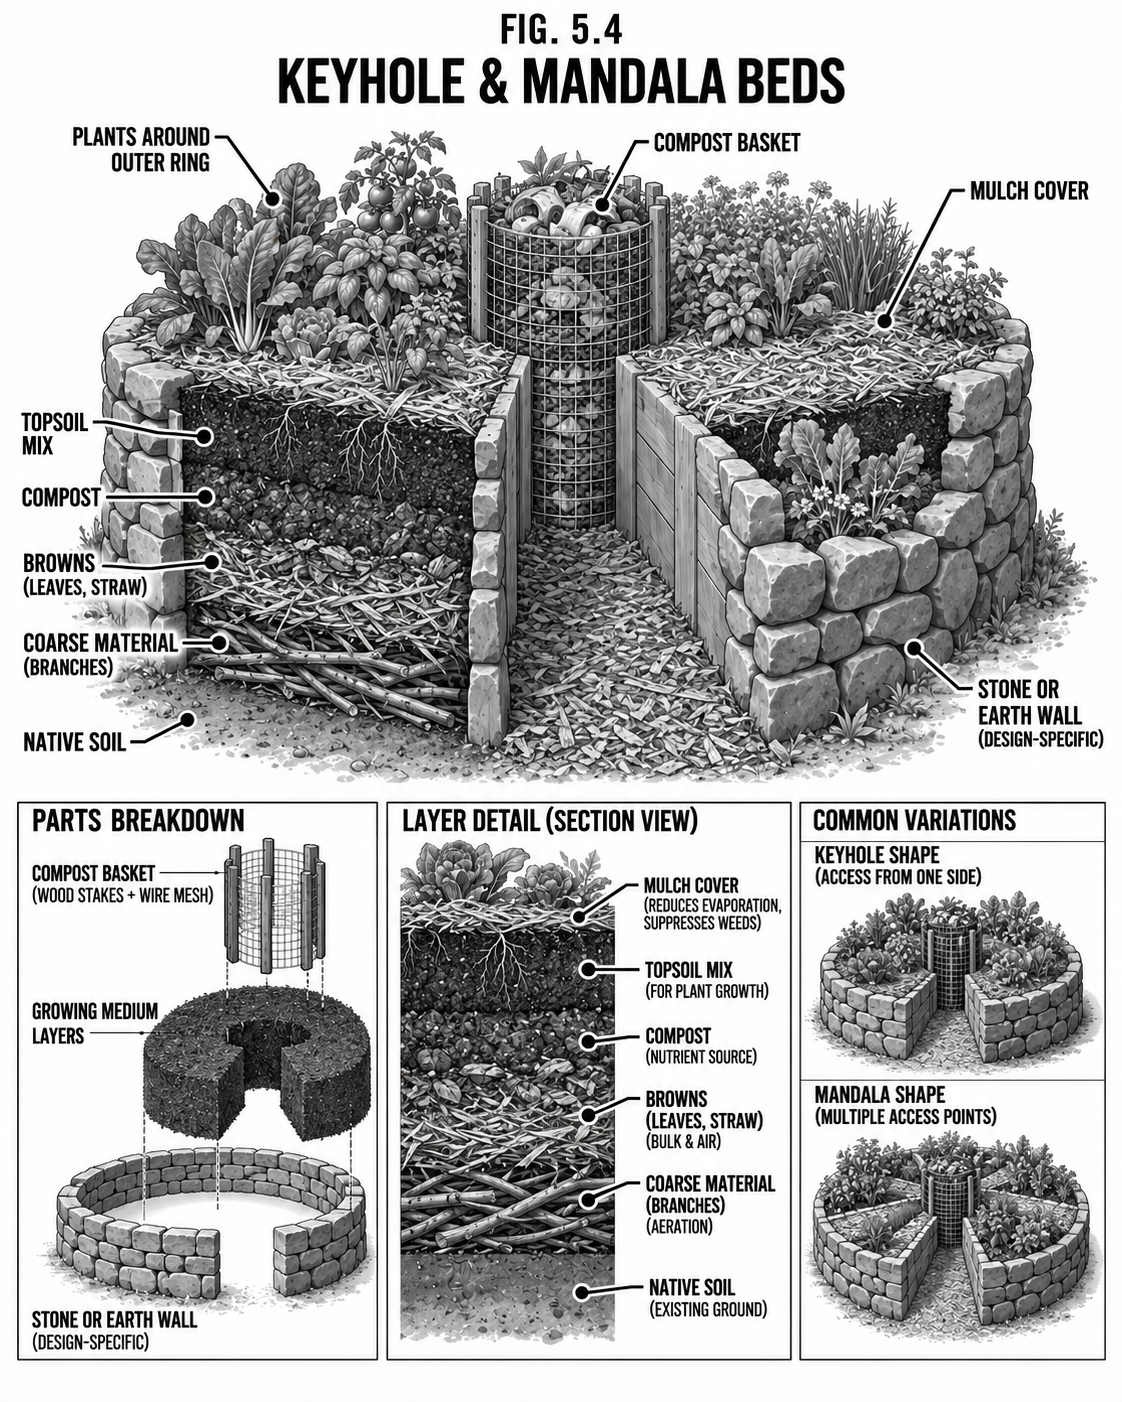
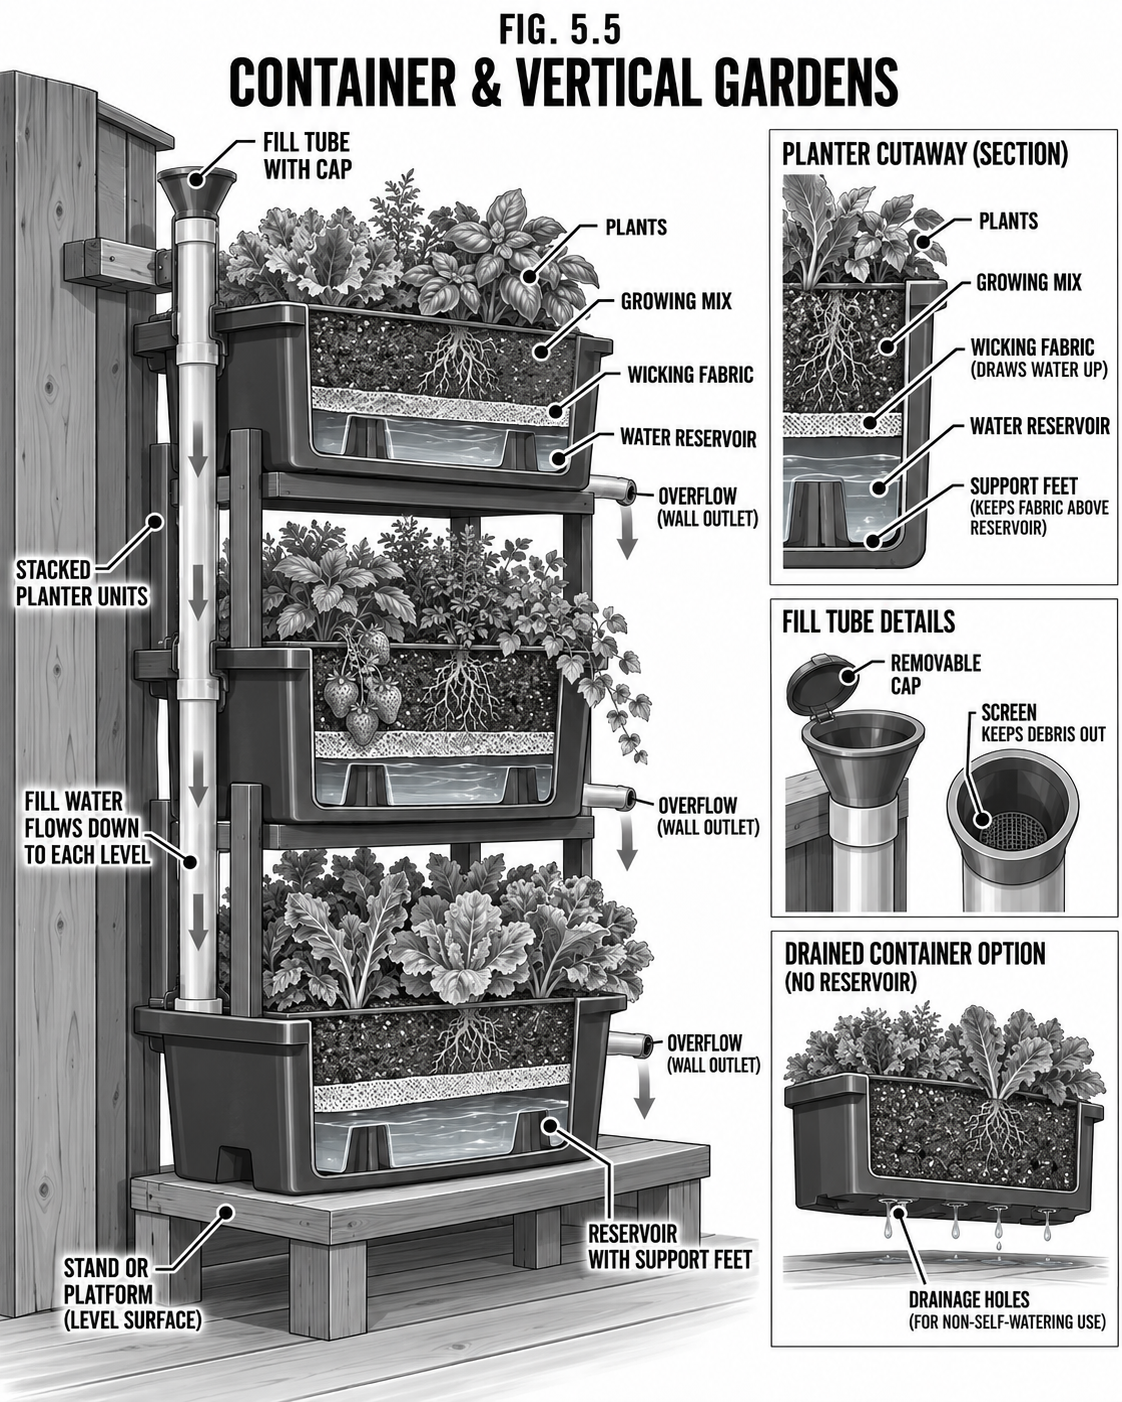
A keyhole bed is a round raised bed with a center compost basket that feeds and waters it from the middle. Containers and vertical trellises let you grow where there is no soil at all. All three squeeze maximum food from minimum ground.
Step by step
Keyhole: build a round bed with a notch to reach a central mesh compost basket.
Container: use any deep, drained vessel with rich mix; self-watering with a reservoir base.
Vertical: trellis beans, squash, cucumbers up to save ground.
Tips & variations Containers dry fast; a reservoir base buys you days between waterings.
Food · GrowingHydro & Aquaponics
Hydroponics & Aquaponics
Grow without soil; with fish, grow protein and greens in one loop.
DifficultyAdvanced
TimeBuild + cycle
CostMed
SkillsPlumbing + biology
Why it is worth it
Hydroponics grows plants in nutrient water, fast and in tight space. Aquaponics closes the loop: fish waste feeds the plants, the plants clean the water for the fish, and you harvest both. It is the most food per square foot and runs indoors or in a greenhouse.
Step by step
Set a fish tank and a media grow bed above or beside it.
Pump tank water to the bed; a bell siphon floods and drains it.
Let the nitrogen cycle establish (weeks) before heavy planting.
Feed the fish; harvest greens continuously.
Safety & code The system depends on a pump and power; a long outage kills the fish, so plan battery or aeration backup. Keep electricity well clear of water.
Tips & variations Tilapia (warm) or trout (cold) suit different climates; match fish to your water temperature.
Food · GrowingFood Forest
Food Forest & Permaculture Guild
Plant it once; eat from it for fifty years.
DifficultyIntermediate
TimeYears to mature
CostLow–Med
SkillsPlanning
Why it is worth it
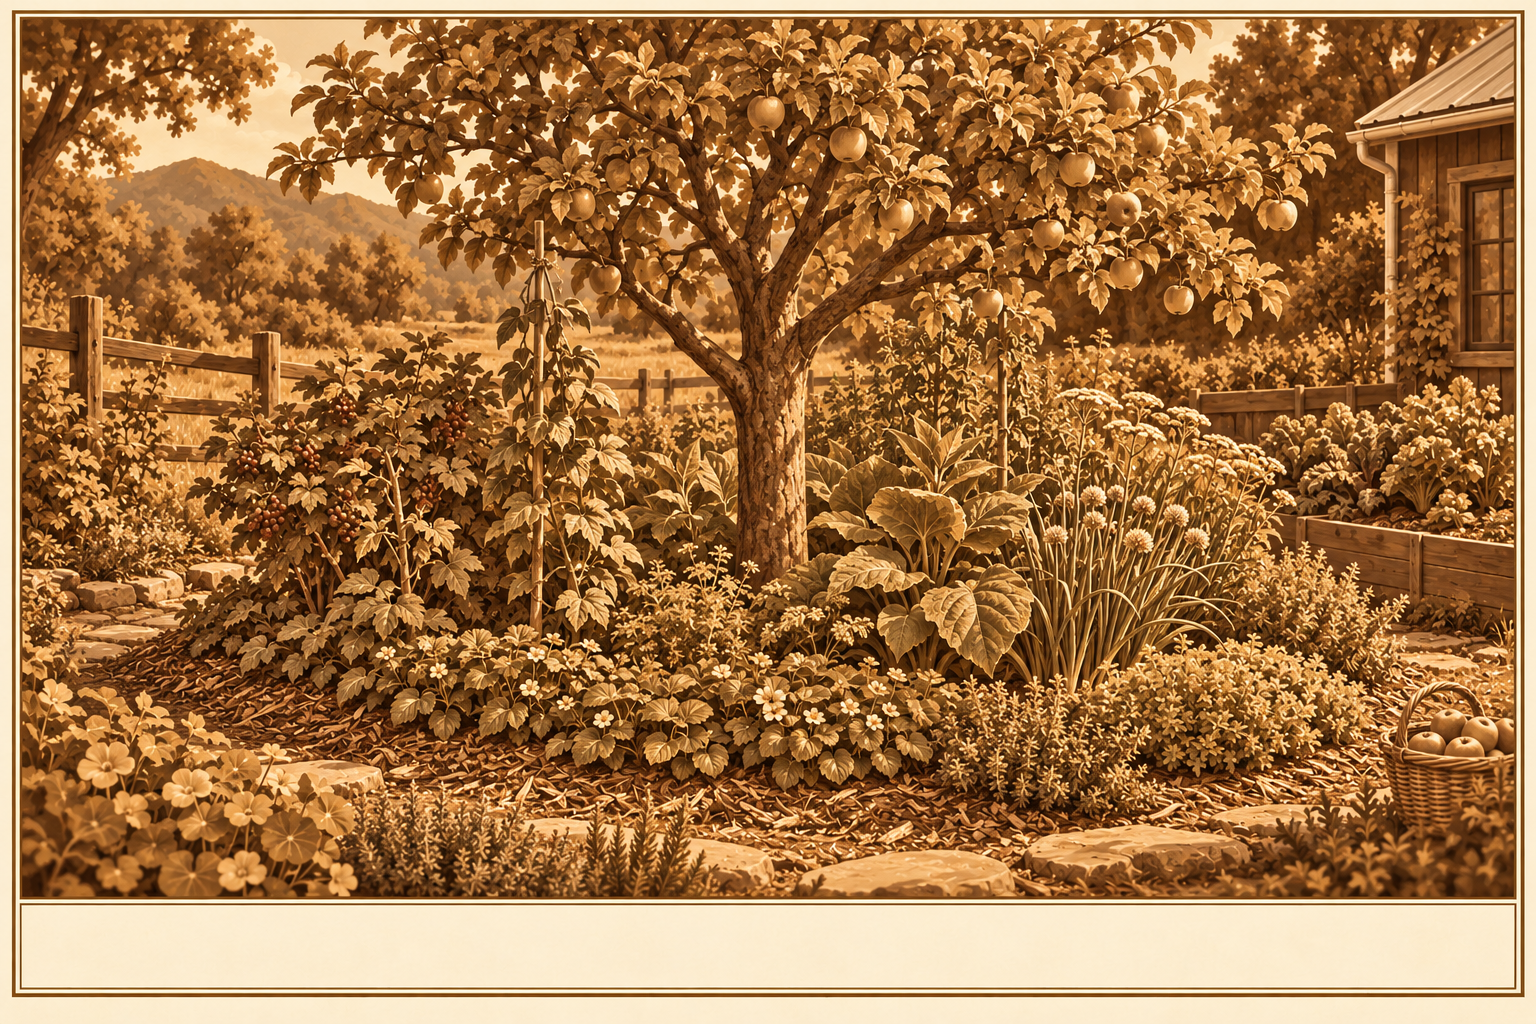
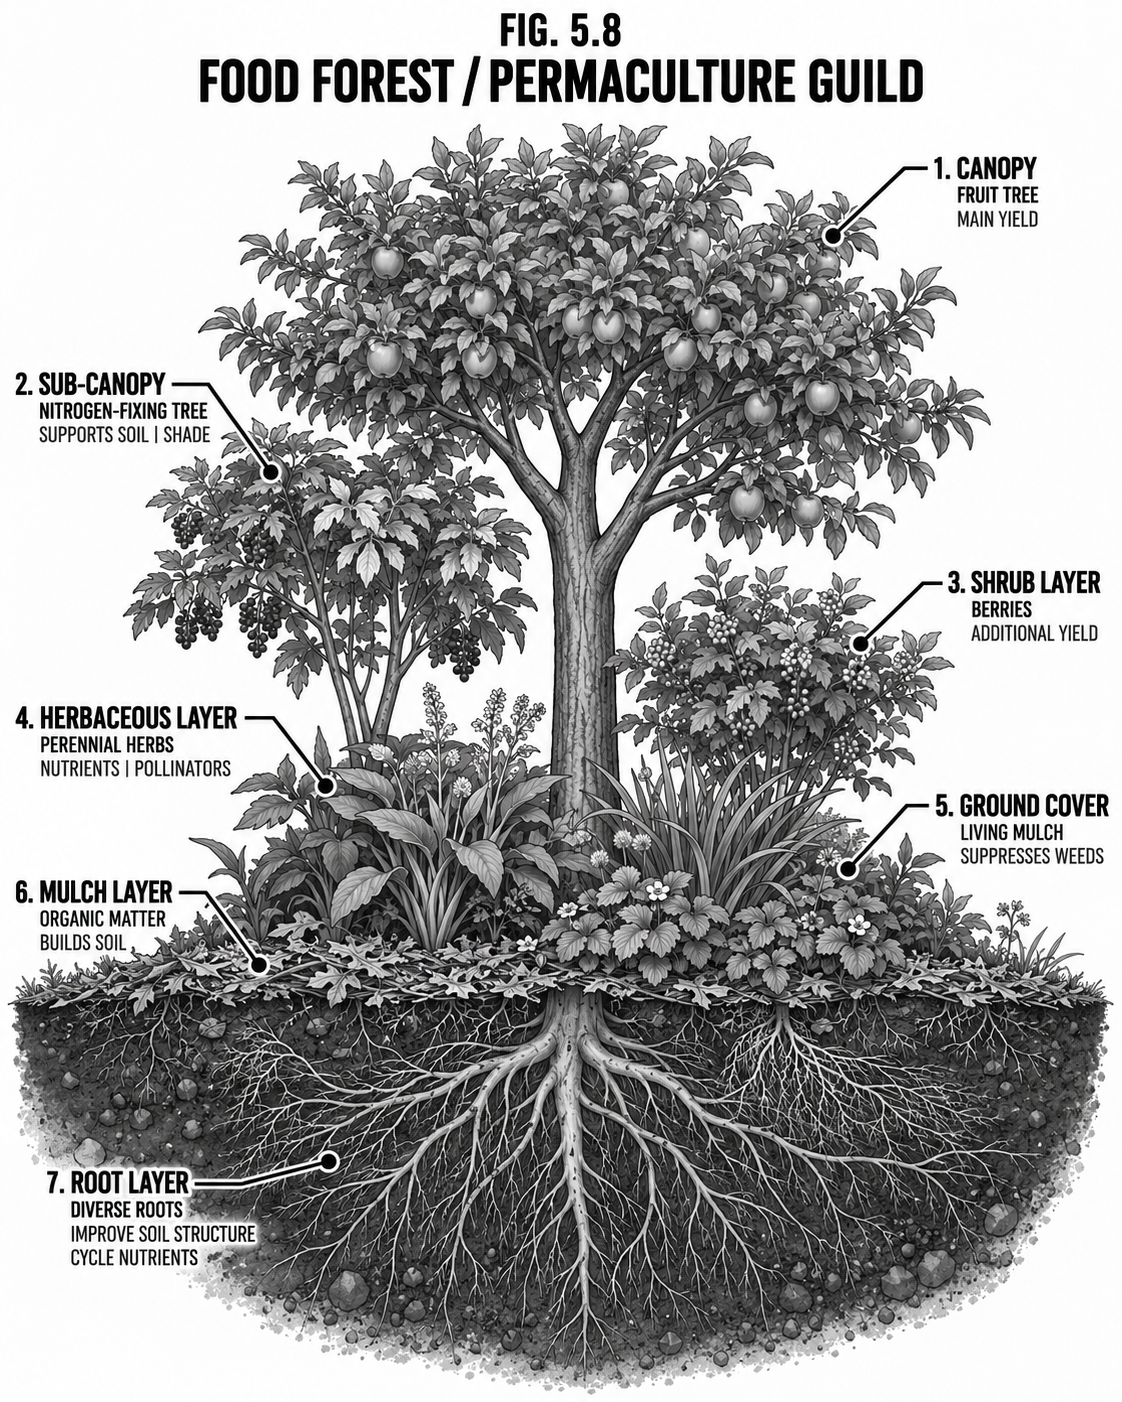
A food forest stacks layers the way a wild woodland does: canopy fruit and nut trees, an understory of smaller fruit, shrubs of berries, herbs and greens below, roots underground, and vines climbing through. Once established it feeds you with little work, year after year.
Step by step
Place canopy trees first, spaced for sun.
Build a guild around each: nitrogen-fixers, pest-confusing herbs, mulch-makers, pollinator flowers.
Fill the lower layers with berries, greens, and root crops.
Mulch heavily and let it mature.
Tips & variations Start guilds around any tree you already have; you do not need to plant a forest at once.
Food · Victory GardenThe Plan
The Victory Garden
Proof that a small yard, planted right, can feed a family.
DifficultyBeginner
TimeA season
CostLow
SkillsBasic
Why it is worth it
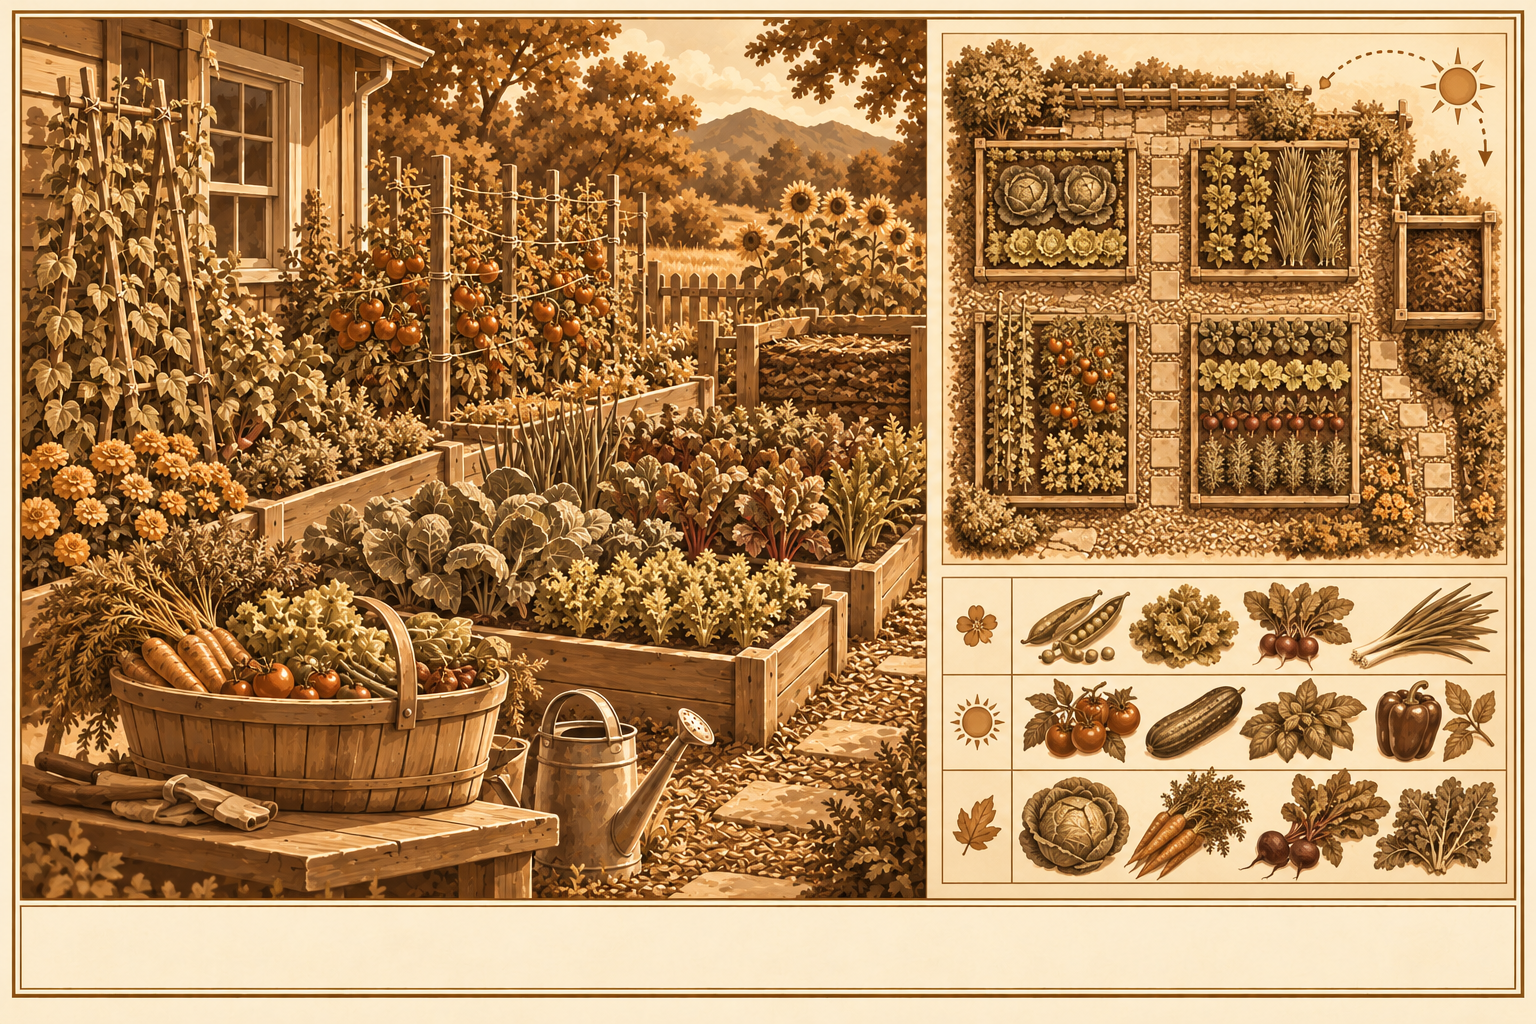
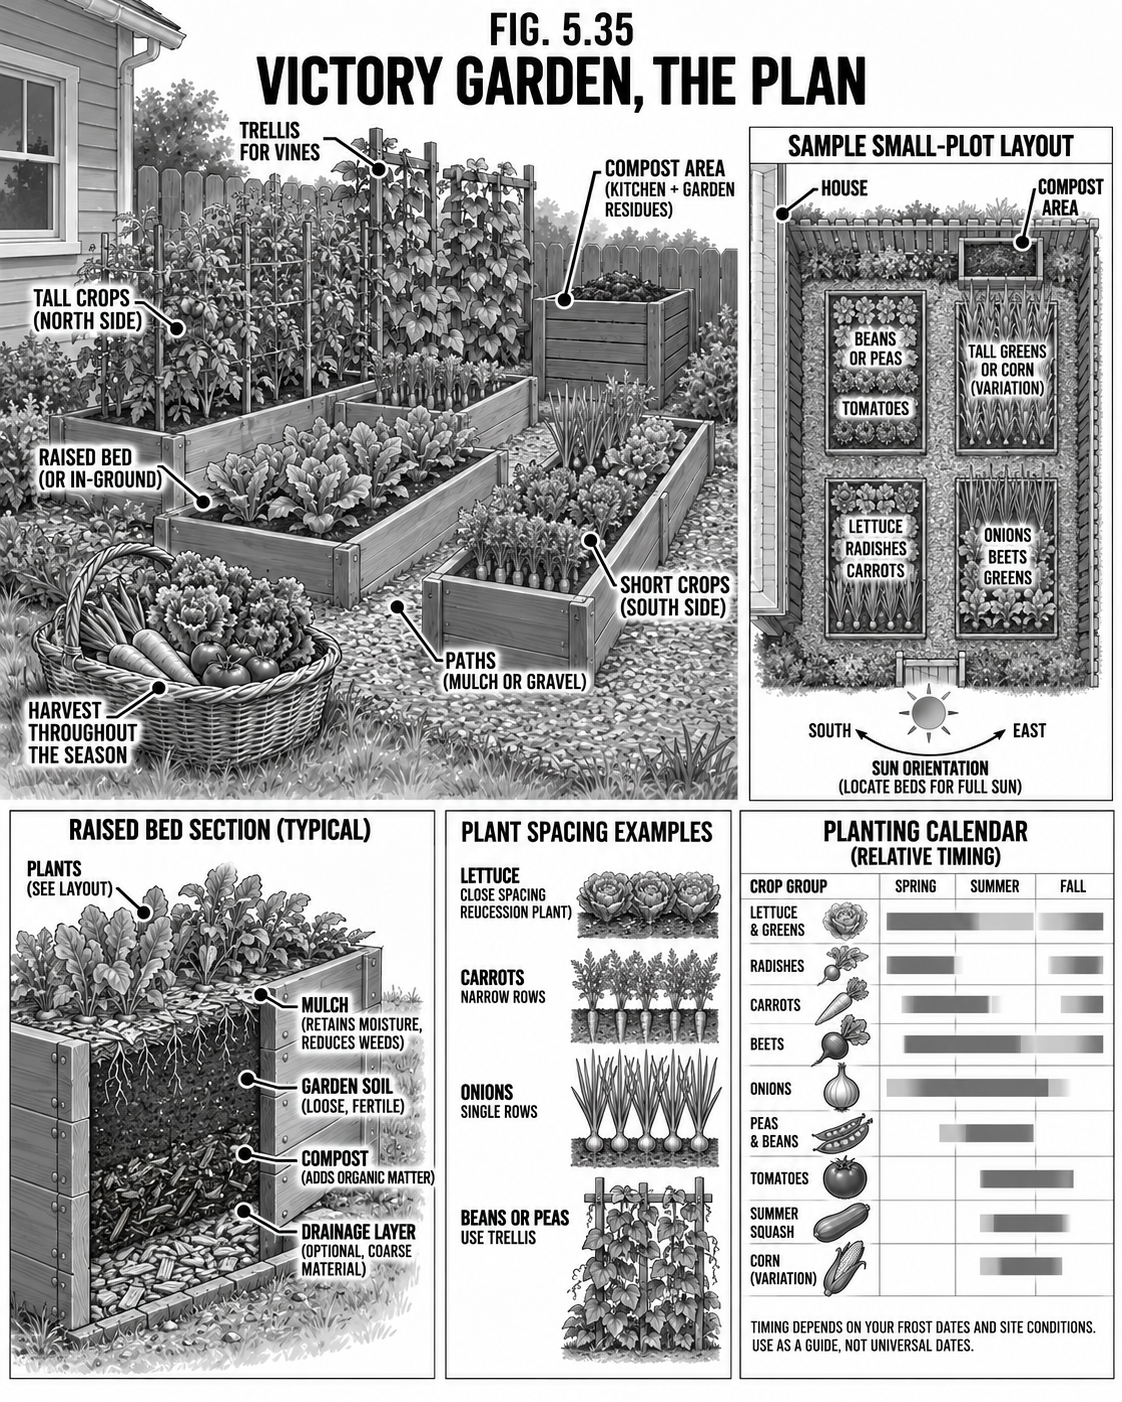
In 1943 roughly twenty million American families dug up lawns and vacant lots and, from small plots, grew close to forty percent of the fresh vegetables eaten in the country that year. The lesson still stands: you do not need acreage to put real food on the table. A plot the size of a parking space, planted for yield instead of looks, feeds one person through the summer and fills the pantry for winter. In a lean year that is not a hobby, it is a cushion.
Step by step
Pick the sunniest spot you have (six-plus hours) close to the kitchen door and a water source. Closeness is what keeps you tending it.
Grow for the plate and the pantry: pick high-yield, high-value, stores-well crops (bush and pole beans, tomatoes, summer and winter squash, greens, carrots, beets, onions, potatoes) over space hogs that store poorly.
Plant in close blocks, not long single rows. Blocks shade out weeds, hold moisture, and put far more food on the same ground.
Keep a simple plan on paper so no square sits bare: as one crop comes out, the next goes straight in.
Tips & variations Grow what your family actually eats, not what looks impressive. Send anything vining (beans, cukes, small squash) up a trellis or fence to free the ground beneath it.
Food · Victory GardenIntensive & Continuous
Intensive Beds, Kept Producing
Pack it tight, never leave it empty, and preserve what it gives you.
DifficultyBeginner-Intermediate
TimeA season
CostLow
SkillsBasic
Why it is worth it
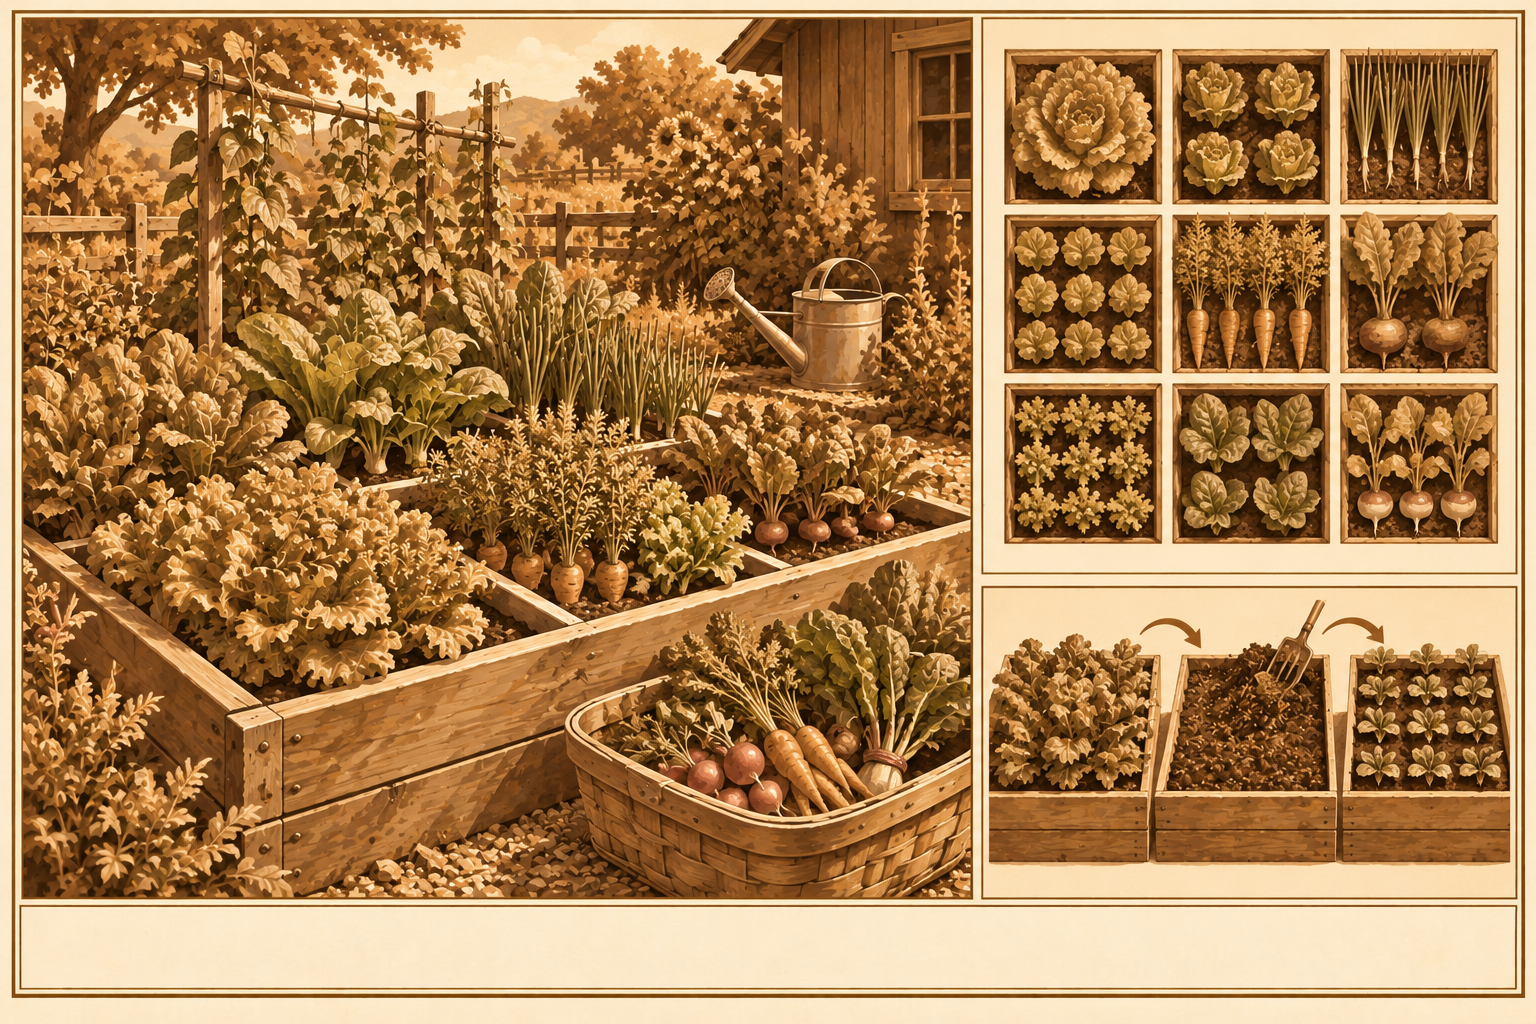
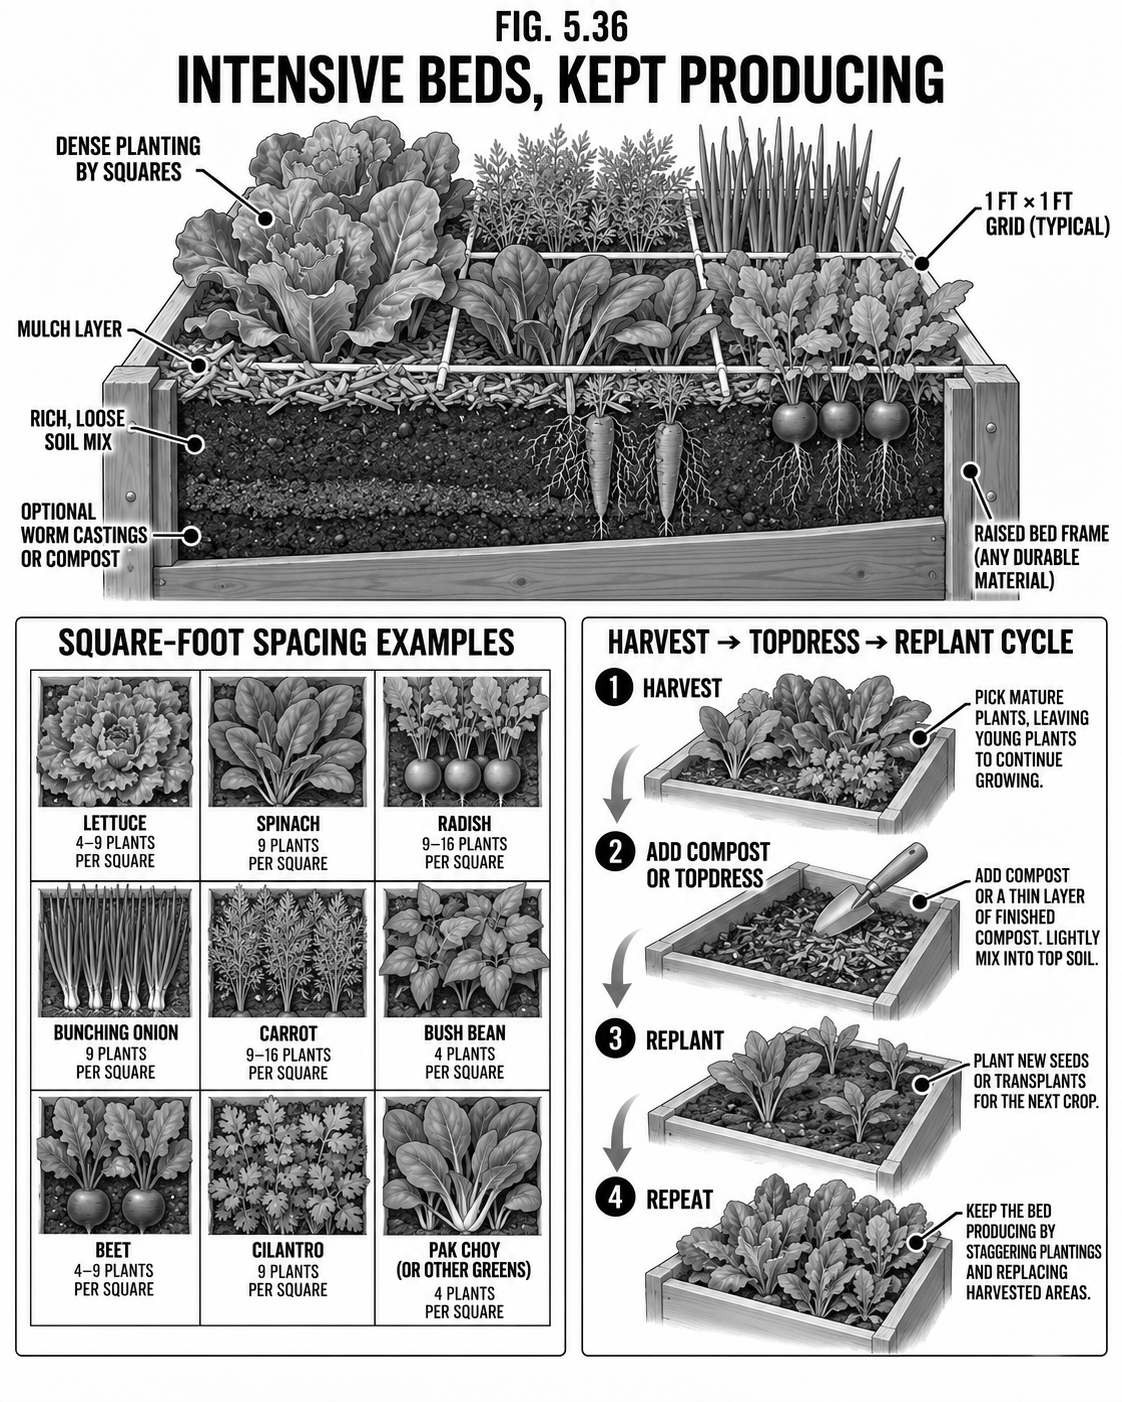
Close spacing on deep, rich soil (the square-foot and biointensive methods) can pull two to four times the harvest off a square foot that a conventional row does. The plants themselves shade the soil, so it weeds less and dries slower. The real win is not one big pick, it is a steady stream all season long that you then put up for winter. A victory garden that feeds you in July but is bare by September only did half its job.
Step by step
Build beds deep and rich (see Raised Beds): the tighter you plant, the better the soil has to be.
Space by the plant, not by rows: a grid where each square holds as many plants as it can carry (one tomato, four lettuces, sixteen carrots).
Interplant fast with slow: drop radishes and lettuce between young tomatoes or cabbage and harvest them before the big crop needs the room.
Trellis every vine upward to buy back ground.
The hour a square is harvested, replant it (succession). Keep transplants coming so there is always a replacement ready.
Move the surplus straight to the canner, the dryer, and the root cellar (see Preserving and Storage): that is where the garden becomes winter food.
Safety & note Go easy on fast nitrogen feeds for leafy greens you eat raw, and wash well. Rotate plant families to a new square each year so pests and diseases never settle in.
Tips & variations A cold frame or low hoop over one bed (see Season Extension) stretches the harvest weeks past frost at both ends of the year.
Food · SoilWorm Magnet
Worm Magnet & Black Gold
Let the worms make your richest soil for you, right in the bed.
DifficultyBeginner
TimeOngoing
CostLow
SkillsBasic
Why it is worth it
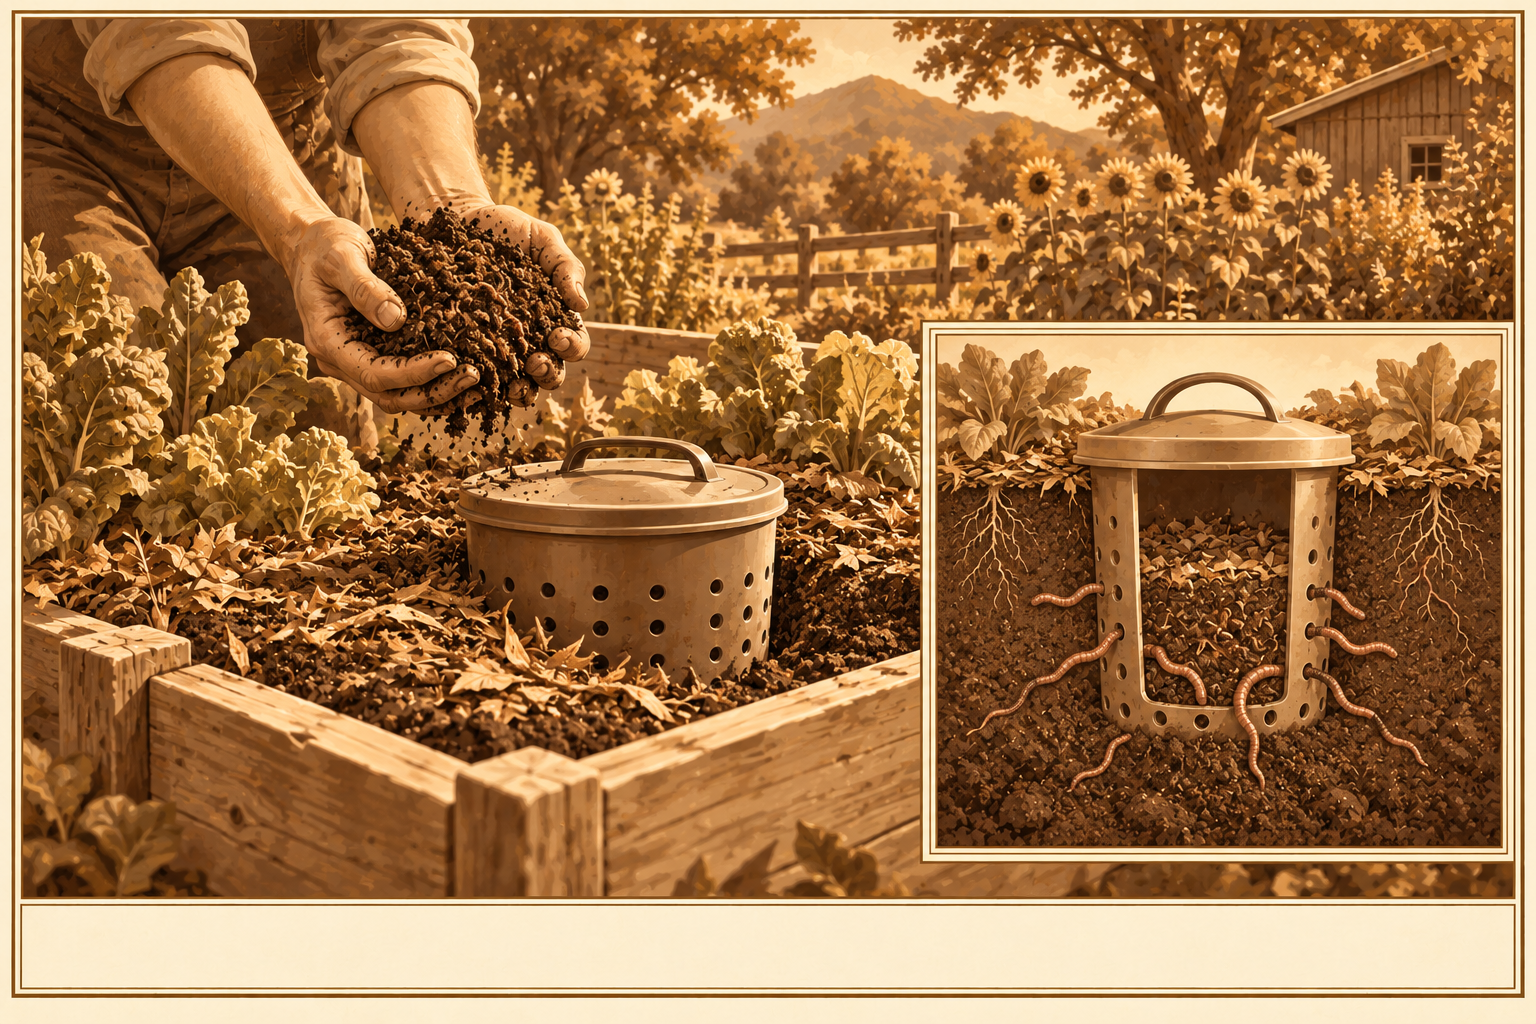
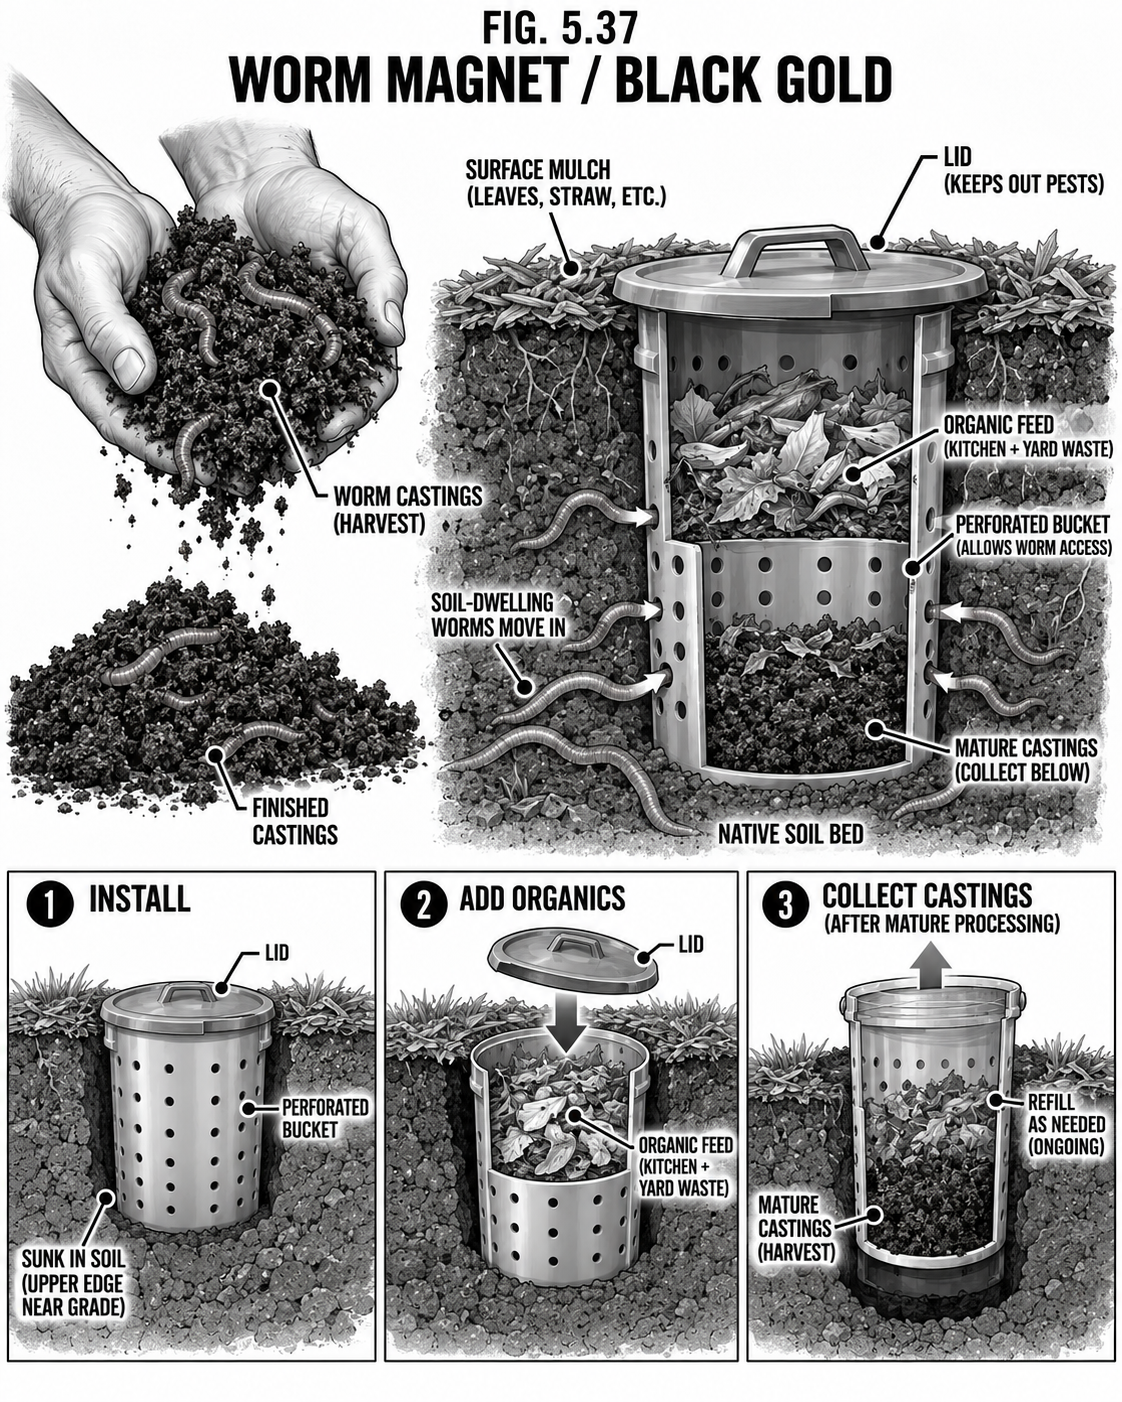
Worm castings are the gardener's black gold: the richest, gentlest fertilizer there is, full of plant-ready nutrients and living microbes, and it never burns a root. The worm magnet skips the separate bin. You sink a feeder right into the bed, and the worms come to it, eat, and leave their castings in the soil where the roots already are. The bed fertilizes itself.
Step by step
Drill a tall bucket or wide pipe full of quarter-inch holes all around the sides.
Sink it most of the way into a bed, lid sitting just above the soil.
Fill it with kitchen scraps and damp shredded cardboard, then add a handful of red wigglers to start the colony.
The worms move in and out through the holes, feeding inside and spreading castings through the surrounding bed.
When the feeder fills with finished castings, lift them from the bottom and refill the top. Steep a scoop of castings in a bucket of water overnight to make worm tea for a quick feed.
Tips & variations Keep the bedding as moist as a wrung-out sponge and shade it in summer. No meat, dairy, oil, or citrus. Use red wigglers (Eisenia fetida), the composting worm, not soil nightcrawlers.
Food · SoilHealing Sick Ground
Healing Sick Ground: Sunflowers & Hemp
Plants that pull poison and fallout up out of the dirt and rebuild it.
DifficultyBeginner
Time1 to 3 seasons
CostLow
SkillsBasic
Why it is worth it
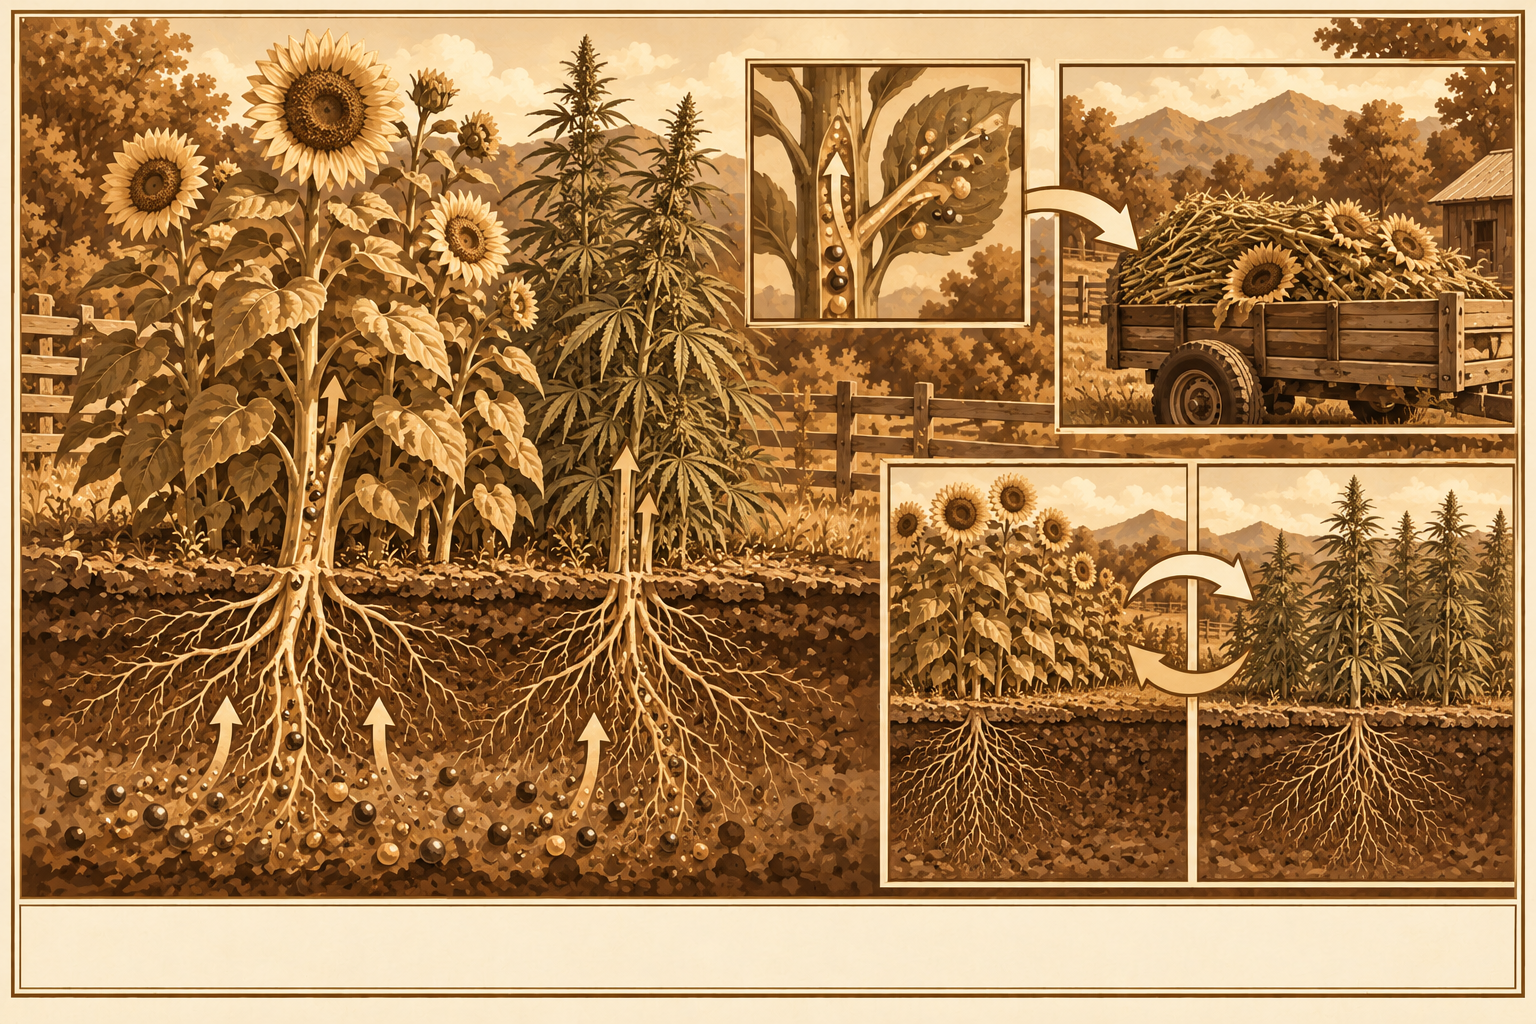
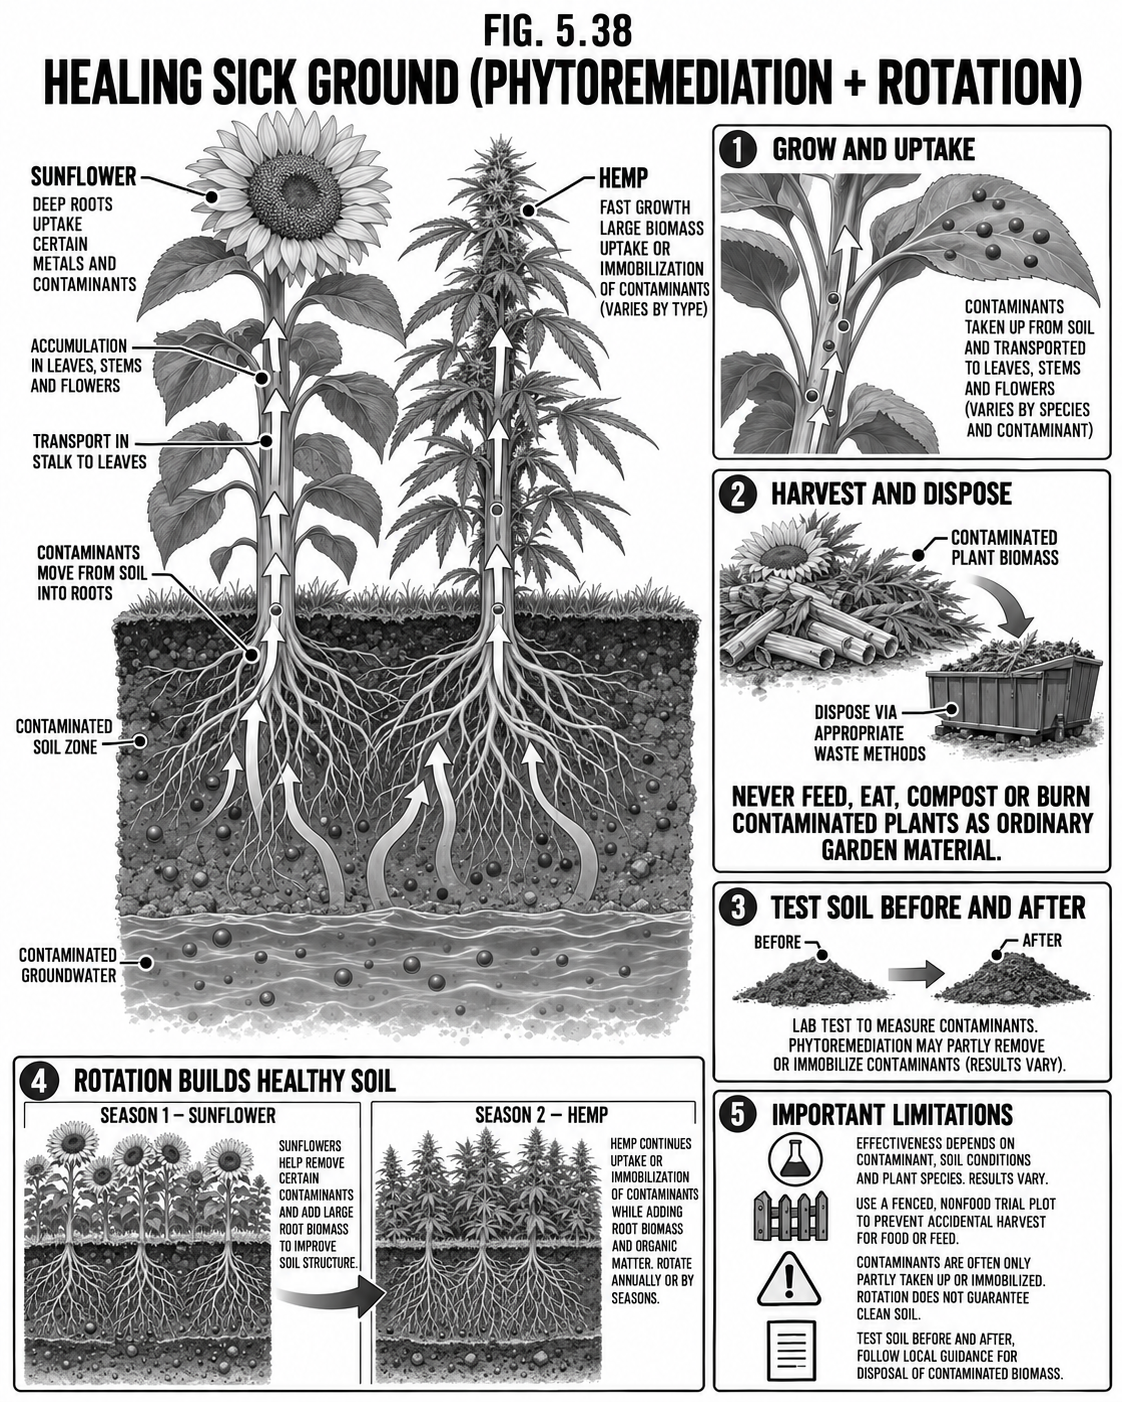
Some plants are hyperaccumulators: they draw contaminants up out of the soil and water and lock them in their stalks and leaves. This is called phytoremediation. Sunflowers famously pulled radioactive cesium and strontium out of the water and ground at Chernobyl and Fukushima, and they also take up lead, arsenic, and other heavy metals. Hemp does the same for many metals, and with its deep, fast roots and heavy leaf drop it breaks up hardpan and rebuilds worn-out soil in a single season. Used together over a few seasons, they can take ground that is contaminated or exhausted and bring it back toward growing food.
Step by step
Test the soil first so you know exactly what you are dealing with.
Plant sunflowers thickly across the bad ground, hemp alongside or in rotation. For poisoned water, float sunflowers on rafts with the roots dangling in.
Let them grow a full season, drawing the contamination up into stalk and leaf.
Harvest and completely REMOVE the whole plant.
Repeat for several seasons, retesting each time, until the levels come down.
Only then plant food in that ground.
Rotate for living soil
You do not need poisoned ground to get the benefit. Alternating sunflowers and hemp season to season builds healthy soil all on its own. Hemp's deep taproots break up hardpan, its fast shade smothers weeds, and its heavy leaf fall feeds the ground; sunflowers root deep to mine nutrients up out of the subsoil and leave a mass of root and stalk behind. Swap the two each season and the soil stays loose, fed, and weed-free, and comes alive with worms and microbes. The one difference from cleanup work: on clean ground you chop the spent plants and turn them straight back in as organic matter, where on contaminated ground you must still haul them off (above).
Safety & honesty A plant grown to clean poisoned ground becomes poison itself. Do NOT eat it, feed it to animals, compost it, or burn it (burning throws the contamination into the air and the ash). Treat the harvested plants as hazardous waste and dispose of them the way your state requires. Phytoremediation is slow and partial, not a magic eraser: it lowers contamination over seasons, it does not promise clean soil. For heavy radiation or a serious chemical spill, get professional testing and help before you trust the ground again.
Tips & variations Mustard and some ferns also pull metals; rotate your remediation crops. Deep-rooted hemp doubles as a cover crop that chokes weeds while it works.
Food · HempGrowing & Processing
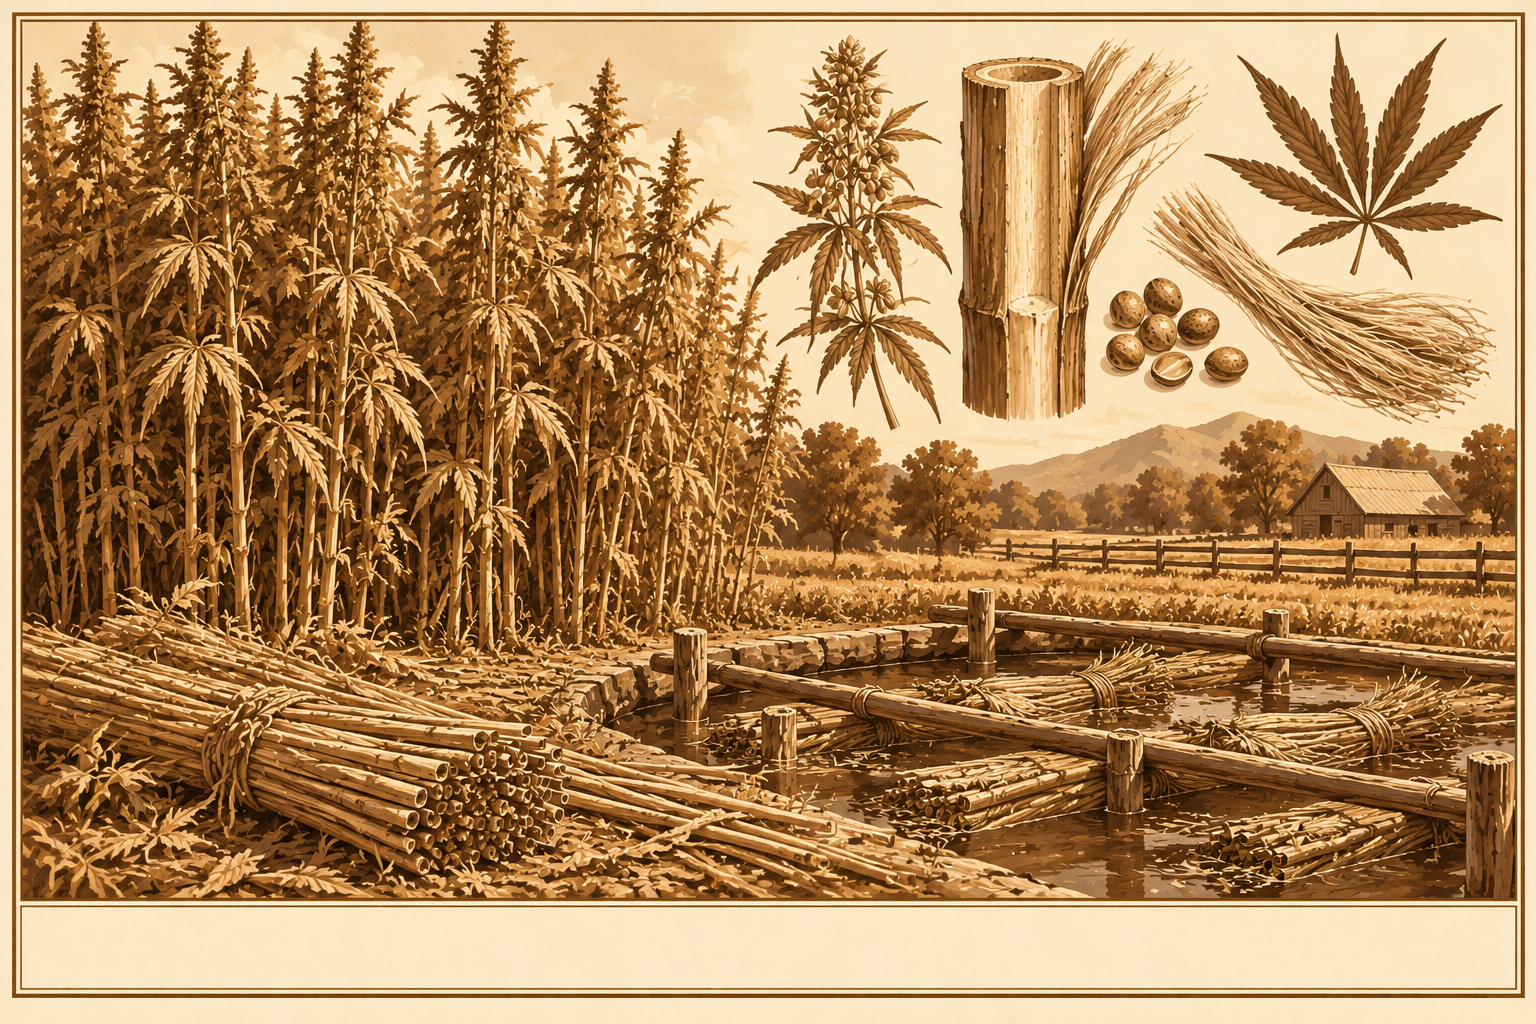
Hemp: Growing the Whole-Plant Crop
One of the most useful plants a homestead can grow, from seed to fiber.
DifficultyIntermediate
TimeA season
CostLow
SkillsModerate
Why it is worth it
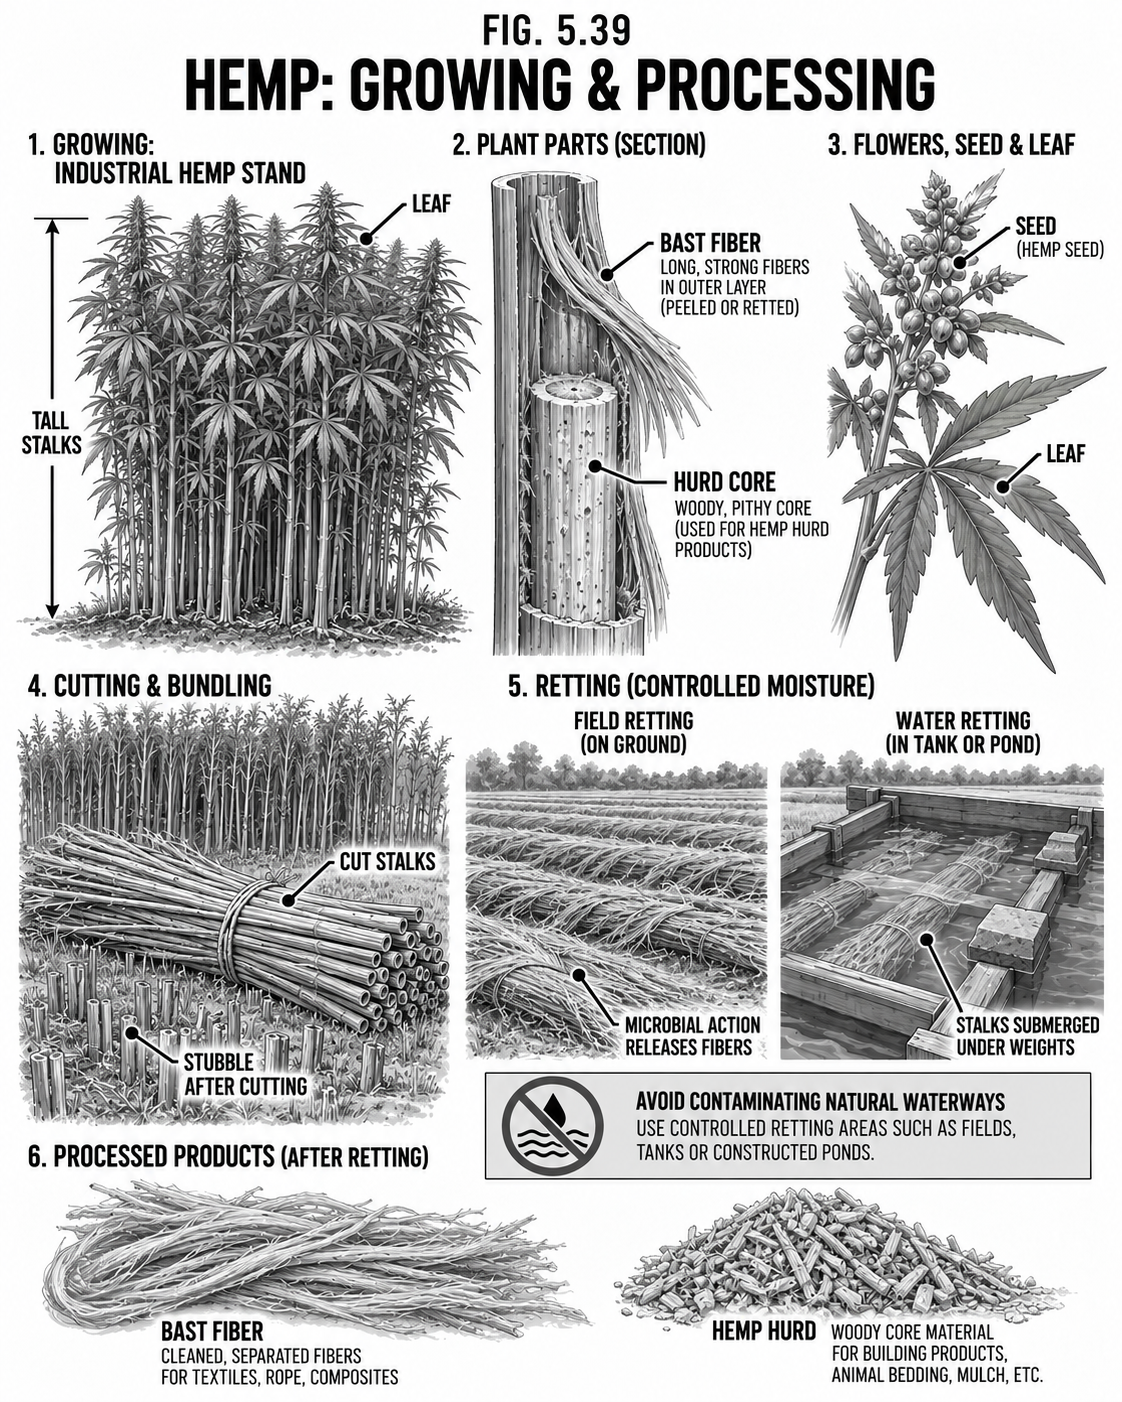
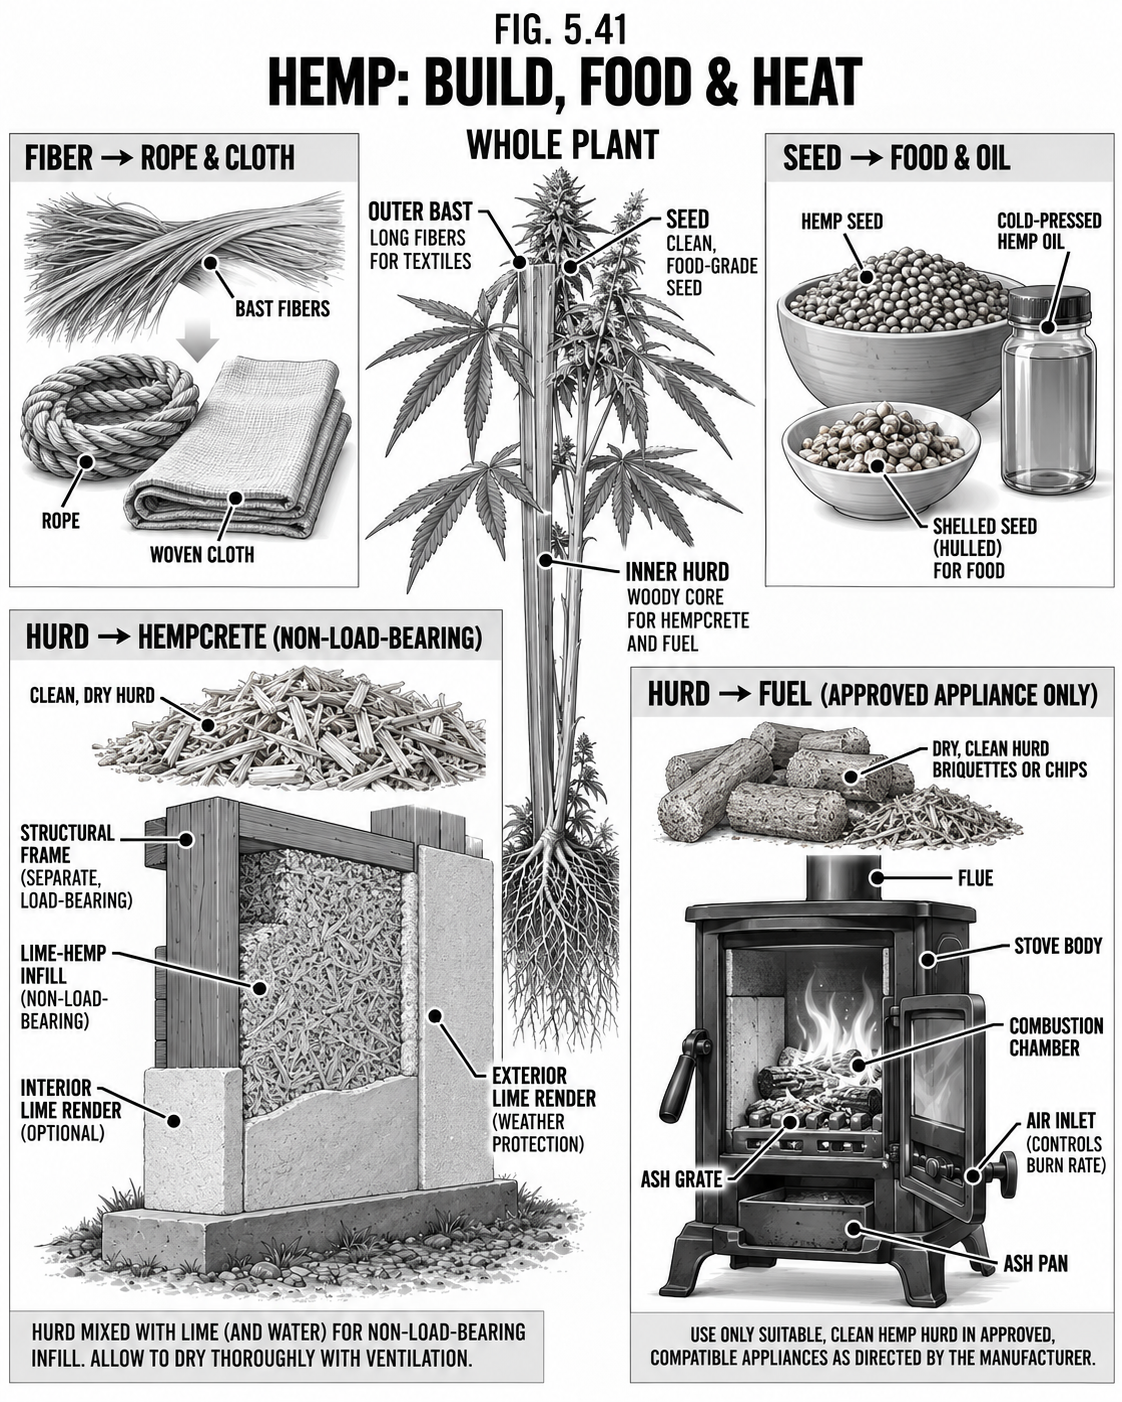
Industrial hemp (the fiber and seed plant, very low in THC, not marijuana) gives you rope, cloth, building material, food, oil, animal bedding, and fuel from one fast crop that also improves the soil as it grows. Very few plants pay a homestead back in so many ways at once.
Step by step
LEGAL FIRST: in the US, industrial hemp (under 0.3% THC) is federally legal under the 2018 Farm Bill, but you must grow it under a USDA or state license or registration. Get licensed and use certified low-THC seed before you plant.
For fiber, sow the seed thickly so the stalks grow tall and straight with little branching. For seed and food, space the plants wider so they bush out and set heads.
Hemp asks little: decent soil, water while young, almost no spray.
Cut fiber hemp at flowering; cut seed hemp when the seed is mature.
Ret the stalks: lay them in a field under the dew, or soak them in water, for one to three weeks until the woody core loosens from the fiber.
Dry the retted stalks well for storage and for the processing that follows.
Safety & law Grow only licensed industrial hemp and know your state program. Keep your seed stock certified under the legal THC limit: that line is what separates a legal crop from a felony.
Food · HempRope & Cloth
Hemp Fiber: Rope & Cloth
Turn retted stalk into cordage and cloth that outlast cotton.
DifficultyIntermediate
TimeDays
CostLow
SkillsFiber craft
Why it is worth it
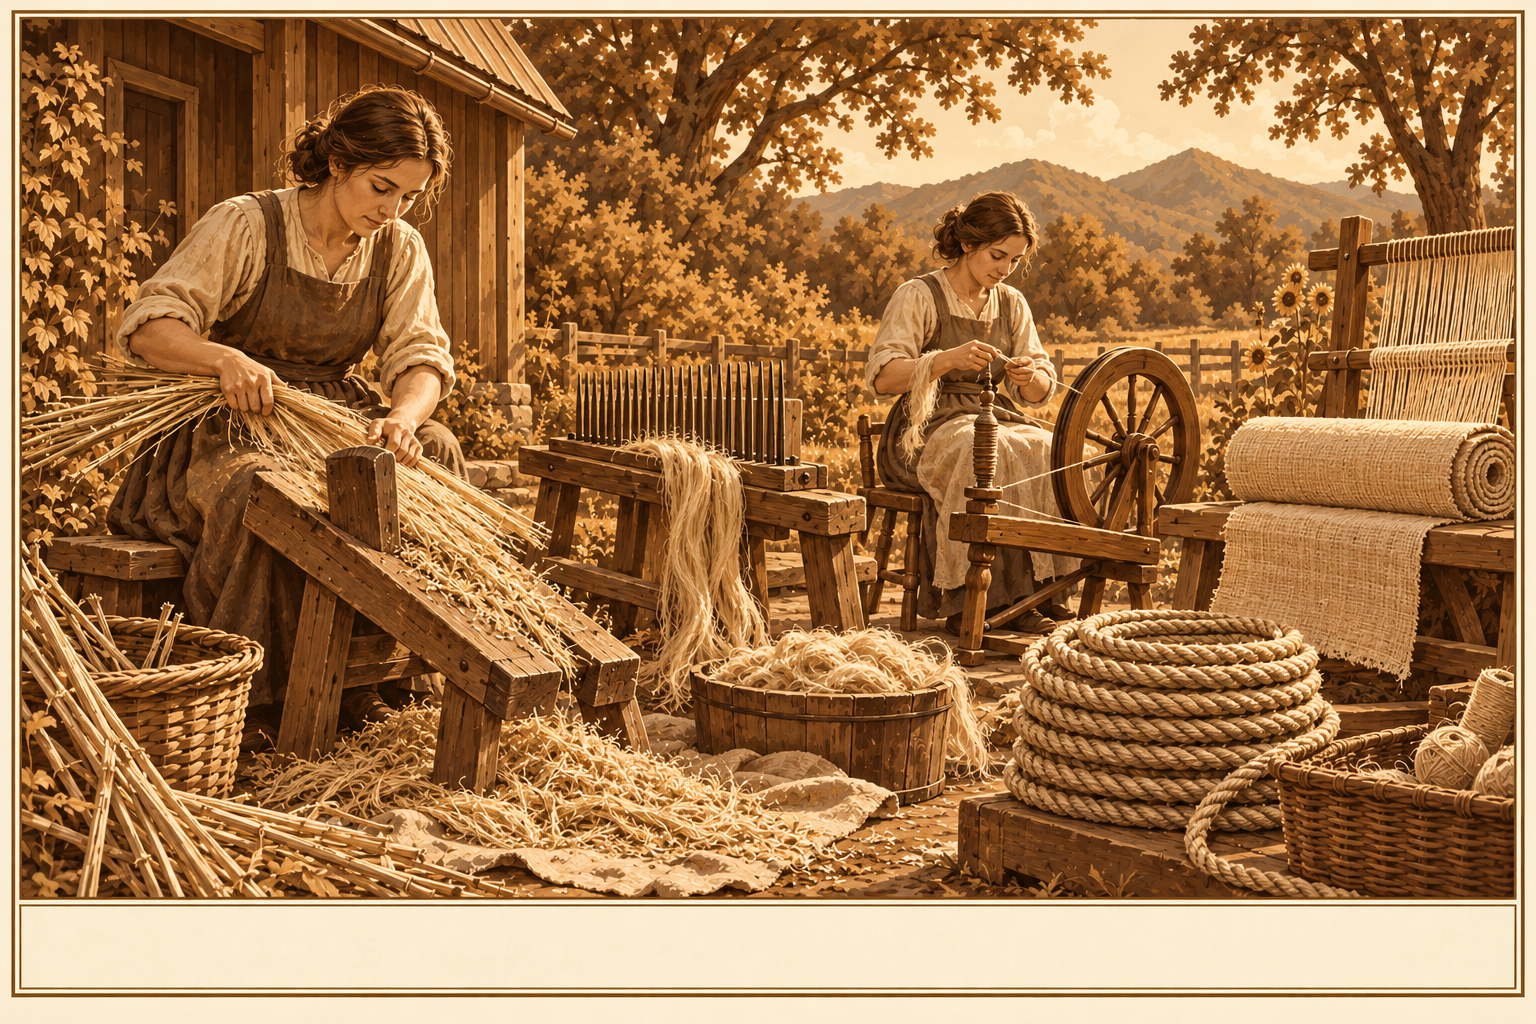
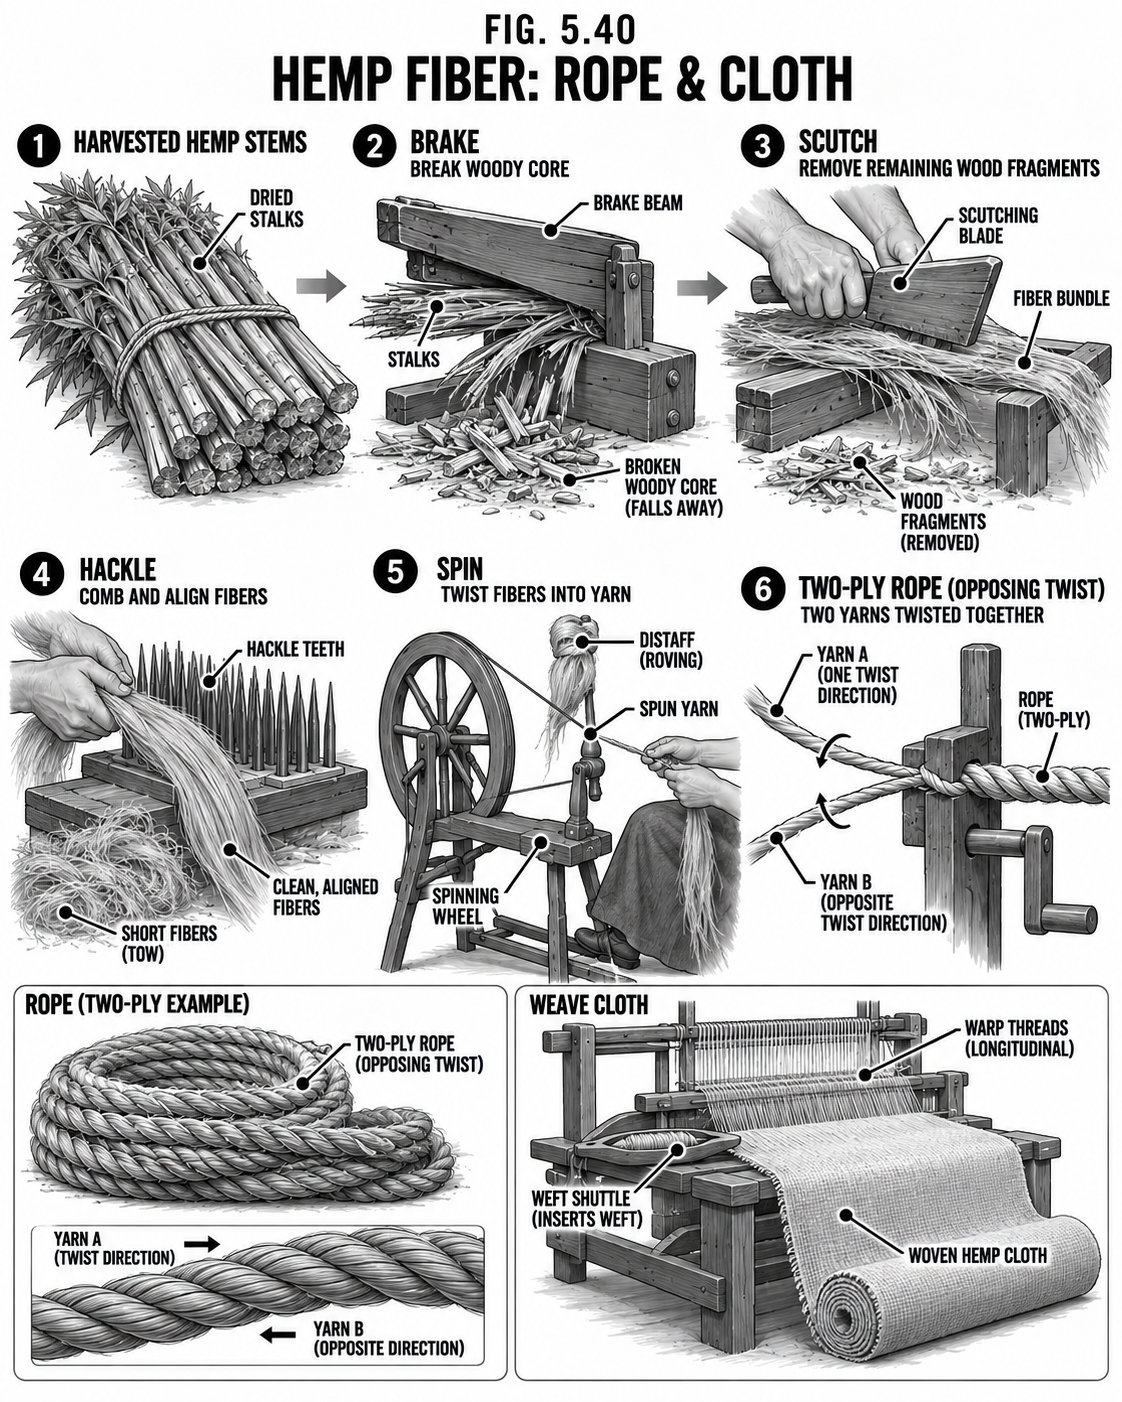
Hemp bast fiber is long, strong, and rot-resistant: the classic rope and sailcloth fiber for thousands of years, back when a ship's rigging and a farmer's clothes were both hemp. Processed finer, the same fiber spins into a tough, breathable, linen-like cloth that wears for decades.
Step by step
Break the dried retted stalks over a wooden brake to crack the woody hurd into short pieces.
Scutch: scrape the broken hurd away from the long fiber with a wooden blade (save the hurd, it is the raw material for building and fuel).
Hackle: pull the fiber through beds of nails or combs to comb it straight and split the coarse fiber from the fine.
For rope: spin the fiber into yarn, twist several yarns into a strand, then lay the strands together in the opposite direction into rope.
For cloth: spin a finer yarn and weave it on a loom.
Tips & variations The coarsest fiber makes rope and grain sacks; the finest makes clothing. Keep every scrap of the woody hurd you scraped off for the next section.
Food · HempBuild, Food & Heat
Hemp for Building, Food & Heat
The seed feeds you; the woody core builds and heats the house.
DifficultyBeginner-Intermediate
TimeVaries
CostLow-Med
SkillsMixed
Why it is worth it
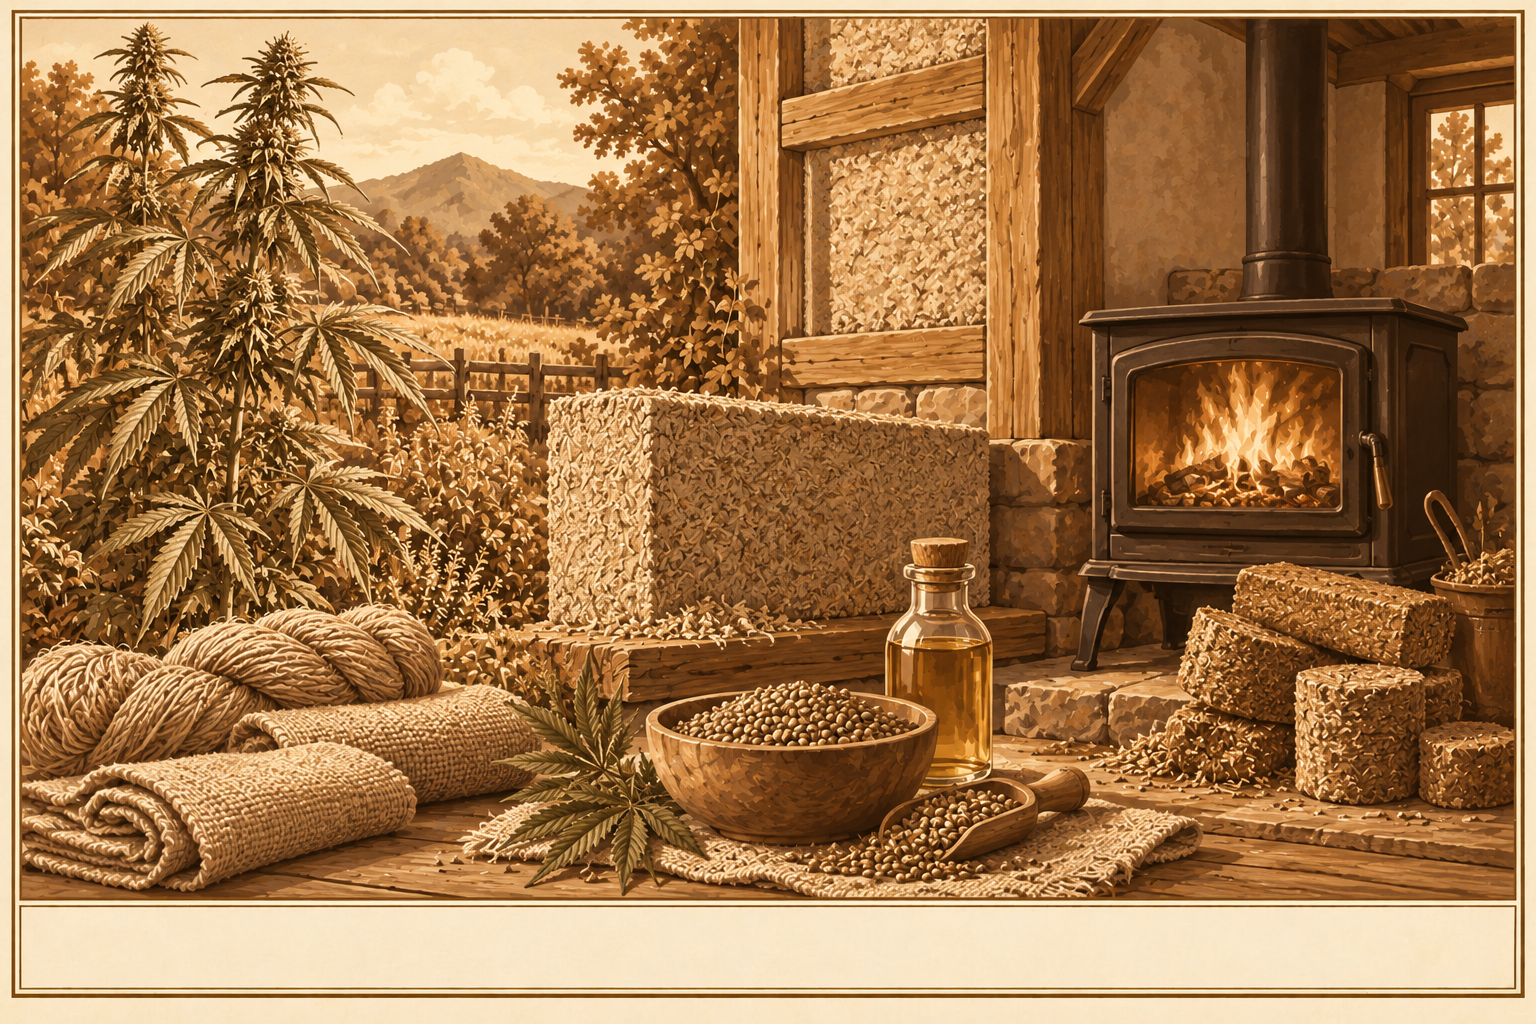
Nothing on the hemp plant is waste. After you take the long fiber for rope and cloth, the seed is food and oil and the woody hurd becomes wall insulation and clean fuel. One crop can help clothe you, feed you, build your walls, and heat them.
Build: hempcrete
Mix hemp hurd with a lime binder and water and pack it into forms around a wood frame. It sets into a light, breathable wall that insulates well and resists fire, mold, and pests. Hempcrete is not load-bearing: the wood frame carries the roof (see Shelter for framing), and the wall's mass holds and releases heat slowly (see Heat).
Food: seed & oil
Hemp seed is a near-complete protein with good oils. Eat it raw or toasted, grind it to meal, or press it for a cooking and finishing oil. Store seed and oil cool and dark (see Storage): the oil goes rancid if it gets warm.
Heat: hurd as fuel
Dried hurd and stalk burn hot and clean. Press them into pellets or fire logs, or burn the chip loose in a proper stove. Fast-growing hemp is a renewable stand-in for firewood that you can regrow every single year.
Safety Lime is caustic: wear gloves and eye protection mixing hempcrete, and let the wall cure and dry fully before you close it in. Press oil fresh and keep it cool and dark. Burn only clean, dry hurd in a well-vented stove, and mind the carbon monoxide rules in the Heat chapter.
Food · Season ExtensionGreenhouses
Greenhouses: Hoop, Pit & Attached
Push the season at both ends and grow in the dead of a Yooper winter.
DifficultyIntermediate
TimeDays
CostMed
SkillsFraming
Why it is worth it
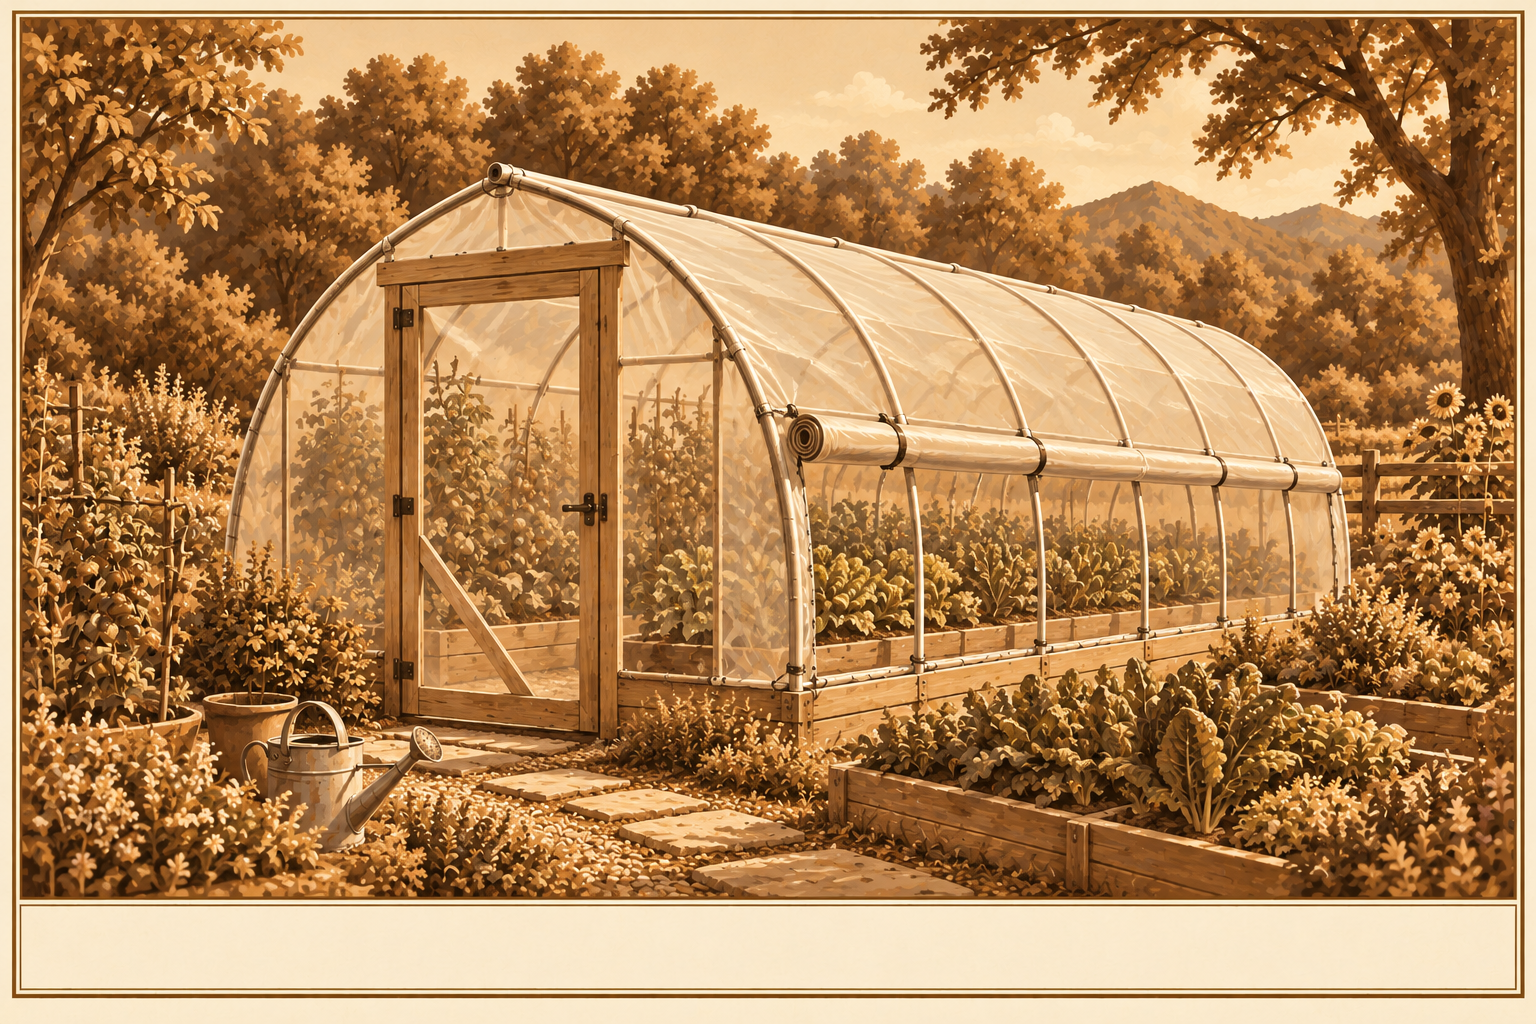
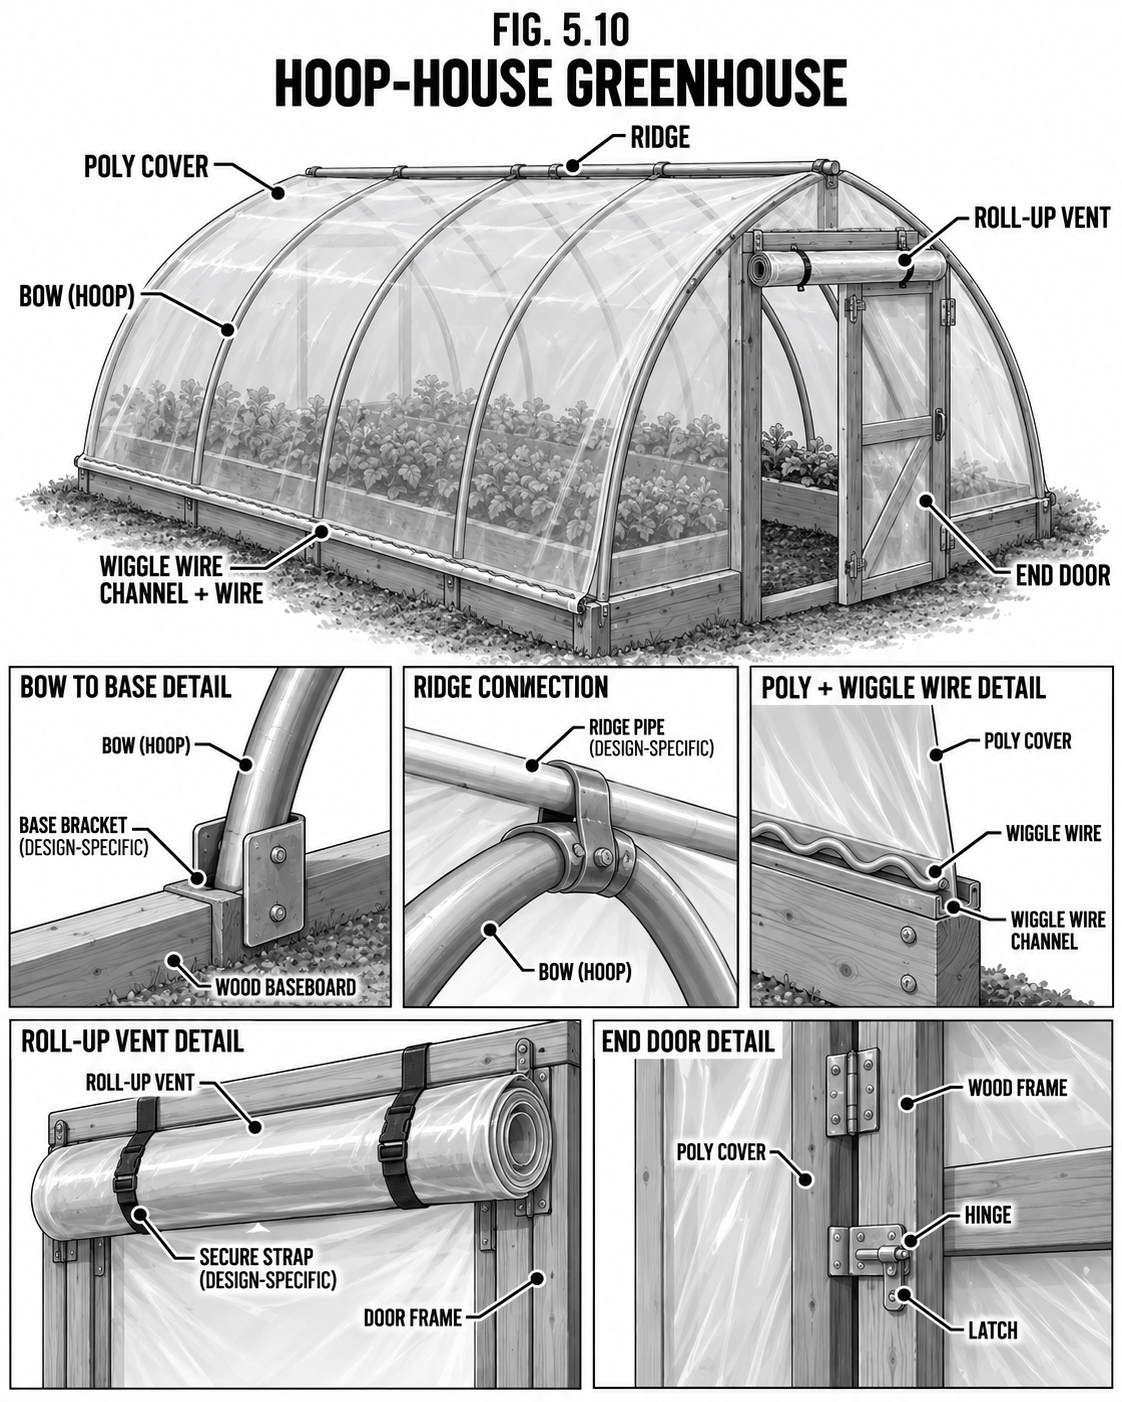
A greenhouse buys you months of growing on both ends of the year. A hoop house is the cheap workhorse. A walipini (pit greenhouse) sinks the beds below the frost line so the earth keeps them warm. An attached greenhouse on a south wall shares the home's heat and warms the house back.
Step by step
Hoop: set ground posts, bend bows into them, add a ridge, stretch poly with wiggle wire, add roll-up side vents and end doors.
Walipini: dig below frost, glaze the south-facing roof at your latitude angle, drain the pit.
Attached: lean the glazing on the south wall; vent the shared heat.
Safety & code Snow load collapses flat hoops; pitch the roof and brace for your winter. Vent on sunny days or you cook the crop.
Tips & variations A water-barrel wall inside stores day heat and releases it at night, frost protection for free.
Food · AnimalsPoultry
Chickens, Ducks & Quail
Eggs, meat, pest control, and fertilizer, on kitchen scraps and foraging.
DifficultyBeginner
TimeDaily care
CostLow–Med
SkillsAnimal care
Why it is worth it
Poultry is the easiest livestock and the fastest return: eggs within months, meat, and manure that supercharges compost. Hens eat scraps and bugs; ducks lay heavily and love a muddy homestead; quail mature fastest in the least space.
Step by step
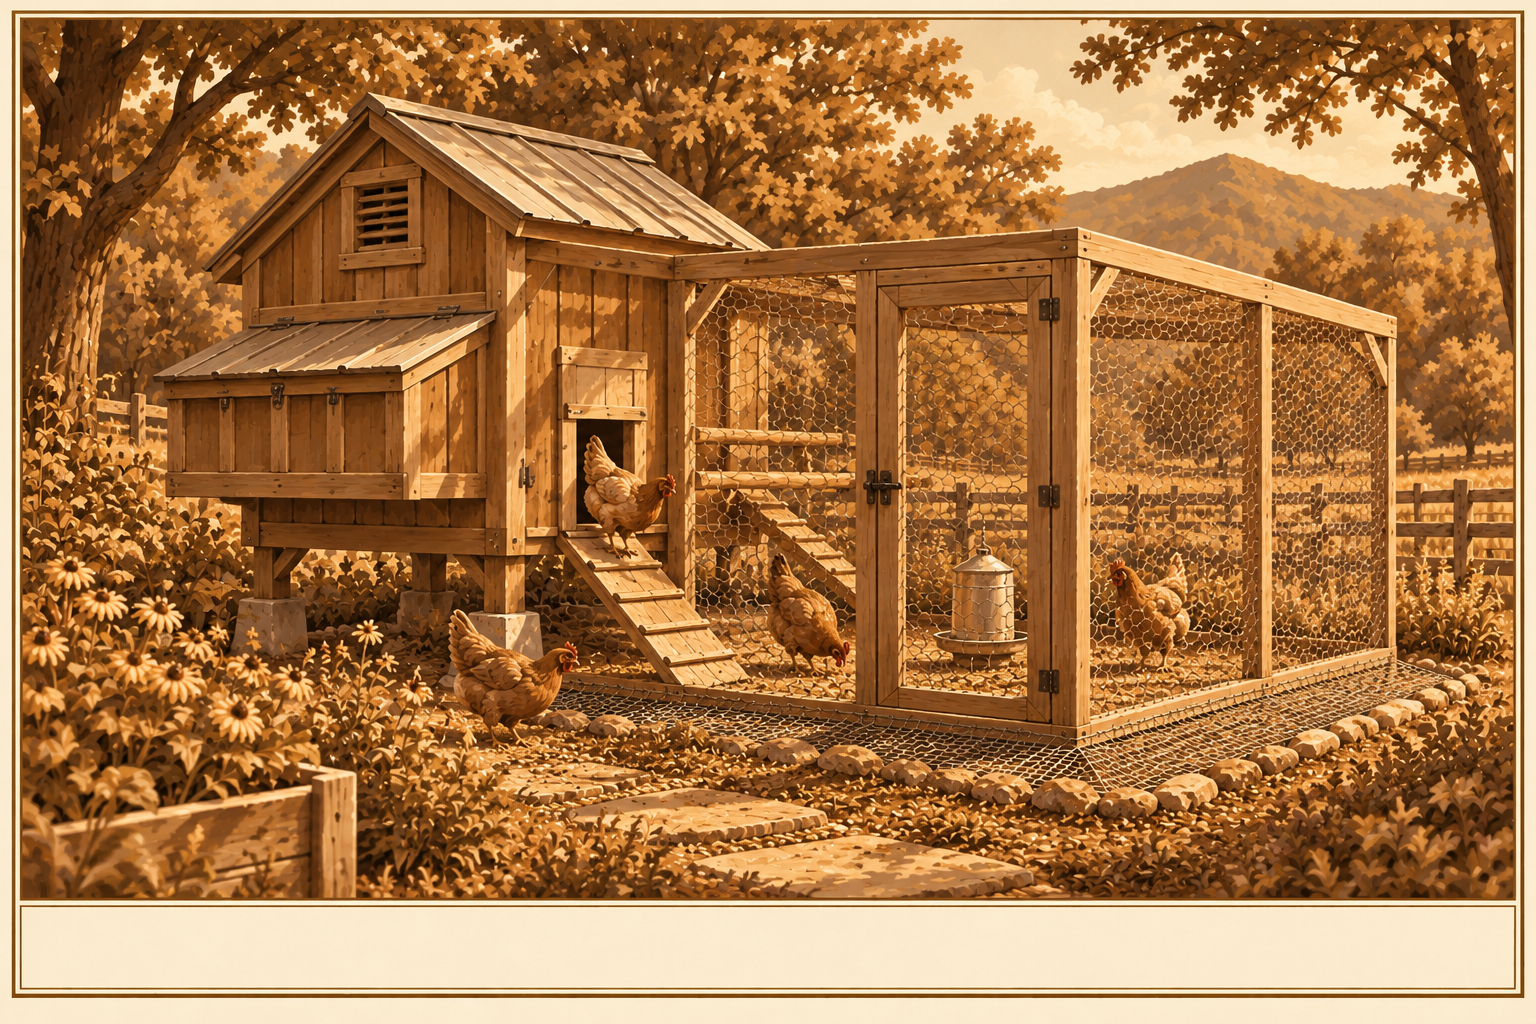
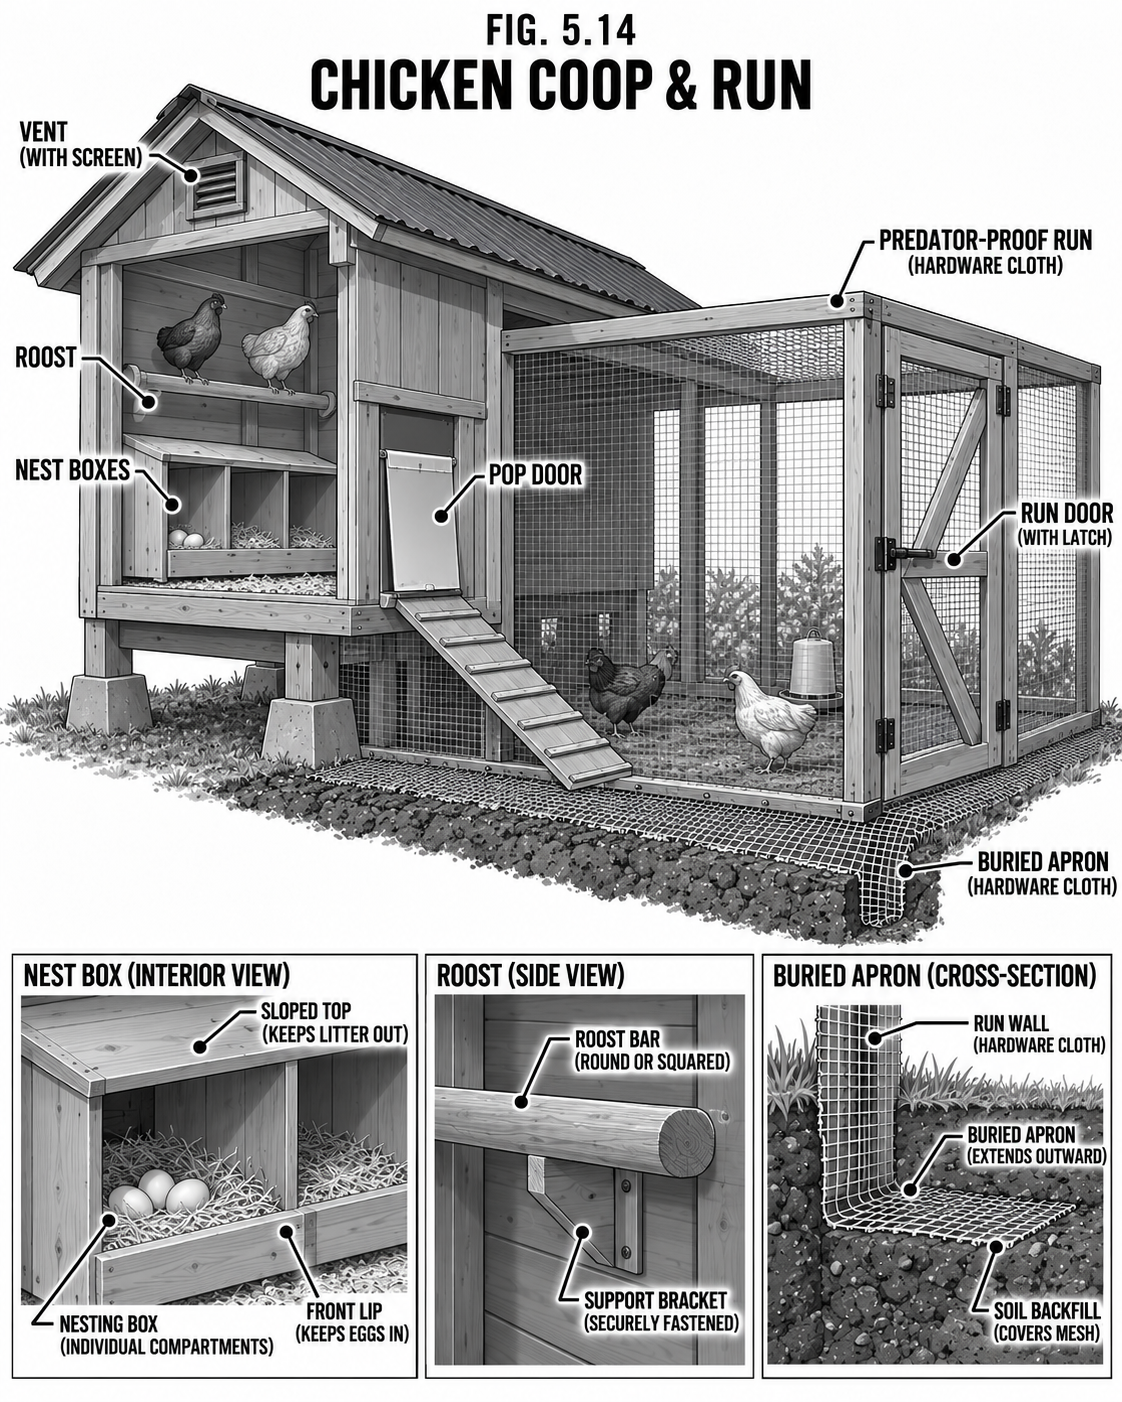
Build a coop with nest boxes, a roost bar, and real ventilation.
Fence a predator-proof run with a buried hardware-cloth apron.
Feed, water daily; collect eggs; add deep litter under the roost for compost.
Safety & code Predators dig and climb, so bury and roof the run. Wash hands after handling; ventilate the coop to prevent ammonia and respiratory illness.
Tips & variations A mobile coop (chicken tractor) spreads manure and bug control across the garden.
Food · AnimalsRabbits, Goats, Bees
Rabbits, Goats & Bees
Quiet meat, daily milk, and sweetness that also pollinates the whole place.
DifficultyIntermediate
TimeDaily care
CostMed
SkillsAnimal husbandry
Why it is worth it
Rabbits turn garden weeds into lean meat in small, quiet hutches. A couple of dairy goats give milk, cheese, and butter, and clear brush. Bees give honey, wax, and pollination that lifts every crop. Together they round out a homestead that eats and sweetens itself.
Step by step
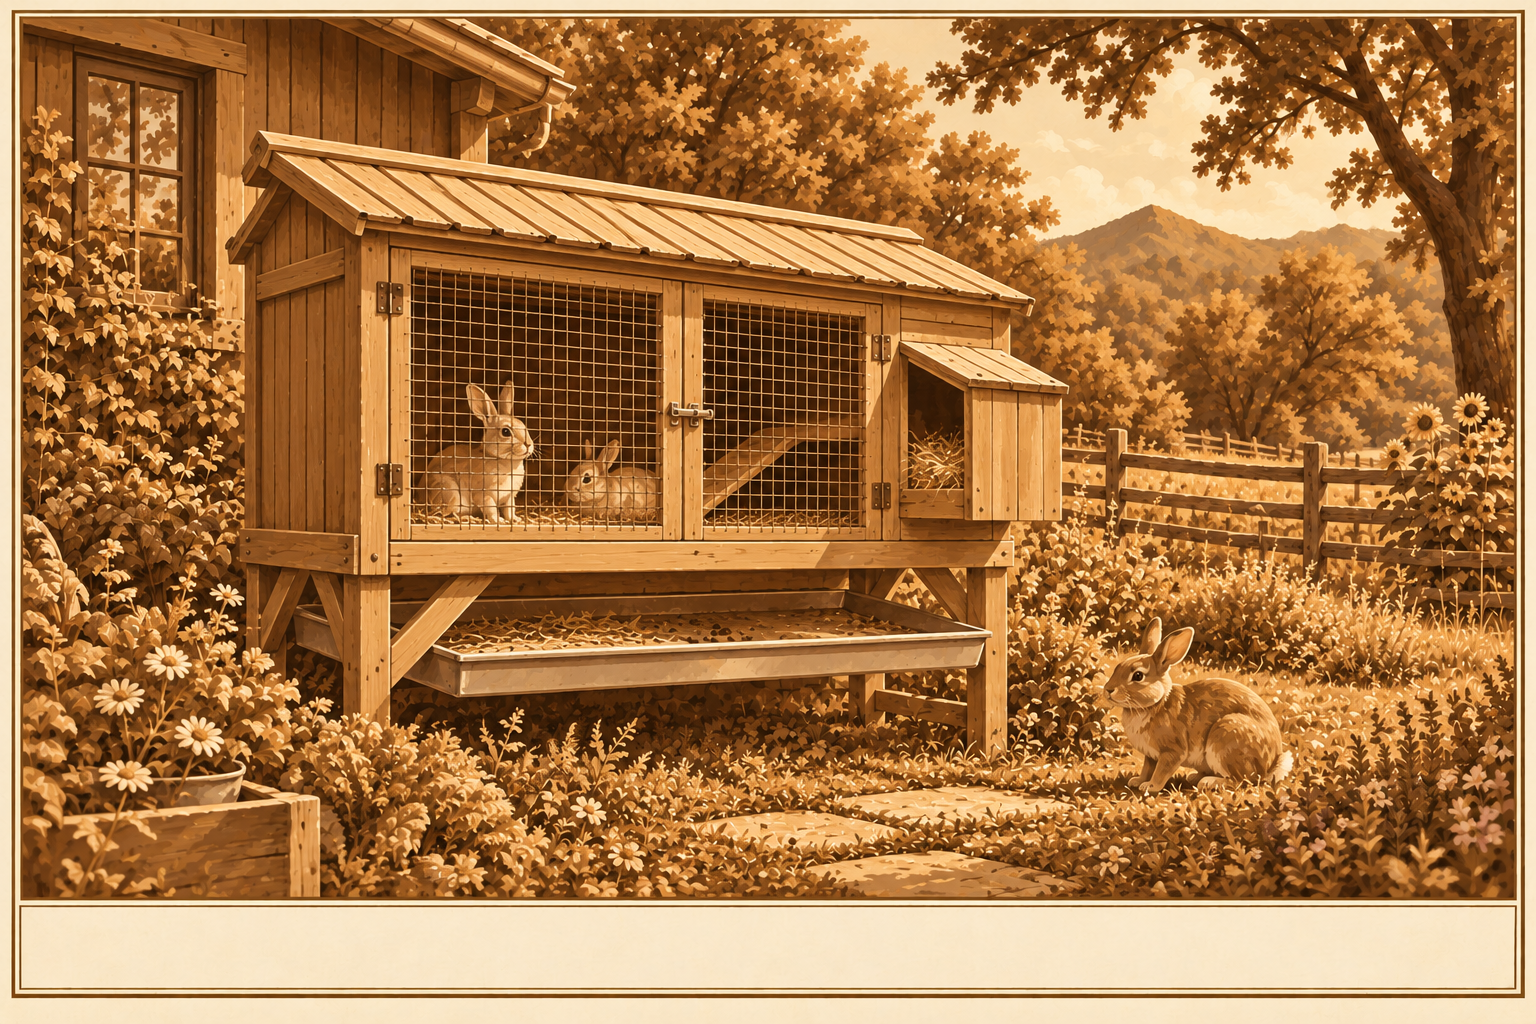
Rabbits: raised hutches with wire floors, nest boxes, and a manure catch (prime garden fertilizer).
Goats: shelter, strong fencing (they escape anything weak), a milking stand, and daily milking once freshened.
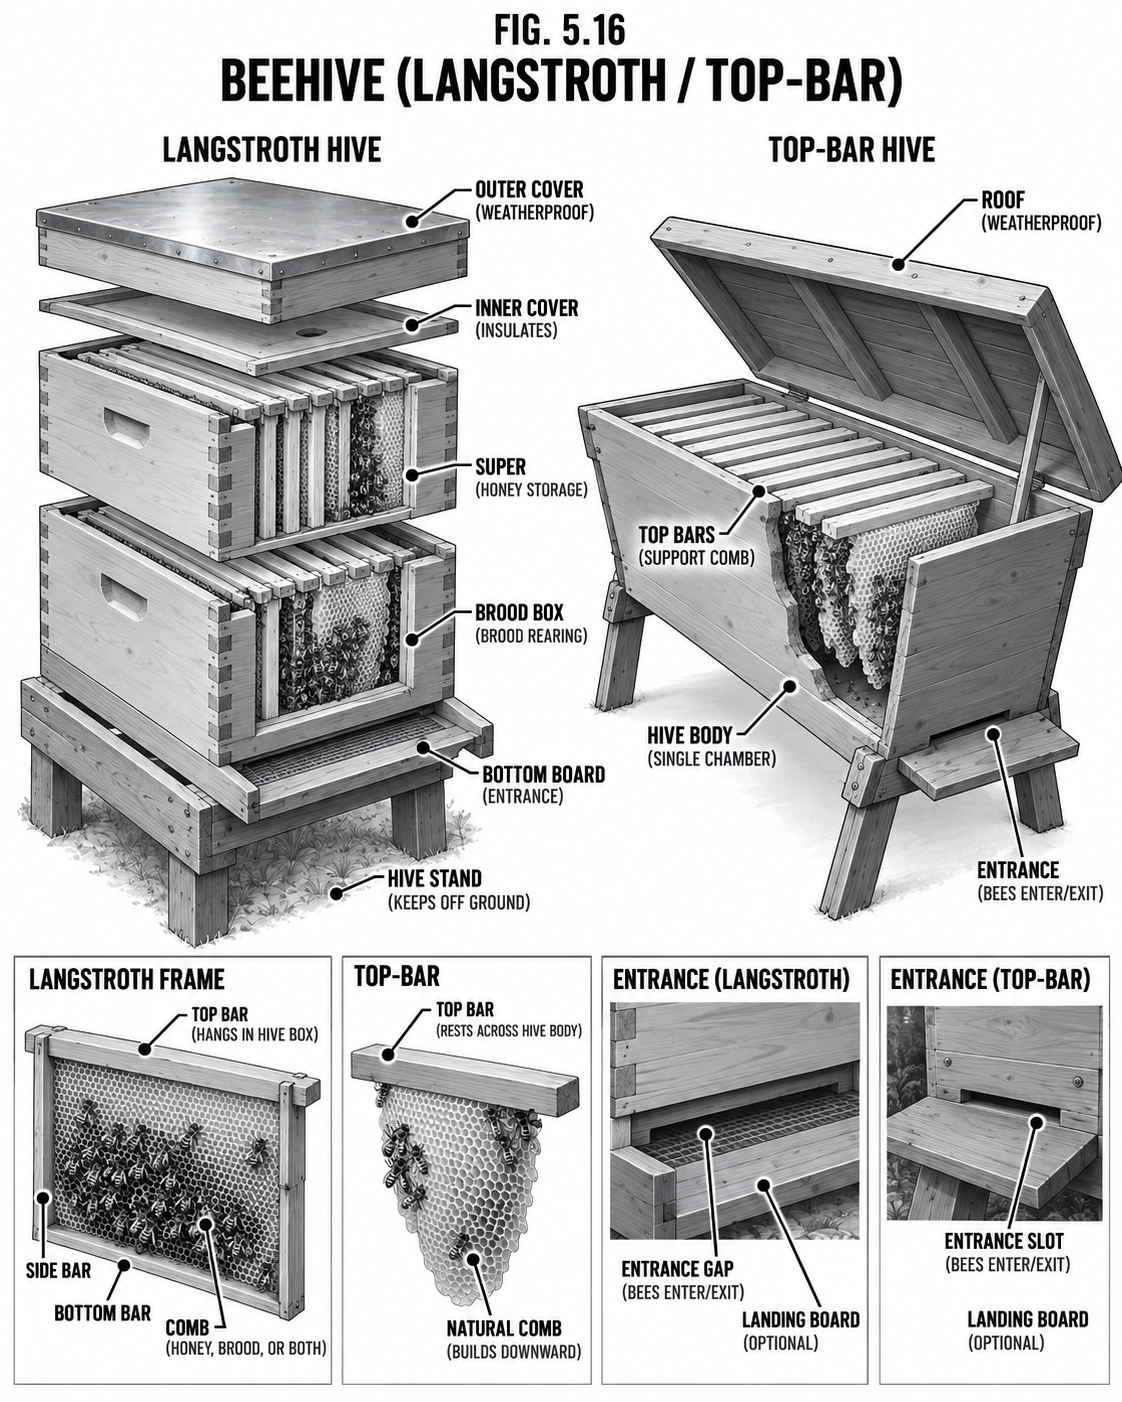
Bees: a Langstroth or top-bar hive in sun, out of the wind, entrance away from paths.
Safety & code Raw milk carries real pathogen risk; know the law and the risk before drinking it unpasteurized. Keep bee hives sited and registered where required; have an allergy plan on hand.
Tips & variations Rabbit manure is the one manure you can put straight on the garden without composting.
Food · AnimalsLiving Fertilizer
Animals as Fertilizer
Every animal on the place is a manure spreader that pays you back in eggs, meat, and milk.
DifficultyBeginner
TimeOngoing
CostLow
SkillsBasic
Why it is worth it
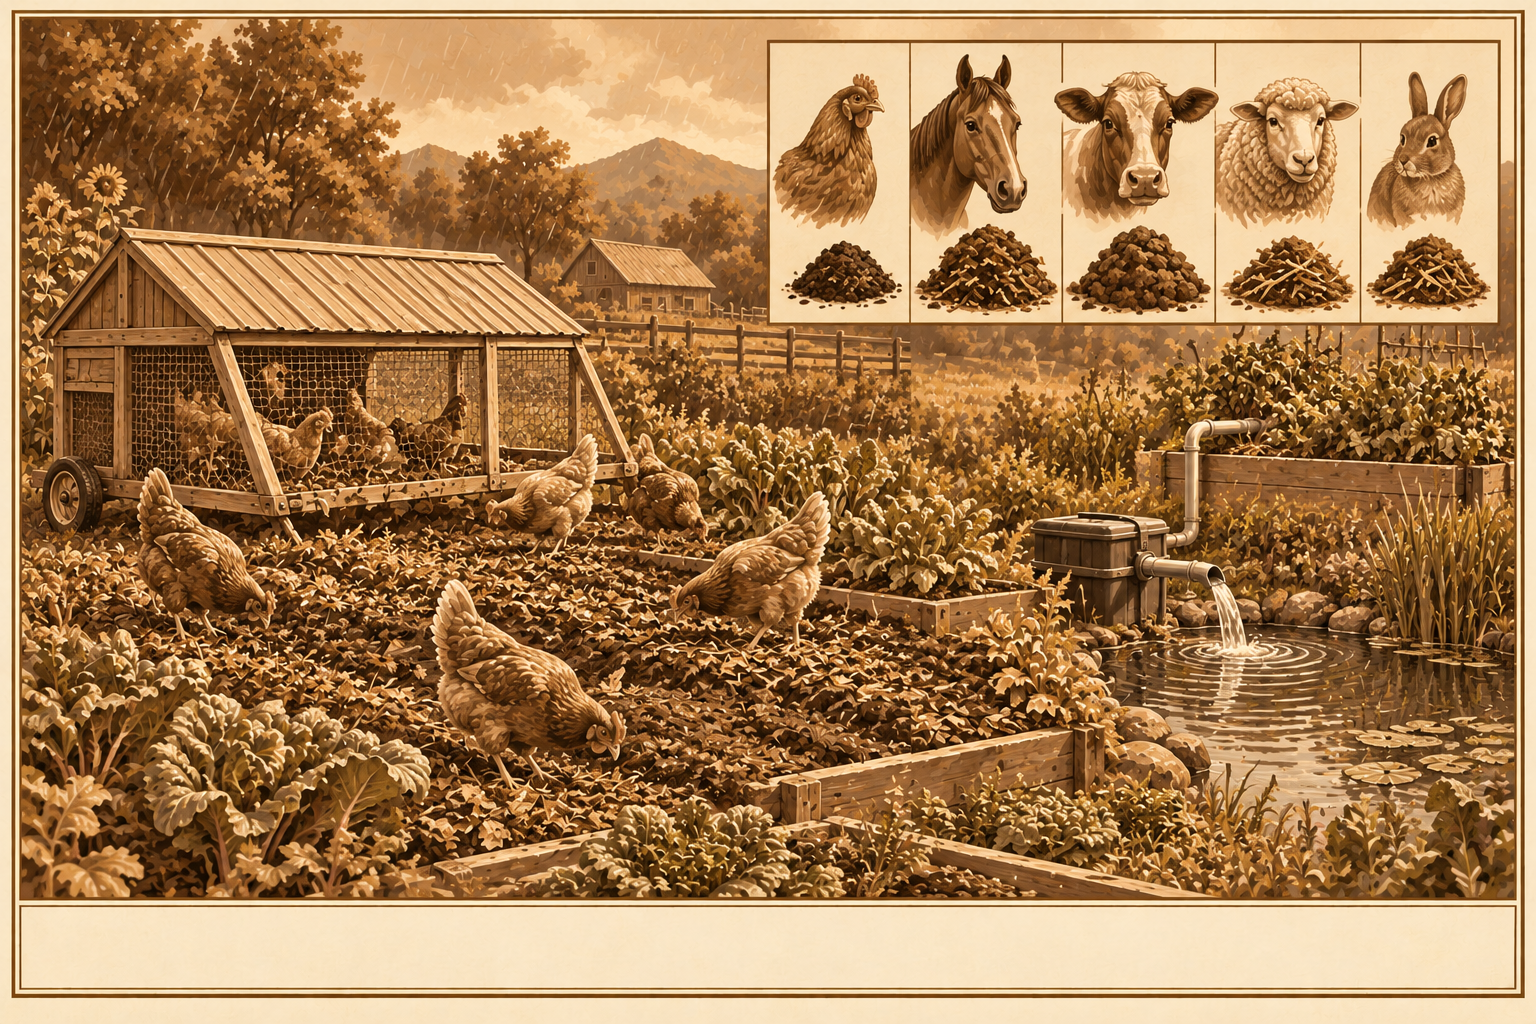
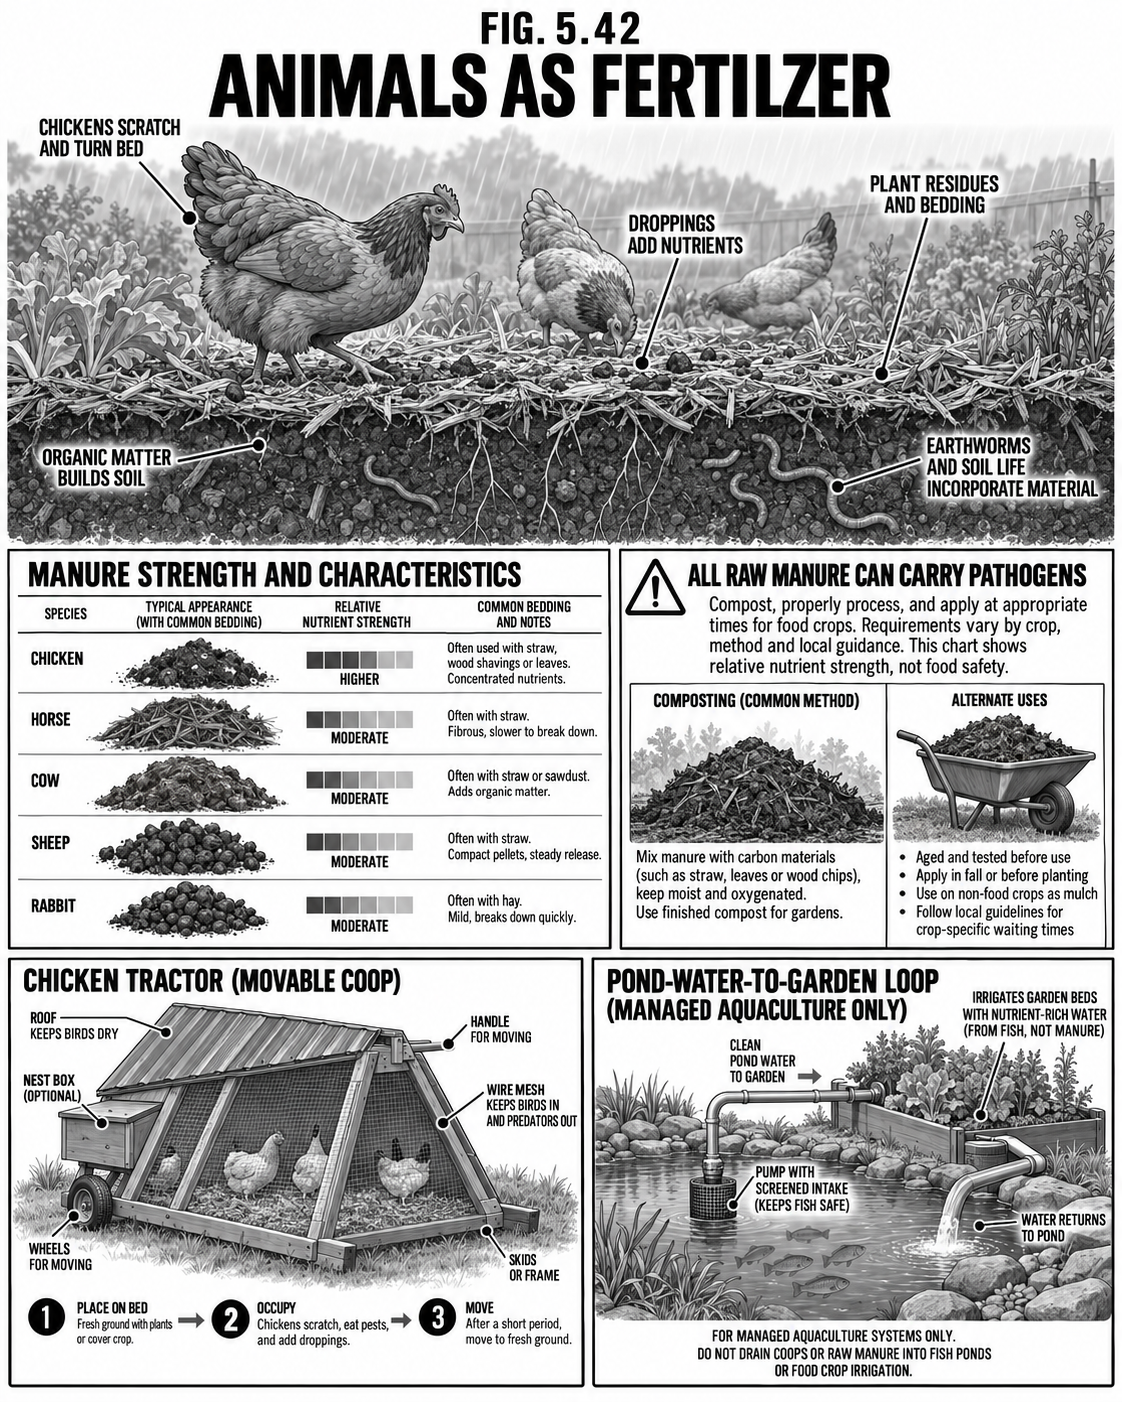
The cheapest fertilizer on a homestead walks around making itself. Chickens, rabbits, sheep, cattle, and fish all turn feed and forage into manure that feeds your soil. The whole trick is knowing which manure is "hot" and which is "cold," and then letting the animals do the spreading for you.
The manure rundown
Chickens: they scratch and drop everywhere. Run them over a bed or in a movable chicken tractor and they fertilize and till at the same time; rain and their own scratching work it in and dilute it. But chicken manure is HOT (very high nitrogen): age or compost it, or spread it thin and rest the ground a few weeks before planting, or it will burn roots and can carry disease.
Rabbits: the gift. Cold manure, safe to put straight on a bed with no composting and it will not burn. Drop the pellets right where you want them.
Sheep & cattle: they manure the pasture as they mow it. Rotate them across paddocks so it falls evenly and the grass recovers.
Fish: in a pond or an aquaponics loop (see Hydro & Aquaponics), fish waste becomes plant food in the water. Pump pond water onto the beds, or let the plants clean the fish's water and hand it back.
Rule of thumb: hot manures (chicken, horse, fresh cow) get composted first; cold manures (rabbit, well-aged sheep) go on direct.
Safety Never put fresh hot manure on crops you eat raw, and leave a rest period between manuring and harvest. Keep manure piles and their runoff well away from the well and any water (see Water and Waste).
Food · AnimalsThe Work Crew
Animals as the Work Crew
Put them to work mowing, clearing brush, tilling, and killing pests, for free.
DifficultyBeginner-Intermediate
TimeOngoing
CostLow
SkillsStockmanship
Why it is worth it
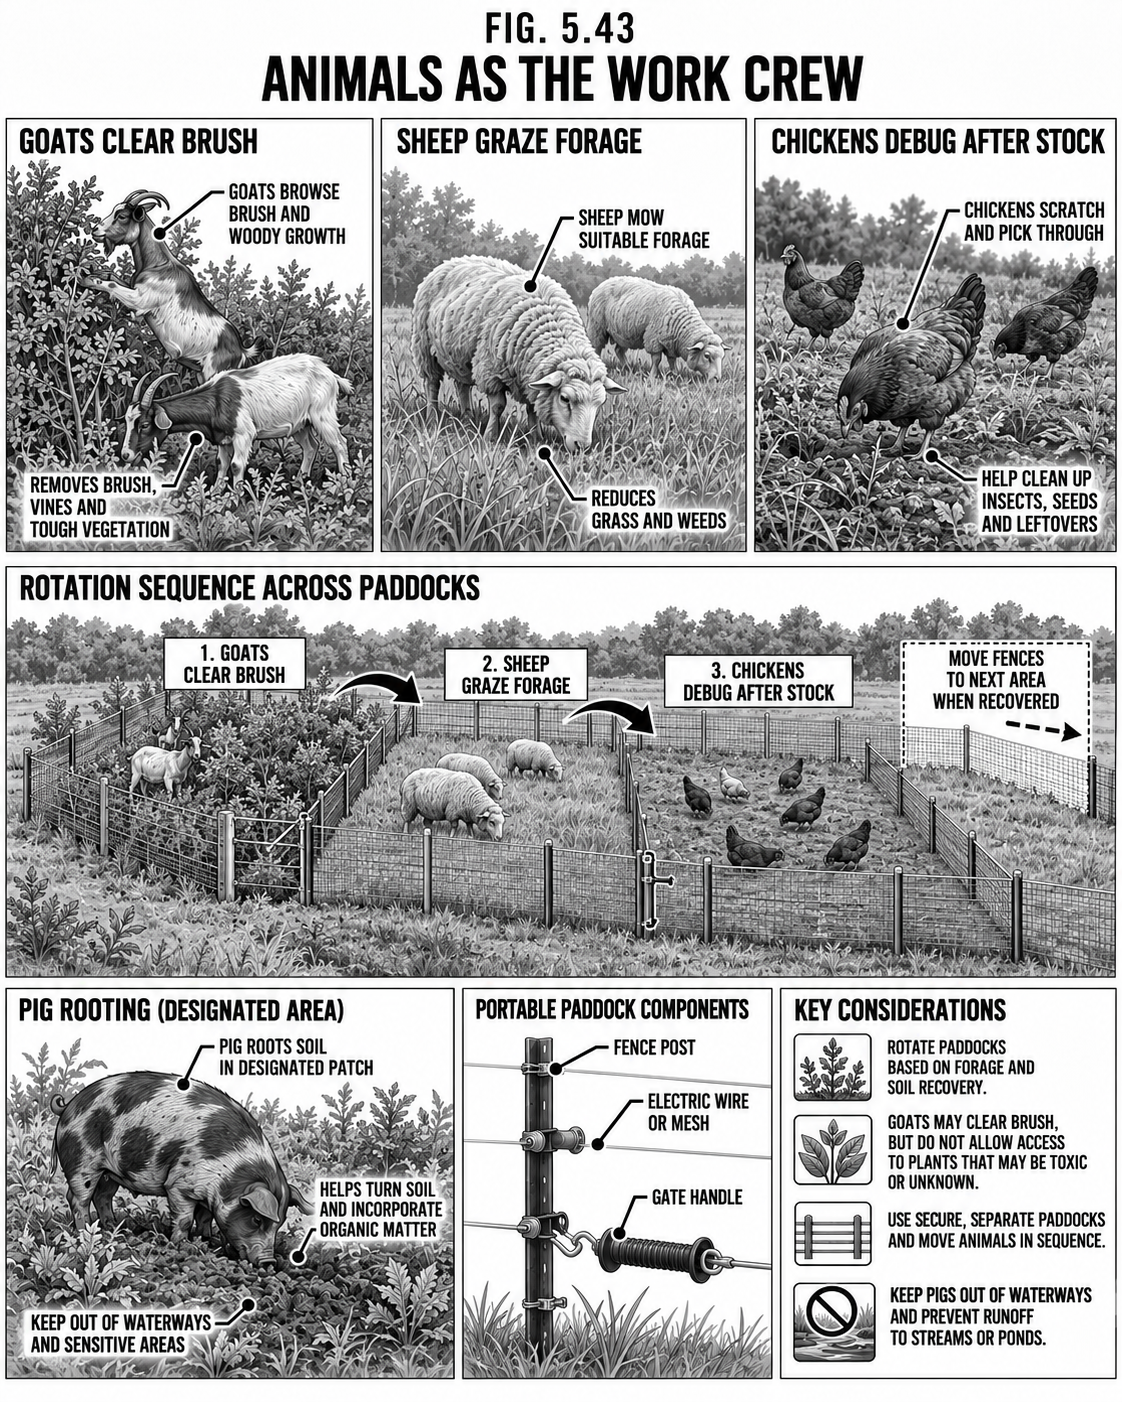
A well-placed animal does the chore and feeds itself doing it. Instead of running a mower, a brush cutter, a tiller, and a sprayer, you simply move the right livestock to where the work is. They clear it, till it, debug it, and fertilize it in one pass.
The crew
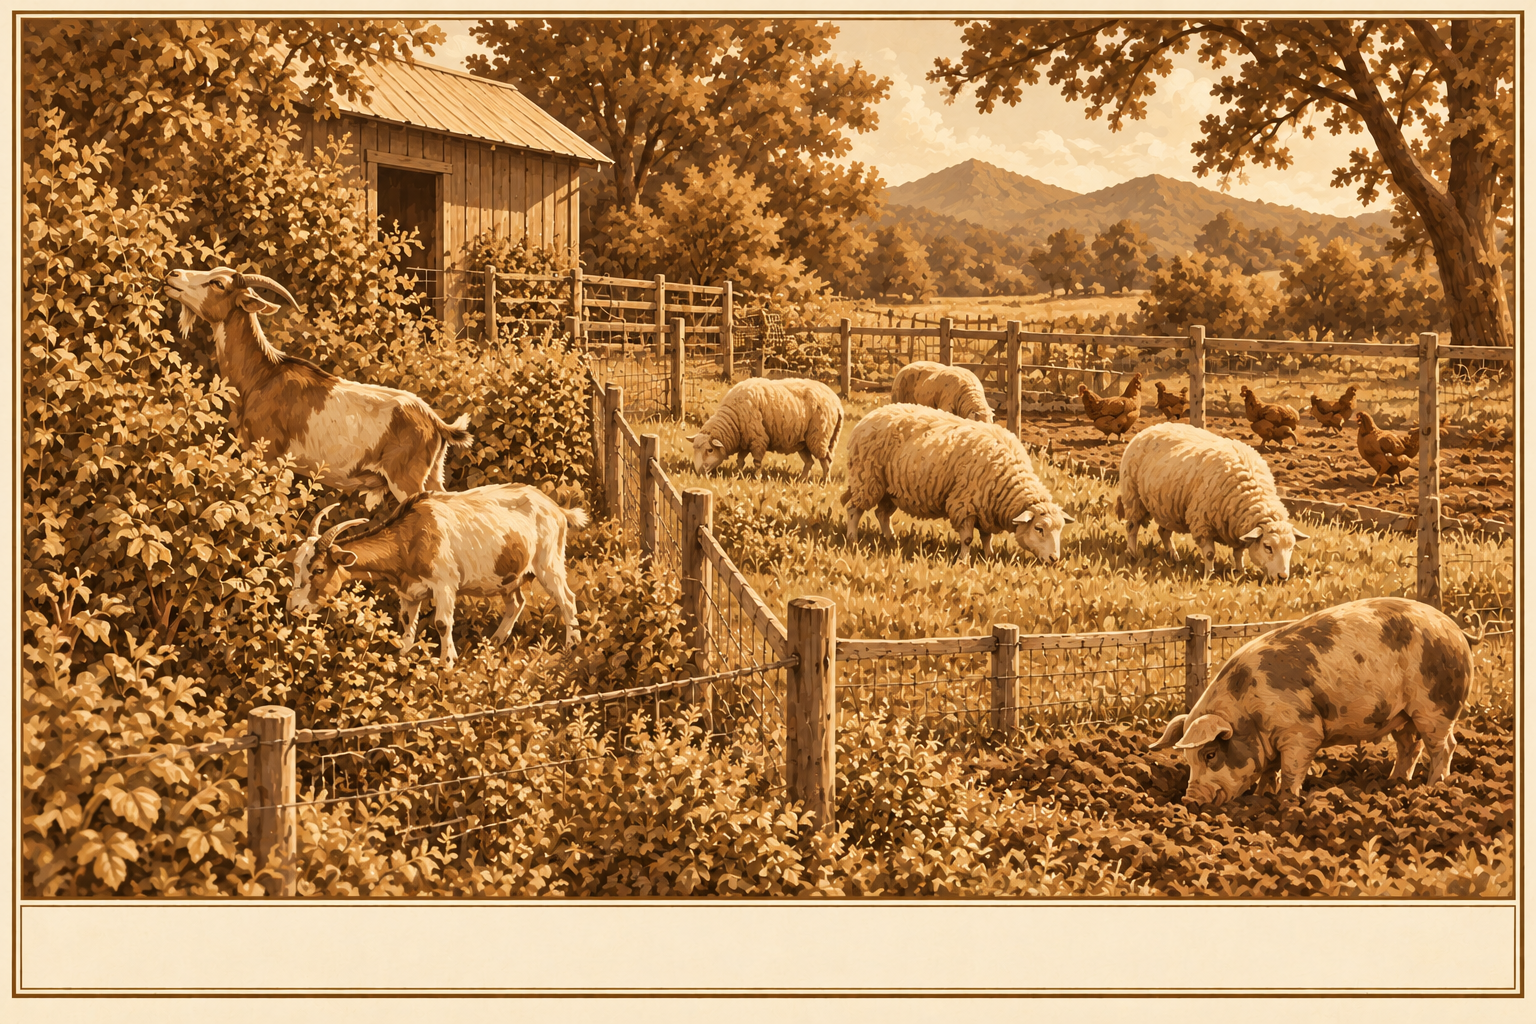
Sheep & cattle, the mowers: they graze grass and soft weeds down evenly, keeping pasture, orchard rows, and lawn edges cut. Sheep favor grass and broadleaf weeds.
Goats, the brush crew: they strip the woody shrubs, briars, saplings, and even poison ivy that sheep and cattle walk past. Put goats on overgrown ground first to clear the brush, then run sheep behind them for the grass.
Pigs, the tiller: they root up ground, tear out sod and roots, and turn a compost pile or a new garden patch into worked soil. Ring-fence them on exactly the plot you want broken.
Chickens & ducks, the pest patrol: they eat ticks, grubs, slugs, beetles, and weed seeds and scratch through litter. Run them after the big grazers to clean up and debug the ground.
Geese, the weeders: they pull grass and weeds from between crops (a classic in orchards and berries) and leave many broadleaf crops alone.
Move them (the real secret): managed rotational grazing. Keep animals on a small area, let them work it down, then move them on, so they mow and manure evenly and never overgraze or churn the ground to mud.
Safety & tips Fence to the animal: goats climb and squeeze out, pigs push through. Give shade and water. Do not leave pigs or goats long enough to compact wet ground or kill trees you want, and keep both off young orchard bark, which they will girdle. Match the animal to the job and pull them the moment it is done.
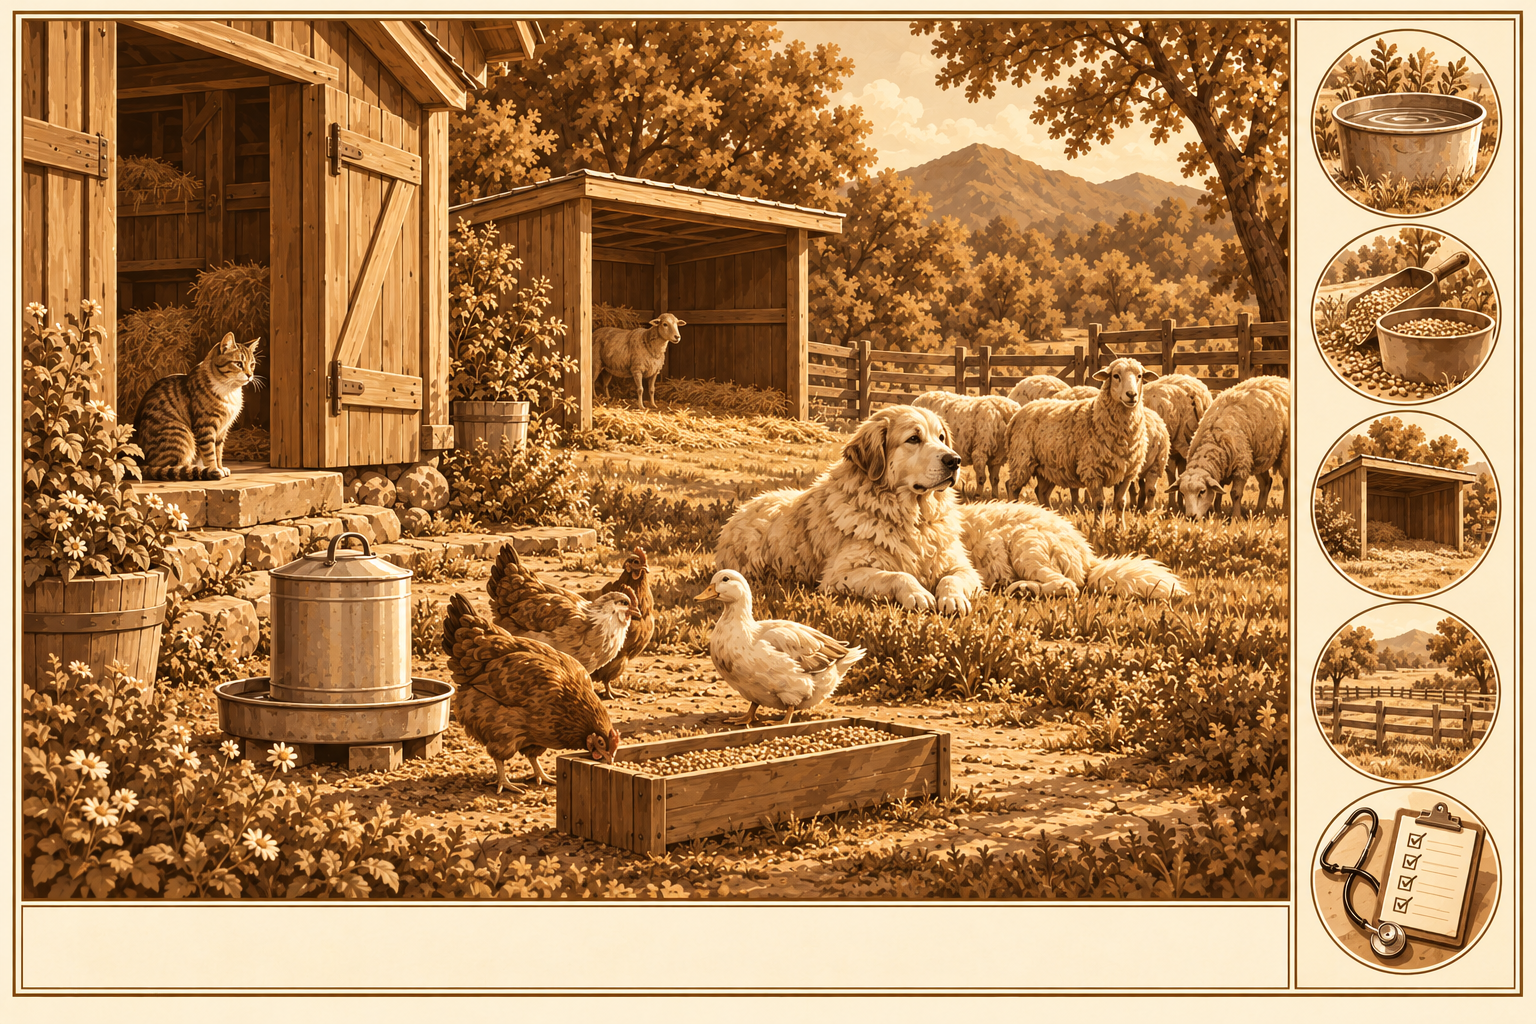
Food · AnimalsHusbandry Basics
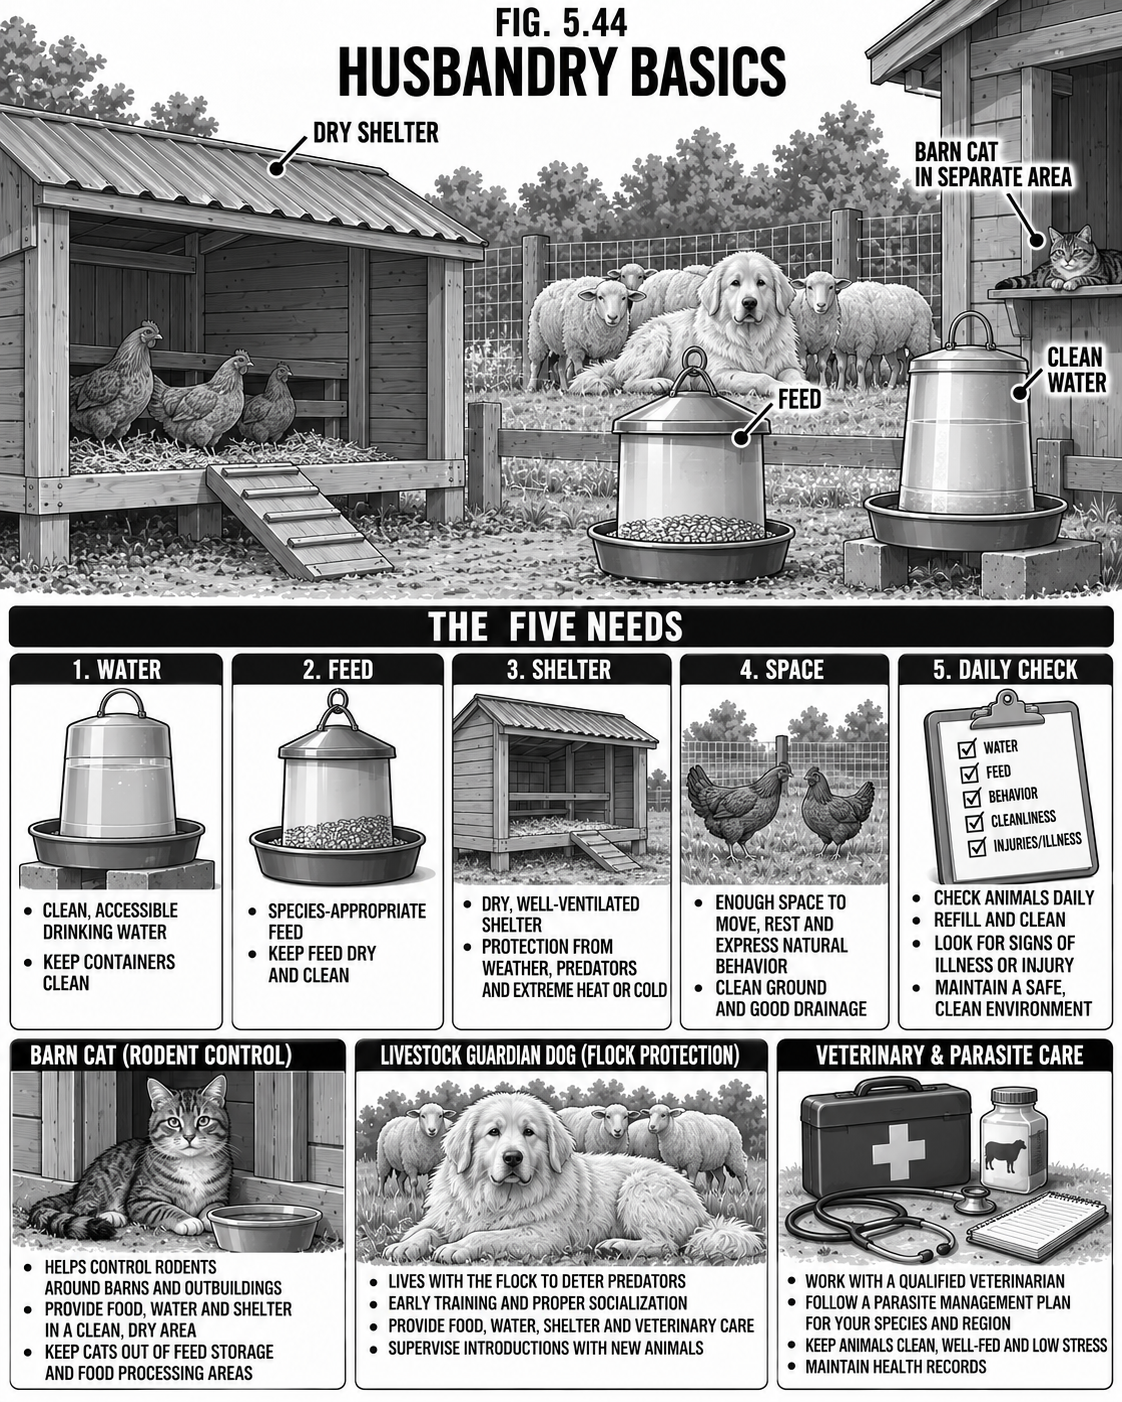
Care & Husbandry: The Basics
Get five things right for every animal and most trouble never starts.
DifficultyBeginner
TimeDaily
CostVaries
SkillsStockmanship
Why it is worth it
Every animal, from a barn cat to a cow, needs the same five things. Get them right and you head off most sickness before it ever starts. An animal is cheaper to keep well than to doctor sick.
The five needs
Water: clean and unfrozen, always in front of them. Nothing kills stock faster than a dry or frozen trough.
Feed: the right ration for the species and its stage of life, good hay or forage, the minerals it needs, and never anything moldy.
Shelter: dry, ventilated but free of drafts, shade in summer, a windbreak and deep bedding in winter.
Space and cleanliness: room to move and clean bedding. Crowding and filth breed parasites and disease.
Daily eyes-on: look at every animal every day. Is it eating, moving right, breathing easy, dropping normal manure? Catch trouble early, keep a basic first-aid kit and a livestock vet's number, and quarantine any new or sick animal away from the herd.
The helpers: cats & dogs
Cats are your barn mousers: they guard the feed stores from rodents that spread disease and eat you out of house and home. Keep them fixed, fed (a fed cat still hunts), wormed, and sheltered. Dogs earn their keep too: a livestock guardian dog lives with the flock and drives off predators, while a herding dog moves stock for you. Start them young, raise them with the animals they will protect, and keep their shots and worming current.
Safety & biosecurity Quarantine every new animal before it joins the herd, and clean your boots and hands between sick and healthy stock. Keep a vet's number on the wall, and know your state's rules on keeping and slaughtering animals.
Food · AnimalsBird to Cow
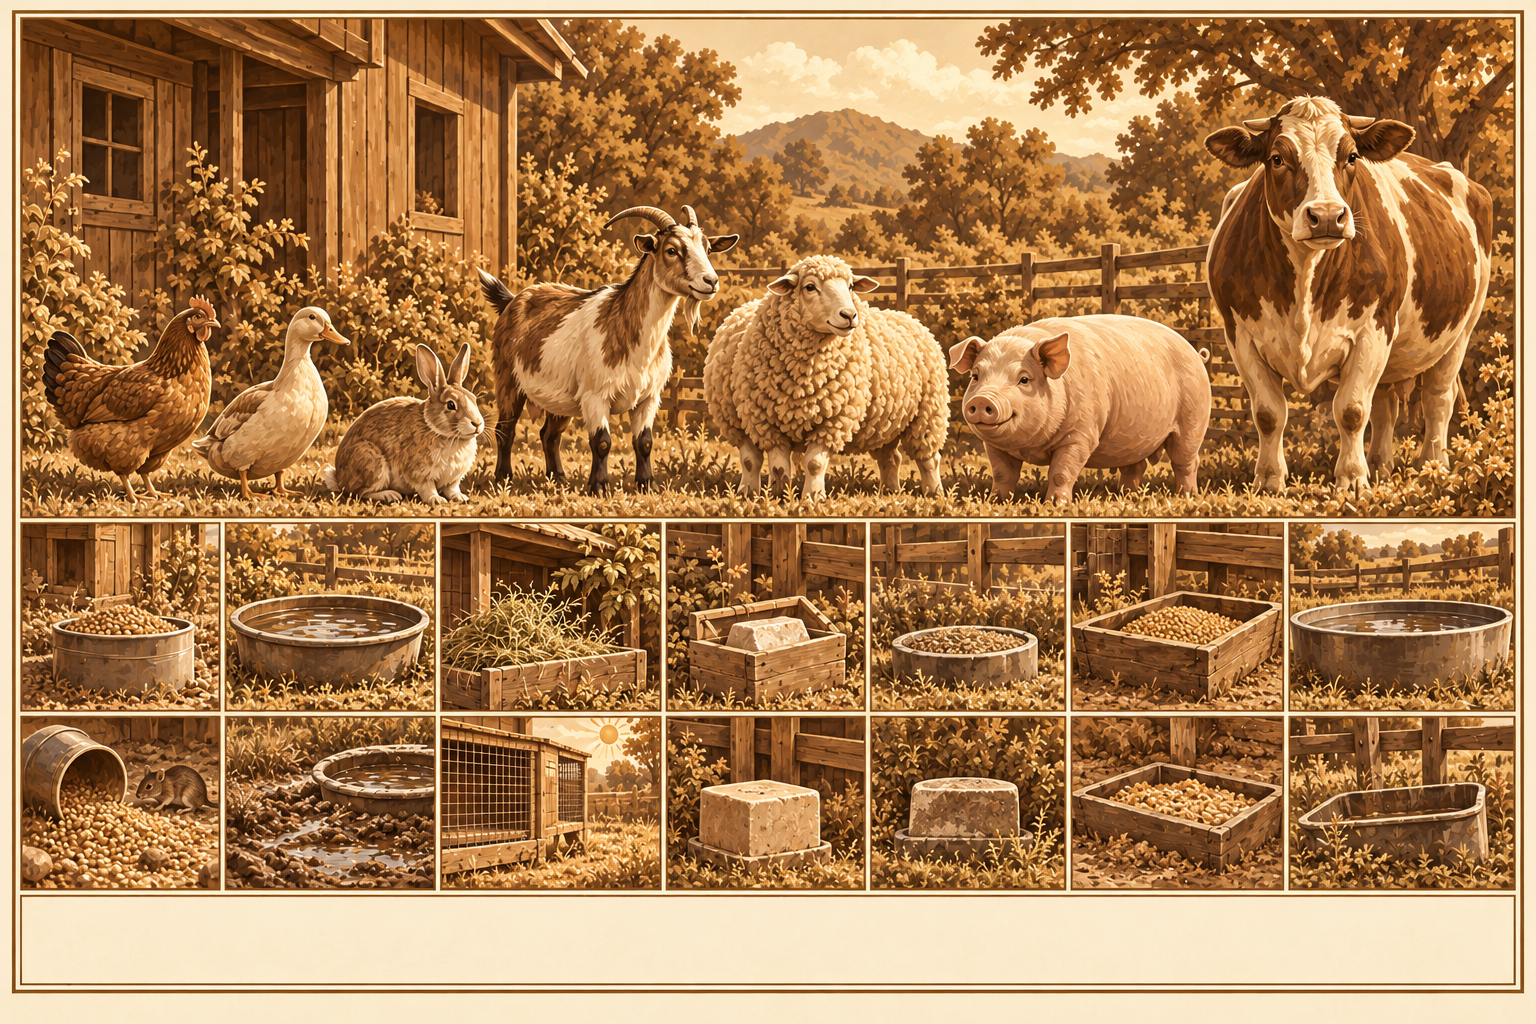
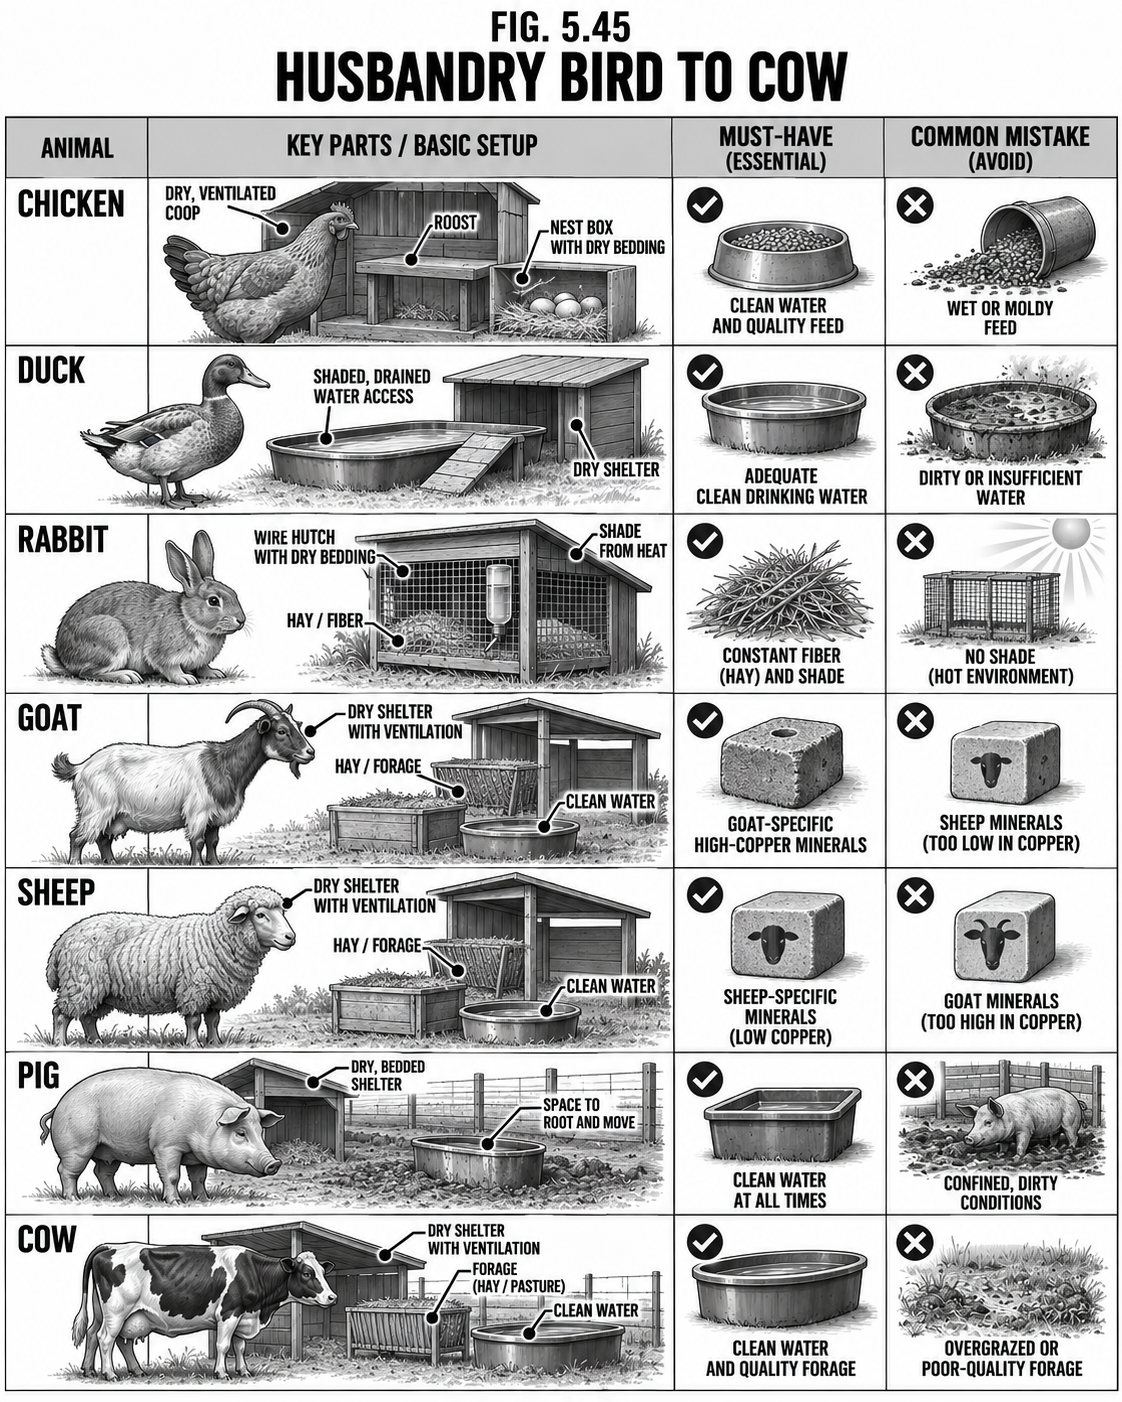
Care & Husbandry: Bird to Cow
The few things each common homestead animal must have, and the mistake that gets them killed.
DifficultyBeginner-Intermediate
TimeDaily
CostVaries
SkillsStockmanship
Why it is worth it
On top of the five basics, each species has its own non-negotiables. Here is the short version for the common ones, and the single mistake that most often does them in.
Species by species
Chickens & poultry: dry coop, a roost, nest boxes, layer feed plus grit, and locked up tight at night. Watch for mites and respiratory illness. Mistake: a coop a raccoon or weasel can open after dark.
Ducks & geese: water deep enough to dip their heads and clean their nostrils (a tub, not a pond, will do), and plenty of bedding because they are messy. Very hardy. Mistake: penning them dry with no water to dabble.
Rabbits: shade and airflow (they die of heat, not cold), a hay-based diet with some pellets, and a clean hutch. Mistake: leaving them in summer sun with no shade.
Goats: fences they cannot climb or squeeze through, browse plus hay and minerals (they need copper), dry footing, and regular hoof trimming and worming. Mistake: wet ground and skipped hooves.
Sheep: grass and forage with sheep minerals that carry NO added copper (copper poisons sheep), shearing once a year, hoof care, and worm control. Mistake: feeding goat or cattle mineral, which can kill them, or leaving them woolly into summer heat.
Pigs: a wallow or shade (they cannot sweat), a strong low fence, lots of water, and room to root. Smart and strong. Mistake: no shade or water in the heat.
Cattle: a great deal of forage or hay and water (many gallons a day), stout fence, a windbreak, minerals, and a watch at calving. Mistake: underestimating winter water and wind shelter.
Tips & variations Start small (chickens and rabbits) and add species as your skill grows. Match the stock to your land and climate: for a Yooper winter that means cold-hardy breeds, good windbreaks, and water you can keep from freezing.
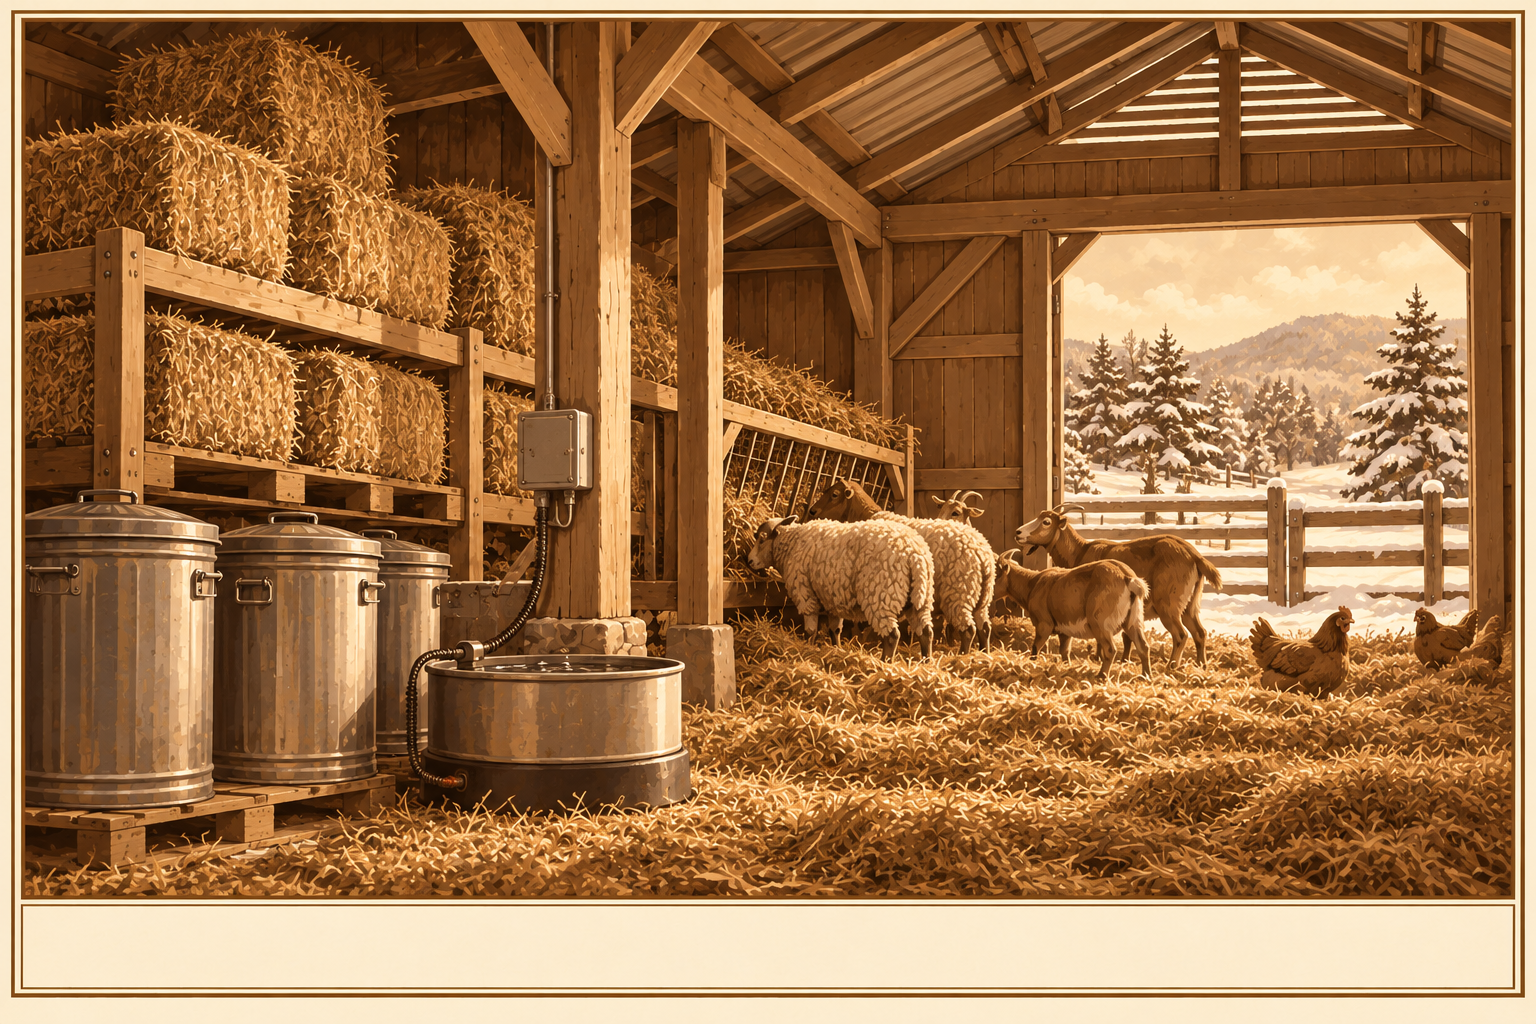
Food · AnimalsFeed, Water & Winter
Feed Store, Water & Winter Care
Keep the hay dry, the water open, and the barn right, or the stock pays for it.
DifficultyBeginner-Intermediate
TimeSeasonal
CostLow-Med
SkillsStockmanship
Why it is worth it
All the good husbandry in the world fails if the feed spoils, the water freezes, or the animals go into a hard winter thin and wet. Storing feed, managing water, and setting up for winter are the quiet chores that keep stock alive between the fences.
Feed storage: hay & grain
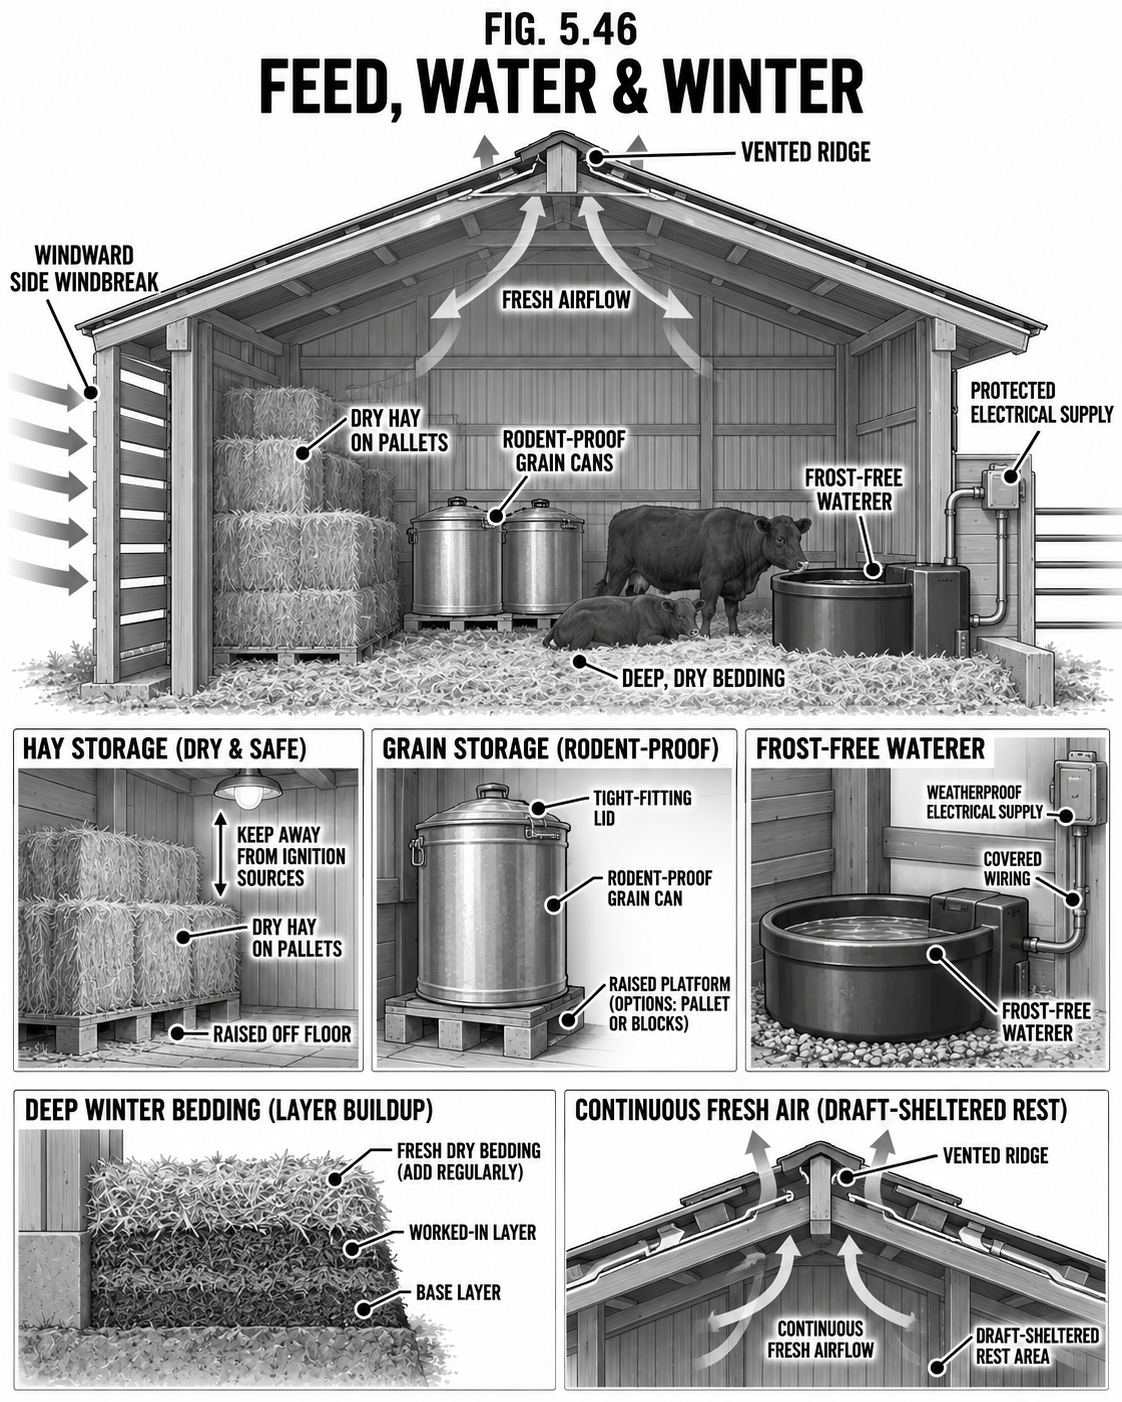
Hay must be baled fully dry. Damp hay molds, and a wet stack can heat until it catches fire on its own, a real barn-burner. Store bales off the ground on pallets, under a roof, with air moving around them, and keep rain and snow off. Grain and oats go in cool, dry, rodent-proof metal bins or cans with tight lids: mice and rats foul far more than they eat and spread disease. Keep it sealed, use the oldest first, and toss anything musty or weevily. Store all feed where a loose animal cannot break in and gorge, because a gut full of stolen grain founders or bloats stock dead.
Water & troughs
Scrub troughs out often: algae, slime, and droppings breed sickness. A float-valve or automatic waterer fed by gravity from a tank, a spring, or a frost-free hydrant saves hauling (see Water). Site troughs uphill of manure so runoff never drains back in, and keep them clear of the well and streams (see Waste). In winter, keep water open with a heated trough, a tank de-icer, or an energy-free insulated waterer, or break and skim the ice at least twice a day. Bury supply lines below the frost line and heat-tape what you cannot bury.
Winter: heat & quality of life
Most livestock take cold far better than heat, as long as they are dry and out of the wind. A good windbreak and deep dry bedding (deep-litter packs down and gives off its own warmth) beat a sealed, heated barn, which traps damp and ammonia and brings on pneumonia. Keep the barn vented even in the cold: damp and ammonia are the enemy, not the chill. Go easy on heat lamps, which are a leading cause of barn fires: use them only for the young and vulnerable (chicks, newborns), hung secure and clear of bedding, and prefer a radiant heat plate. Feed more in the cold, because digestion itself makes heat and ruminants especially need extra hay to stay warm. Choose cold-hardy breeds, shelter the babies, and check daily for frostbitten combs, wattles, and teats. Quality of life is the rest of it: a dry place to lie down, room to move, light, and the company of their own kind.
Safety Two fire risks live in every barn: wet hay that heats itself, and heat lamps against bedding. Mind both. Never seal a barn airtight to keep heat in, the damp and ammonia will do more harm than the cold ever would.
Food · PreservingCanning
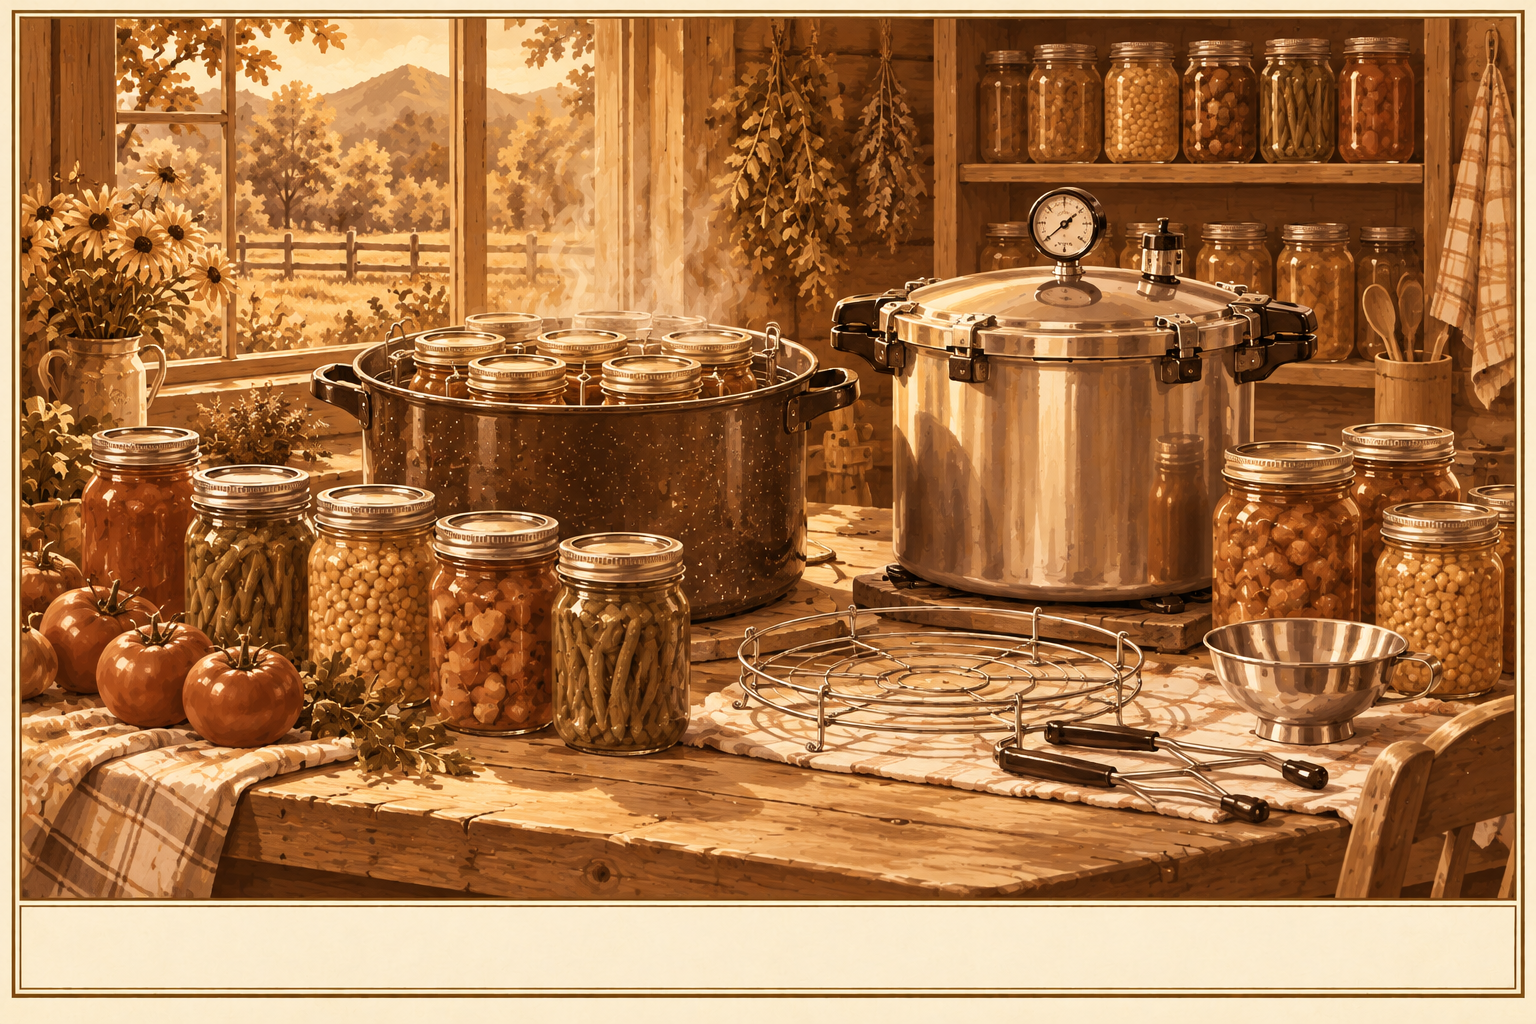
Canning: Water-Bath & Pressure
Shelf-stable jars of summer. Get the method right or it can kill you.
DifficultyIntermediate
TimeA day
CostMed
SkillsFollowing a tested recipe
Why it is worth it
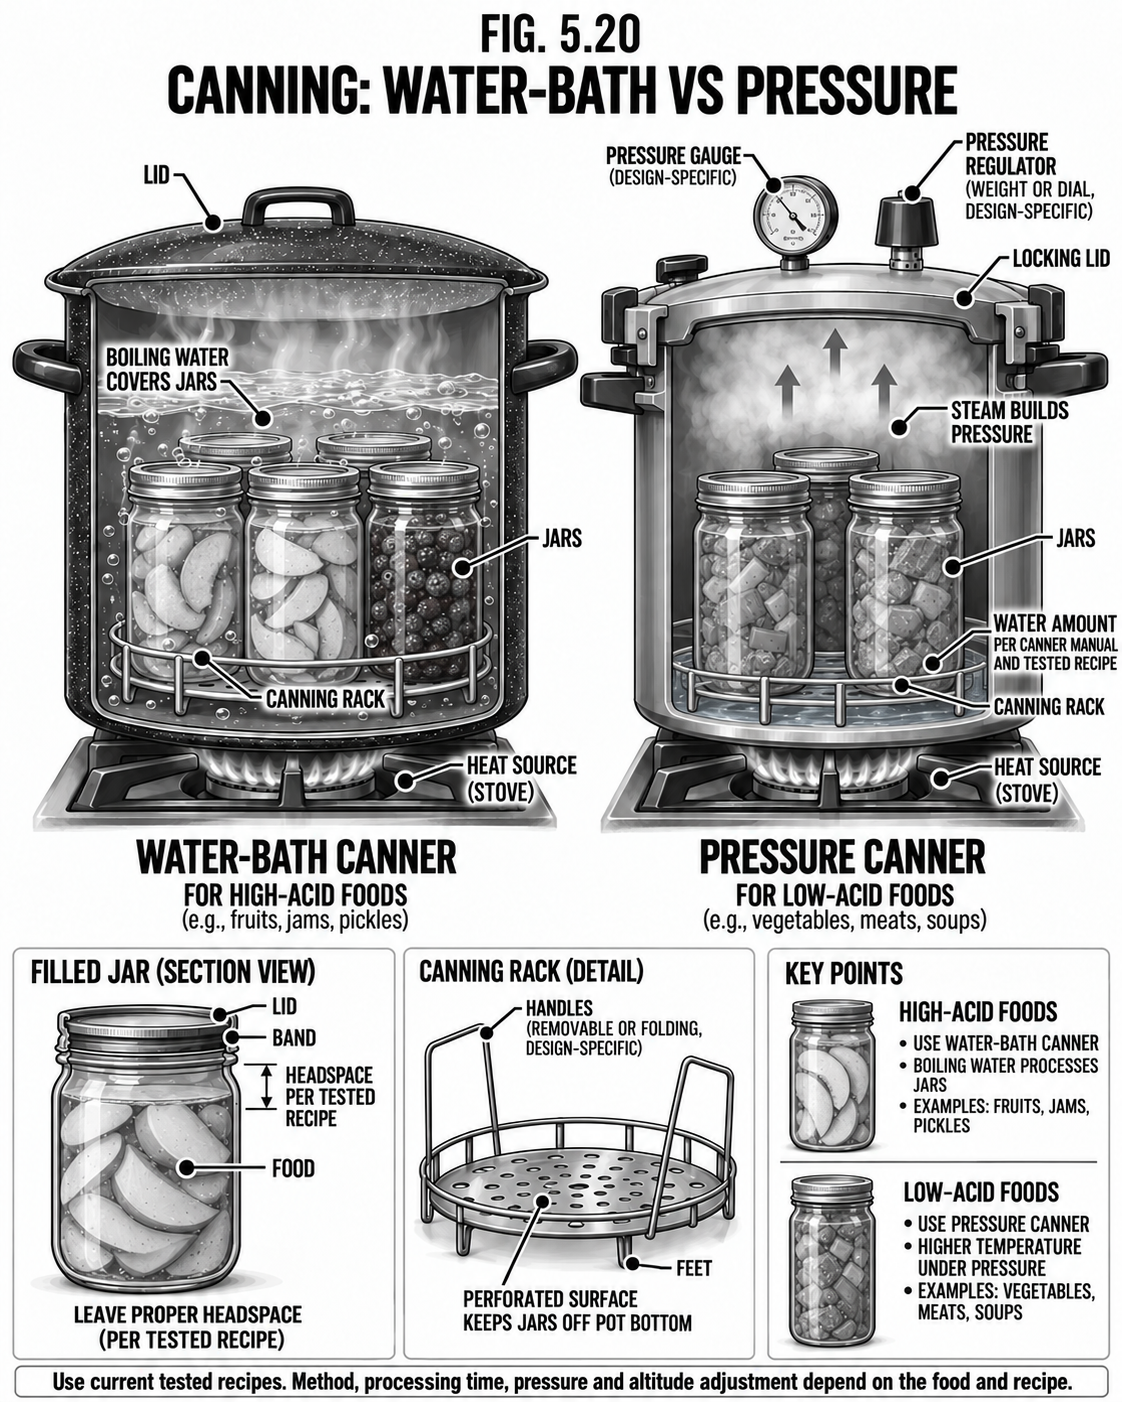
Canning puts a whole harvest on the shelf with no refrigeration. There are two methods and the choice is not about taste, it is about safety: water-bath for high-acid foods (fruit, jam, pickles, tomatoes with added acid) and pressure canning for low-acid foods (all vegetables, meat, fish, beans, soups).
Step by step
Use a current, tested recipe; do not improvise times or acidity.
Pack clean jars to the correct headspace; wipe rims; set lids.
Water-bath high-acid foods in a rolling boil for the recipe time (adjust for altitude).
Pressure-can low-acid foods at the specified pressure and time (adjust for altitude).
Cool undisturbed; check every seal; label and date.
Safety & code This is the one that kills people. Low-acid foods (vegetables, meat, fish) MUST be pressure-canned: boiling water alone does NOT destroy botulism spores, and botulism is often fatal with no change in taste or smell. Never water-bath green beans or meat. If a jar is unsealed, bulging, leaking, spurts, or smells off, DO NOT taste it, throw it out. When in doubt, throw it out.
Tips & variations Reusable lids exist for long-term self-reliance. A pressure canner also doubles as a big pressure cooker.
Food · PreservingDrying & Smoking
Dehydrating, Jerky & Smoking
Pull the water out and food keeps for months with no power.
DifficultyBeginner
TimeHours–days
CostLow
SkillsBasic
Why it is worth it
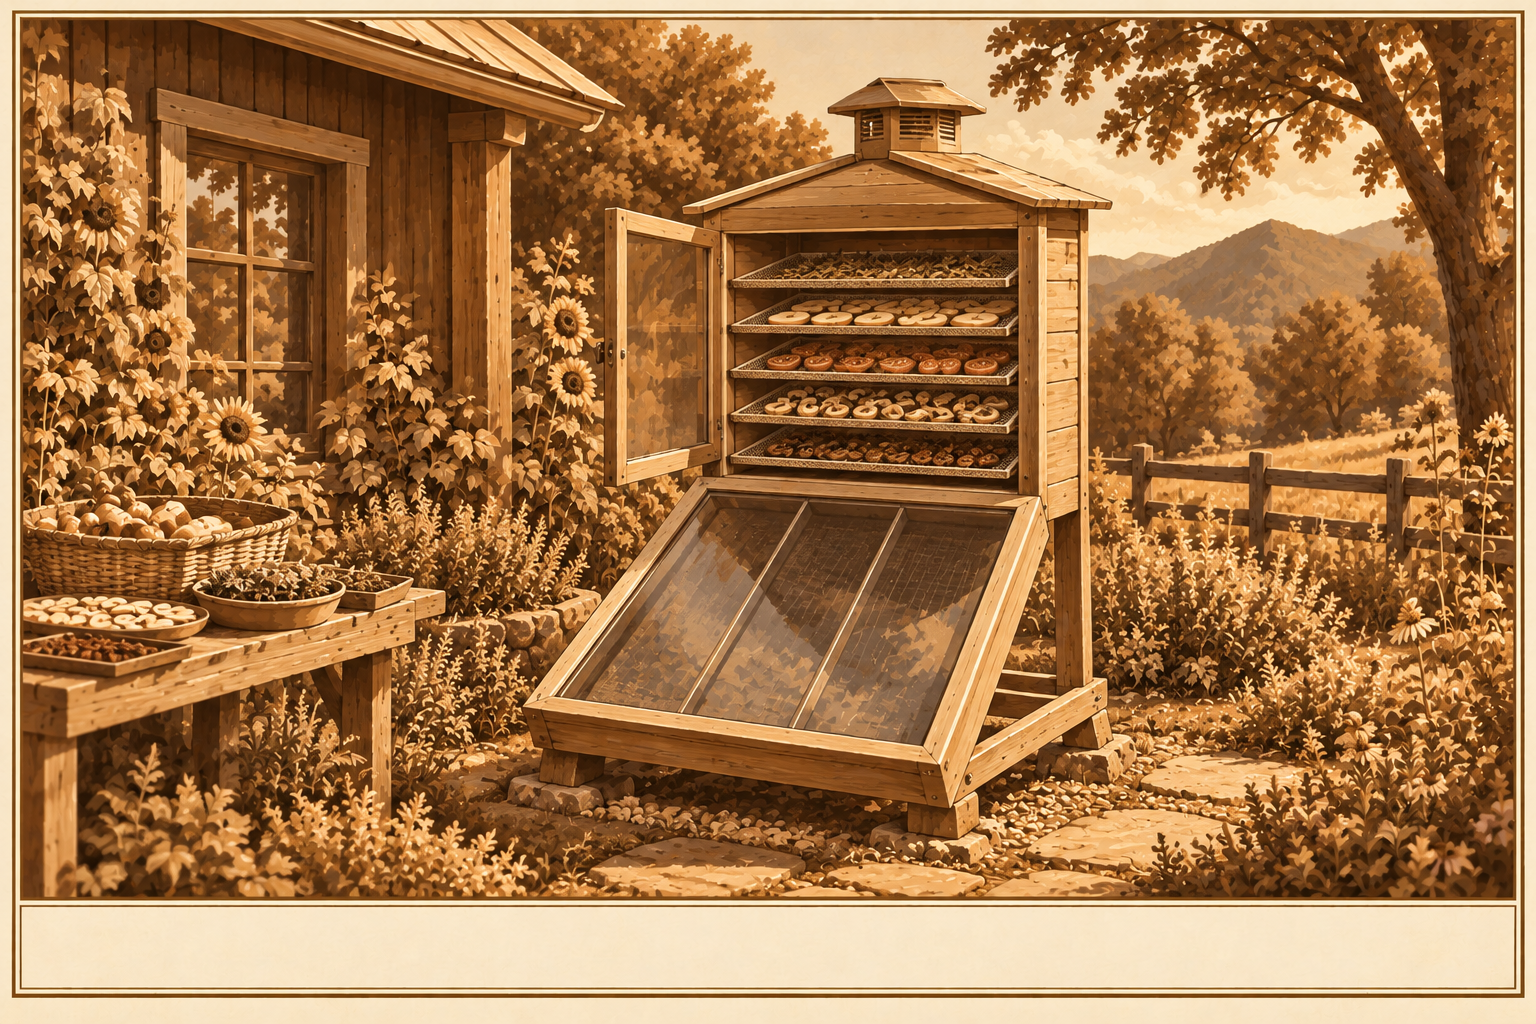
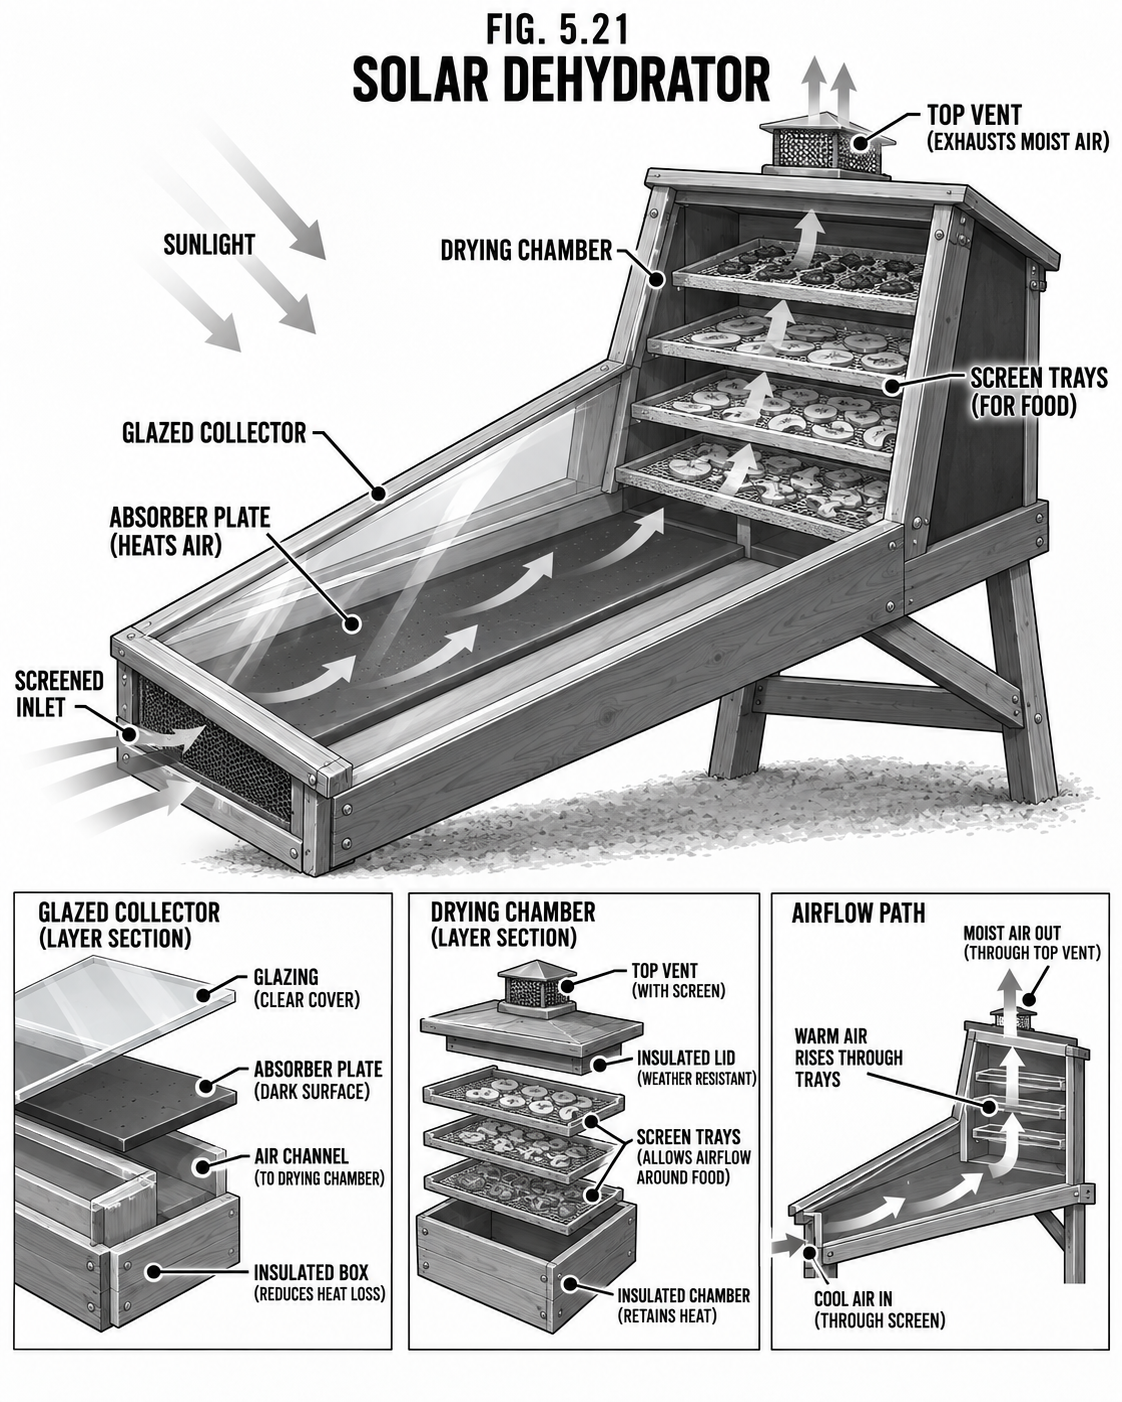
Drying is the oldest preservation there is: remove the moisture and bacteria cannot grow. A solar dehydrator dries fruit, vegetables, and herbs for free; jerky and smoked fish or meat keep for months and travel light. Smoke adds flavor and a surface that resists spoilage.
Step by step
Slice thin and even; blanch vegetables first where needed.
Dry in a solar dehydrator (glazed collector feeding a screened chamber) or low oven until brittle or leathery.
Jerky: marinate/cure lean meat, then dry; use a cure with nitrite for shelf jerky.
Smoke: cold-smoke for flavor (keep it cold), hot-smoke to also cook.
Store bone-dry in airtight jars, away from light.
Safety & code Meat jerky must reach a safe temperature or use a proper cure, or it can harbor bacteria; follow a tested method. Cold-smoking does not cook, so it needs curing to be safe. Any moisture left in stored dried food grows mold, so dry it fully and check jars.
Tips & variations Powder dried vegetables into soup bases and dried fruit into fruit leather.
Food · PreservingCuring & Fermenting
Curing, Salting & Fermenting
Salt and good bacteria preserve food and make it better for you.
DifficultyBeginner–Intermediate
TimeDays–weeks
CostLow
SkillsBasic
Why it is worth it
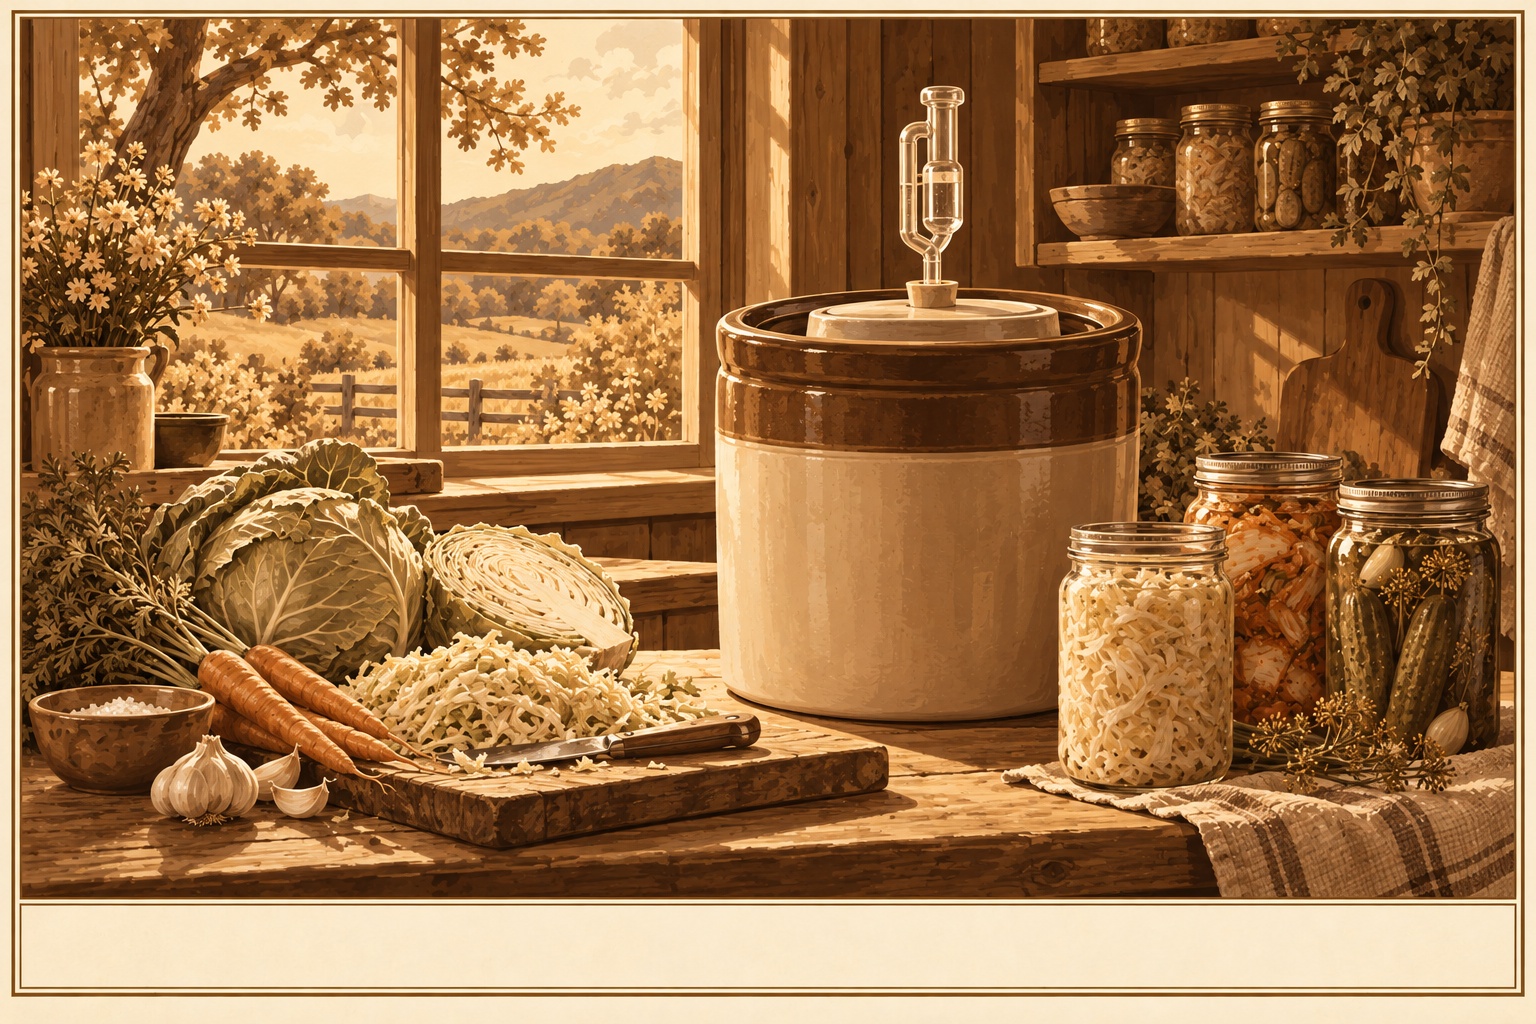
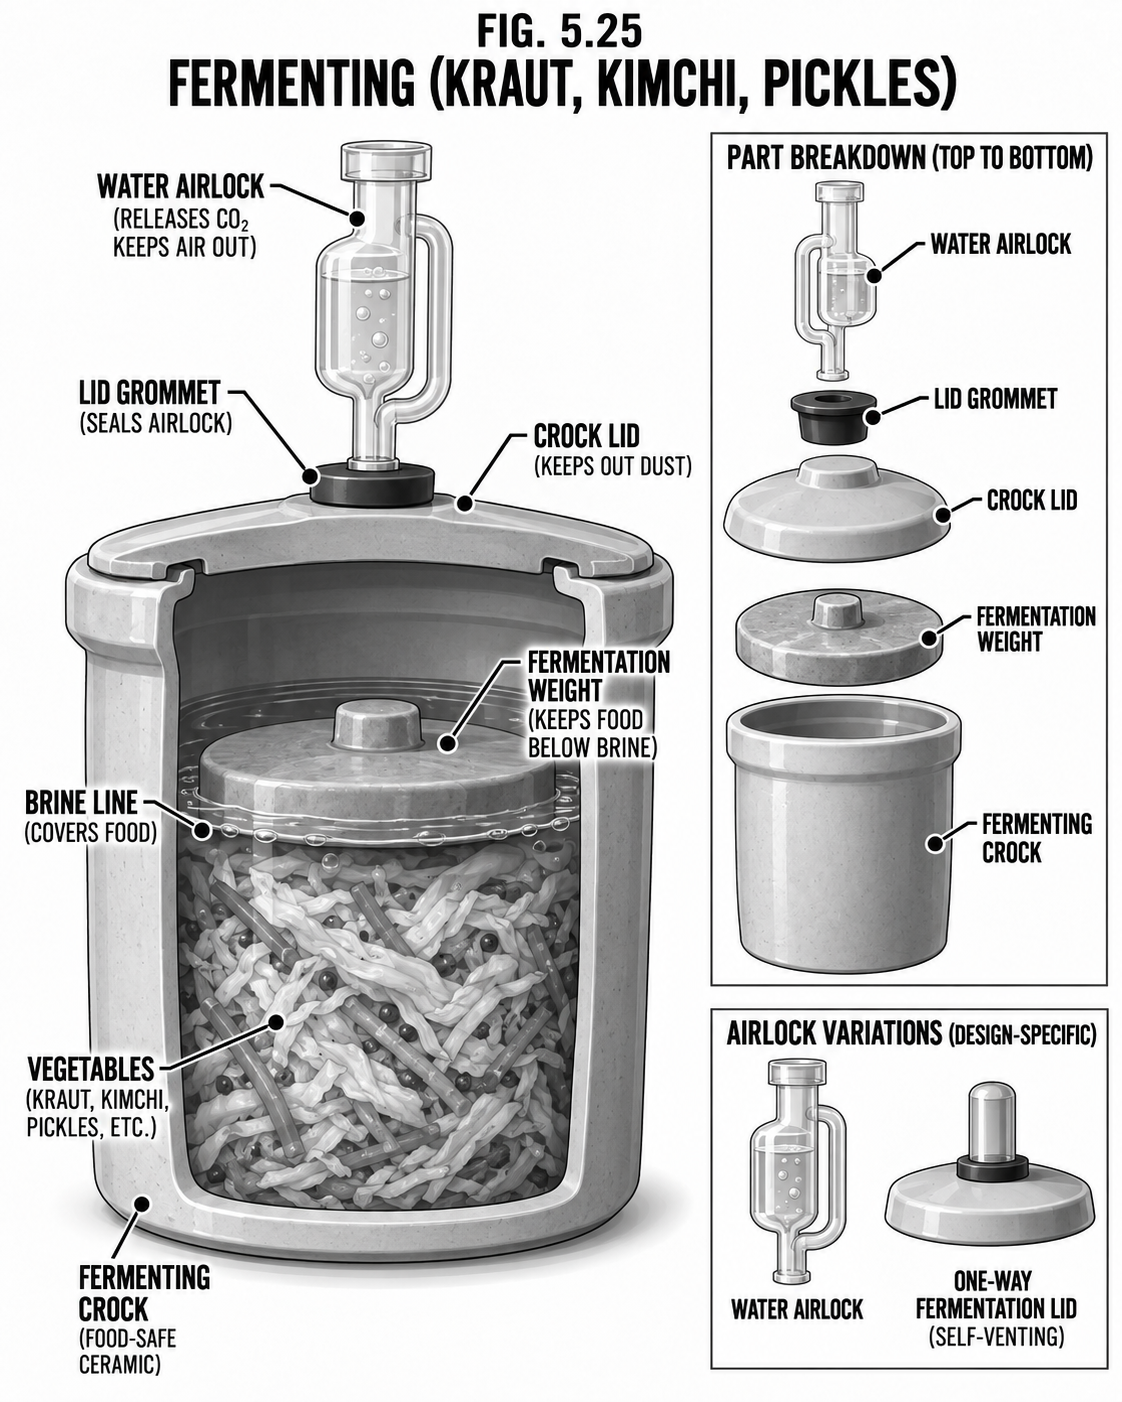
Salt curing draws water out of meat and fish so they keep without cold. Fermenting (kraut, kimchi, pickles) lets good lactic bacteria preserve vegetables and multiply their vitamins and probiotics. Both are ancient, cheap, and need no power.
Step by step
Cure: pack meat/fish in salt (or brine) at the right ratio; keep cold while it cures; dry or smoke after.
Ferment: submerge salted vegetables under their brine in a crock with a weight and an airlock; keep everything below the brine line.
Ferment at cool room temperature until soured, then move to cold storage.
Safety & code Keep ferments fully submerged under brine; what sits above can mold. Use the correct salt ratio, a tested method, and non-reactive vessels. Cured meats for shelf storage need the right cure and temperature; improper curing of low-acid meat risks botulism, so follow a trusted recipe exactly.
Tips & variations A cool cellar is the perfect ferment-and-cure room.
Food · PreservingDairy, Fat & Grain
Dairy, Rendering Fat & Grain
Turn milk into keeping food, fat into fuel and calories, grain into flour.
DifficultyIntermediate
TimeVaries
CostLow
SkillsBasic
Why it is worth it
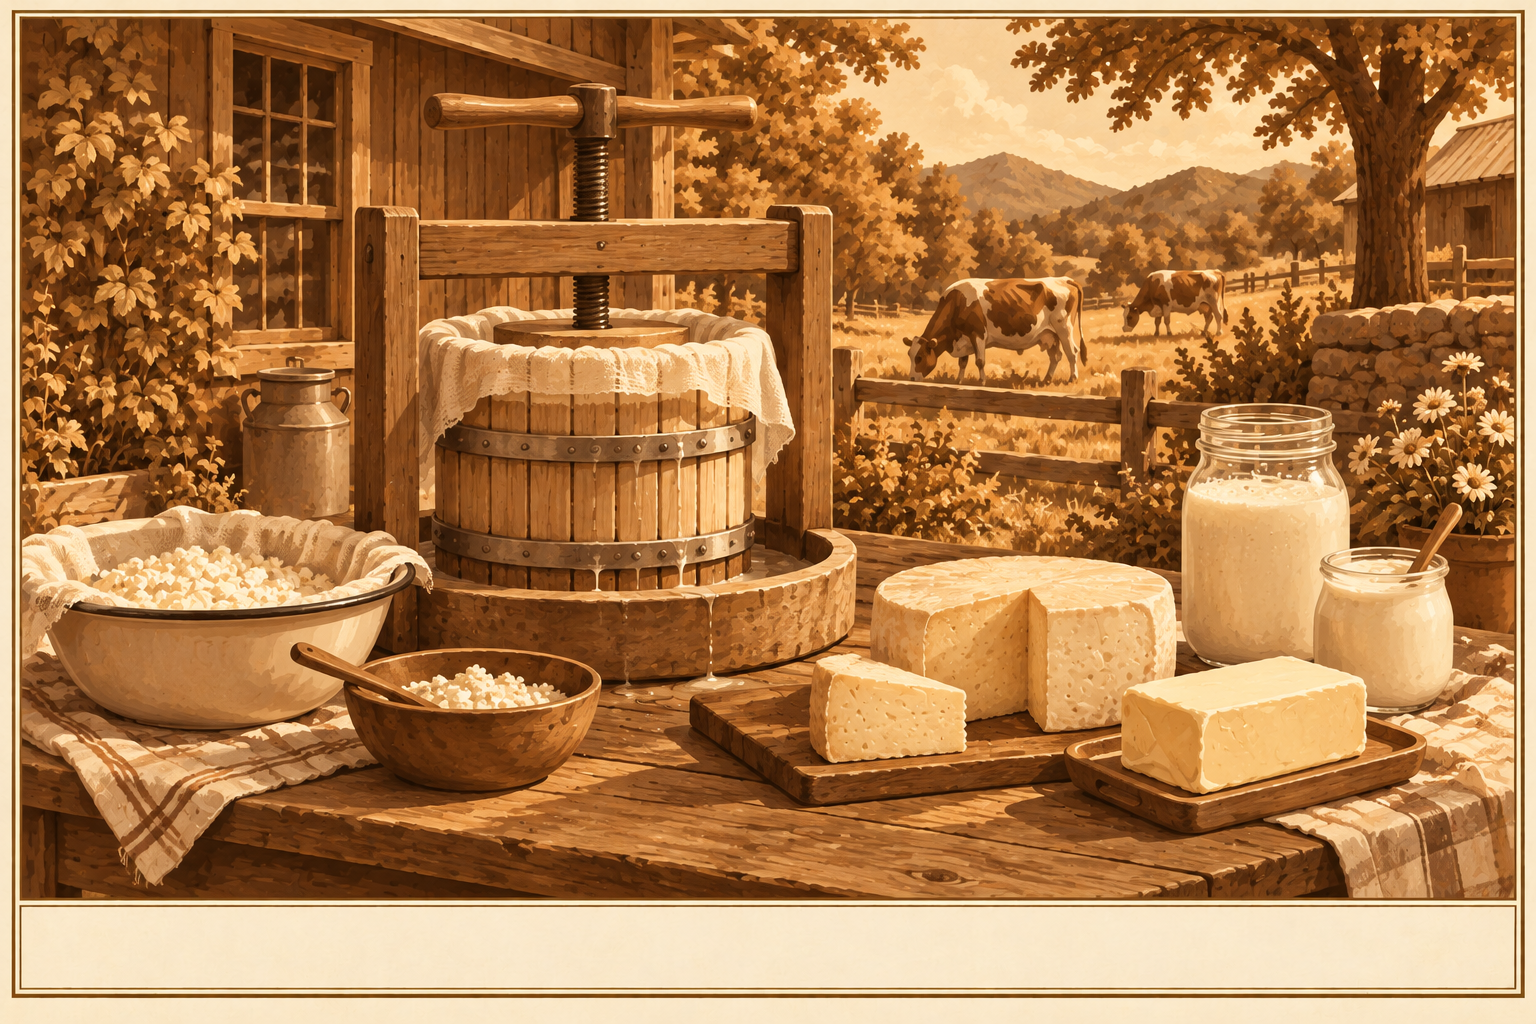
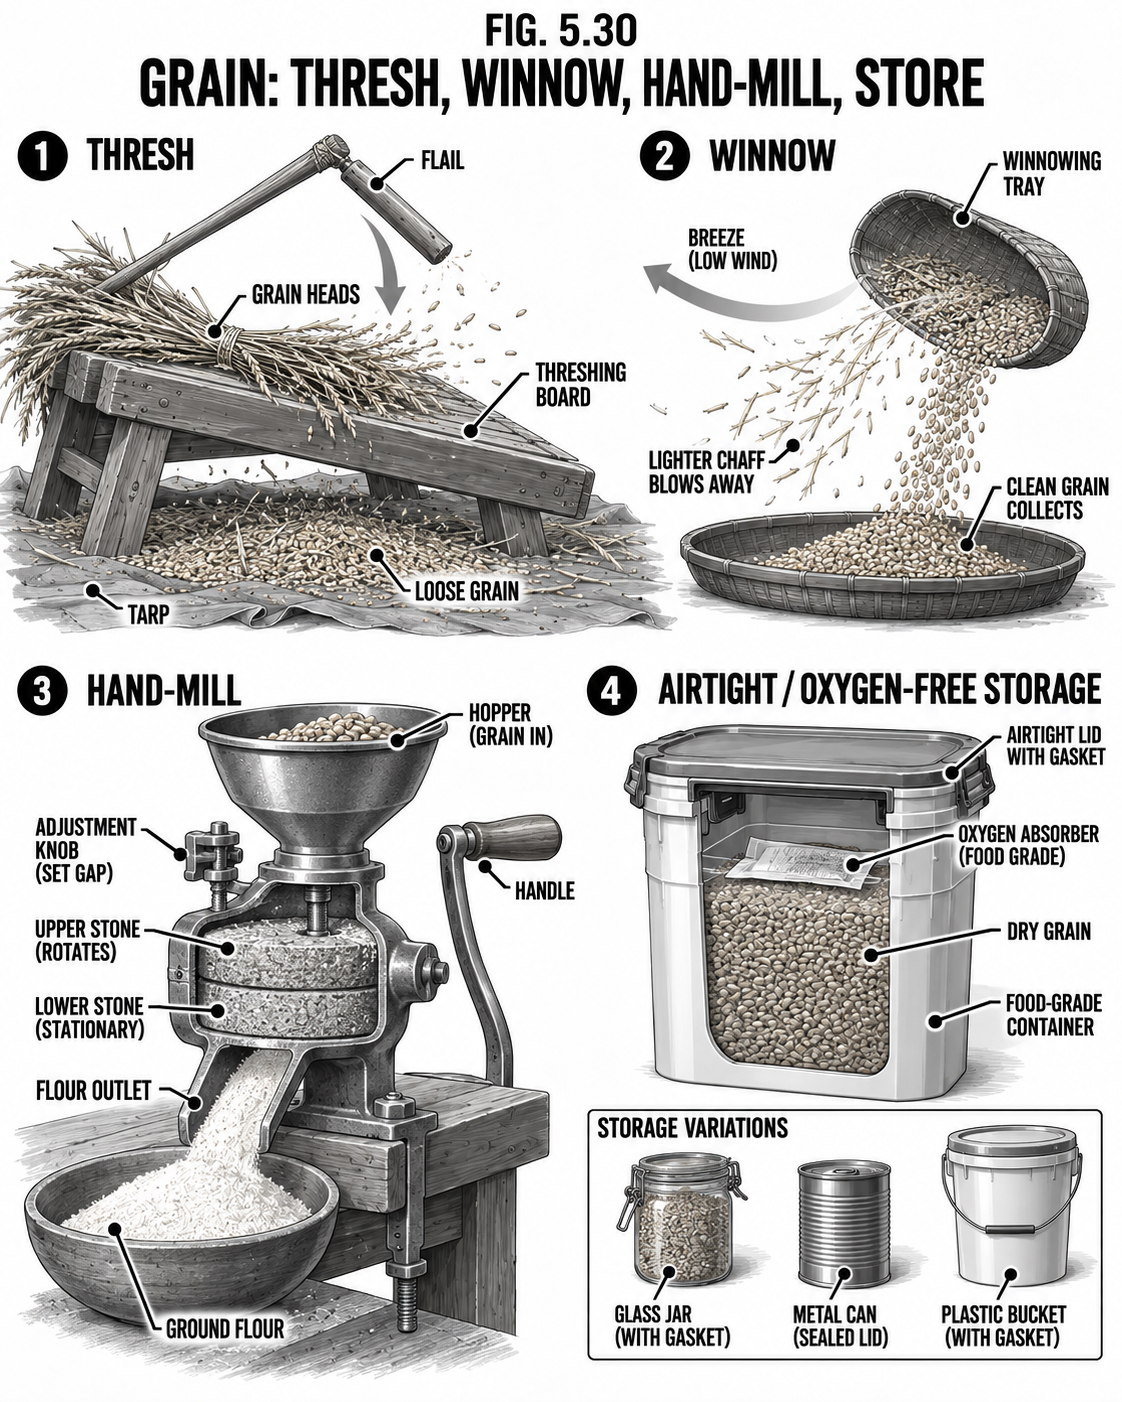
Fresh milk spoils fast; cheese and butter keep. Rendered fat (lard or tallow) stores for a long time and is calories, cooking fat, candles, and soap. Grain stores for years whole, then grinds fresh to flour as you need it, which keeps far better than flour does.
Step by step
Cheese: culture and set milk, cut and drain the curd, press and age the hard cheeses.
Render: melt chopped fat low and slow, strain, and store the clean fat cool.
Grain: thresh and winnow, store whole grain oxygen-free, and hand-mill small batches to flour.
Safety & code Work clean with dairy; bad culture or dirty gear spoils a batch fast. Rendering fat is hot and flammable, so watch it and keep a lid handy for a grease fire (never water).
Tips & variations Pemmican (dried meat + rendered fat + berries) is the original survival ration and keeps for years.
Food · Prolonged HarvestSuccession
Succession & Prolonged Harvest
The goal is not one big harvest. It is food coming in every week.
DifficultyBeginner
TimePlanning
CostFree
SkillsRecord-keeping
Why it is worth it
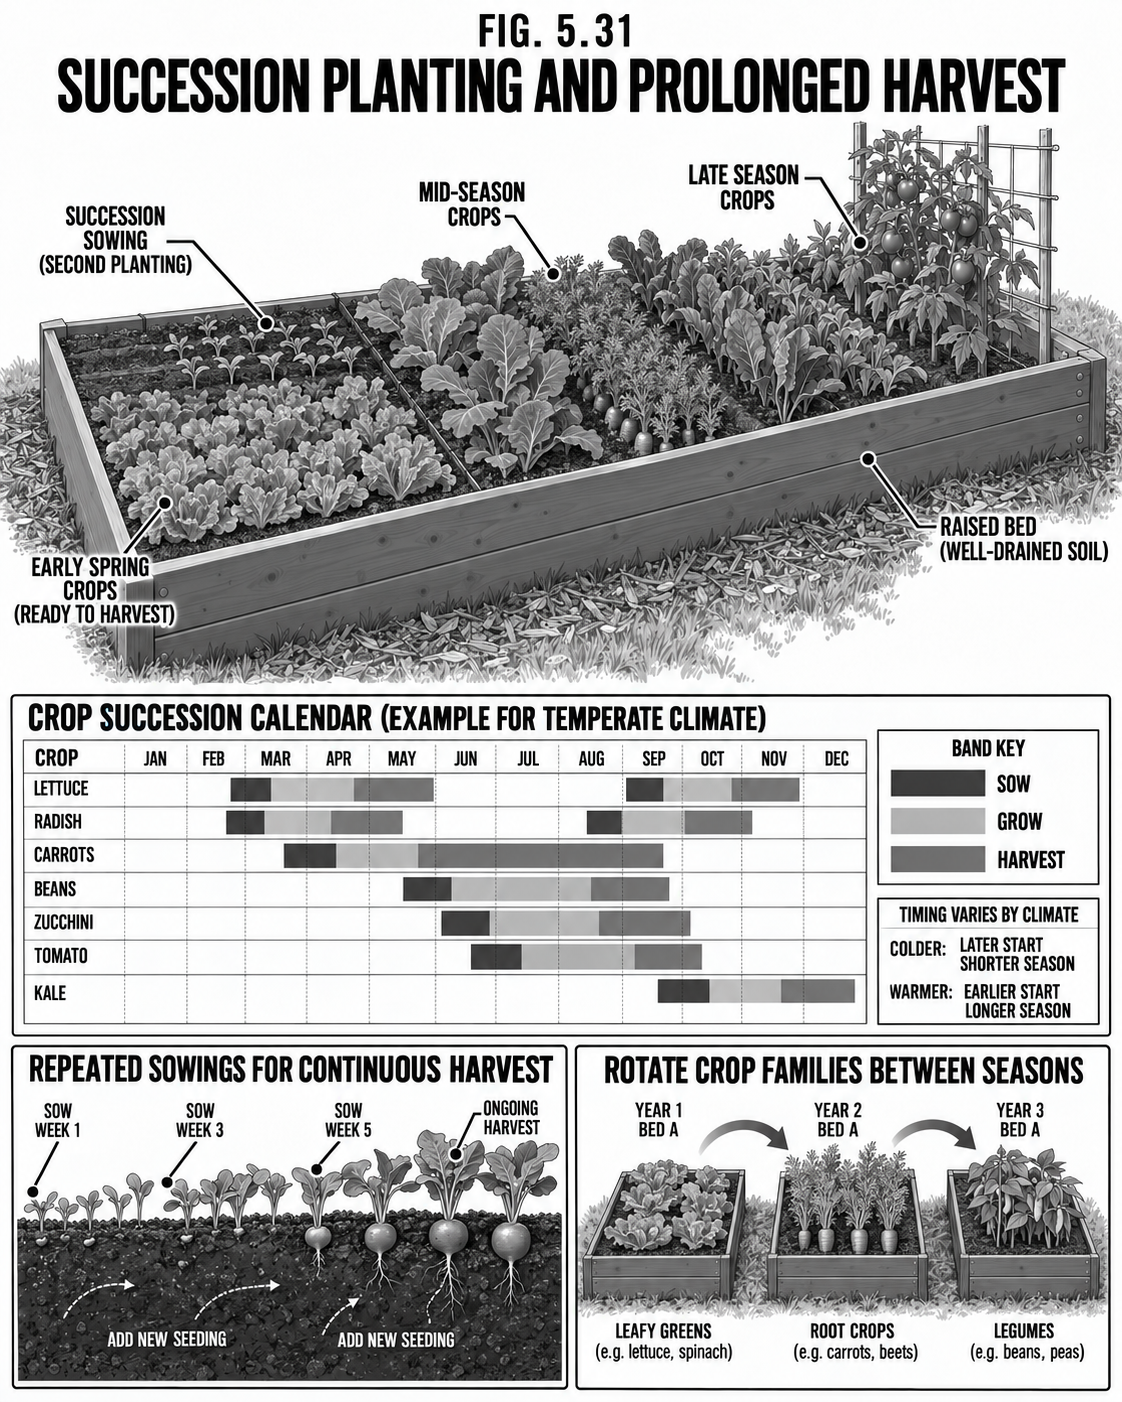
A beginner plants everything at once and drowns in zucchini for two weeks, then has nothing. The homesteader staggers it so something is always ready. The tools are succession sowing (plant a short row every two to three weeks), cut-and-come-again crops (greens that regrow when cut), and season extension (cold frames and overwintering) to stretch both ends of the year.
How to do it
Keep a planting calendar; sow quick crops (lettuce, radish, beans) in small, repeated batches.
Grow cut-and-come-again greens that regrow after harvest.
Mix early, mid, and late varieties of the same crop to spread the pick.
Use cold frames and hardy crops (kale, carrots, leeks) to carry into and through winter.
Replant any bed the moment it empties.
Tips & variations Overwintered carrots and parsnips sweeten in the cold and store right in the ground under mulch in milder winters.
Food · Prolonged HarvestSeed Saving
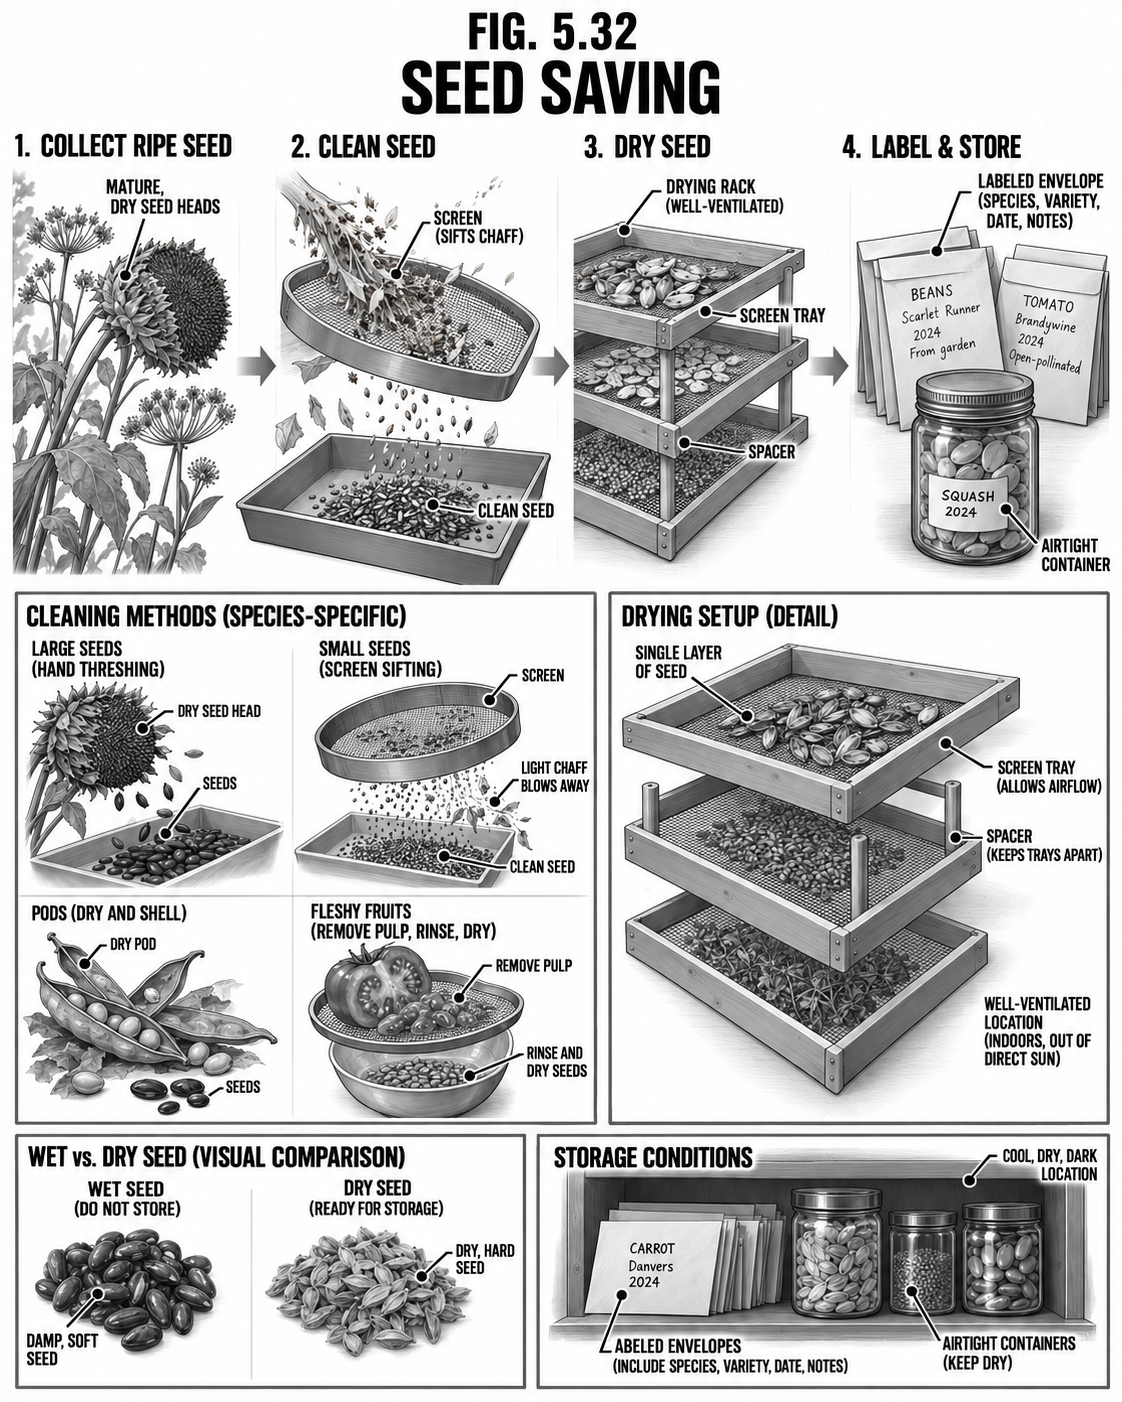
Seed Saving
Save your own seed and you never have to buy a garden again.
DifficultyBeginner–Intermediate
TimeSeason
CostFree
SkillsBasic
Why it is worth it
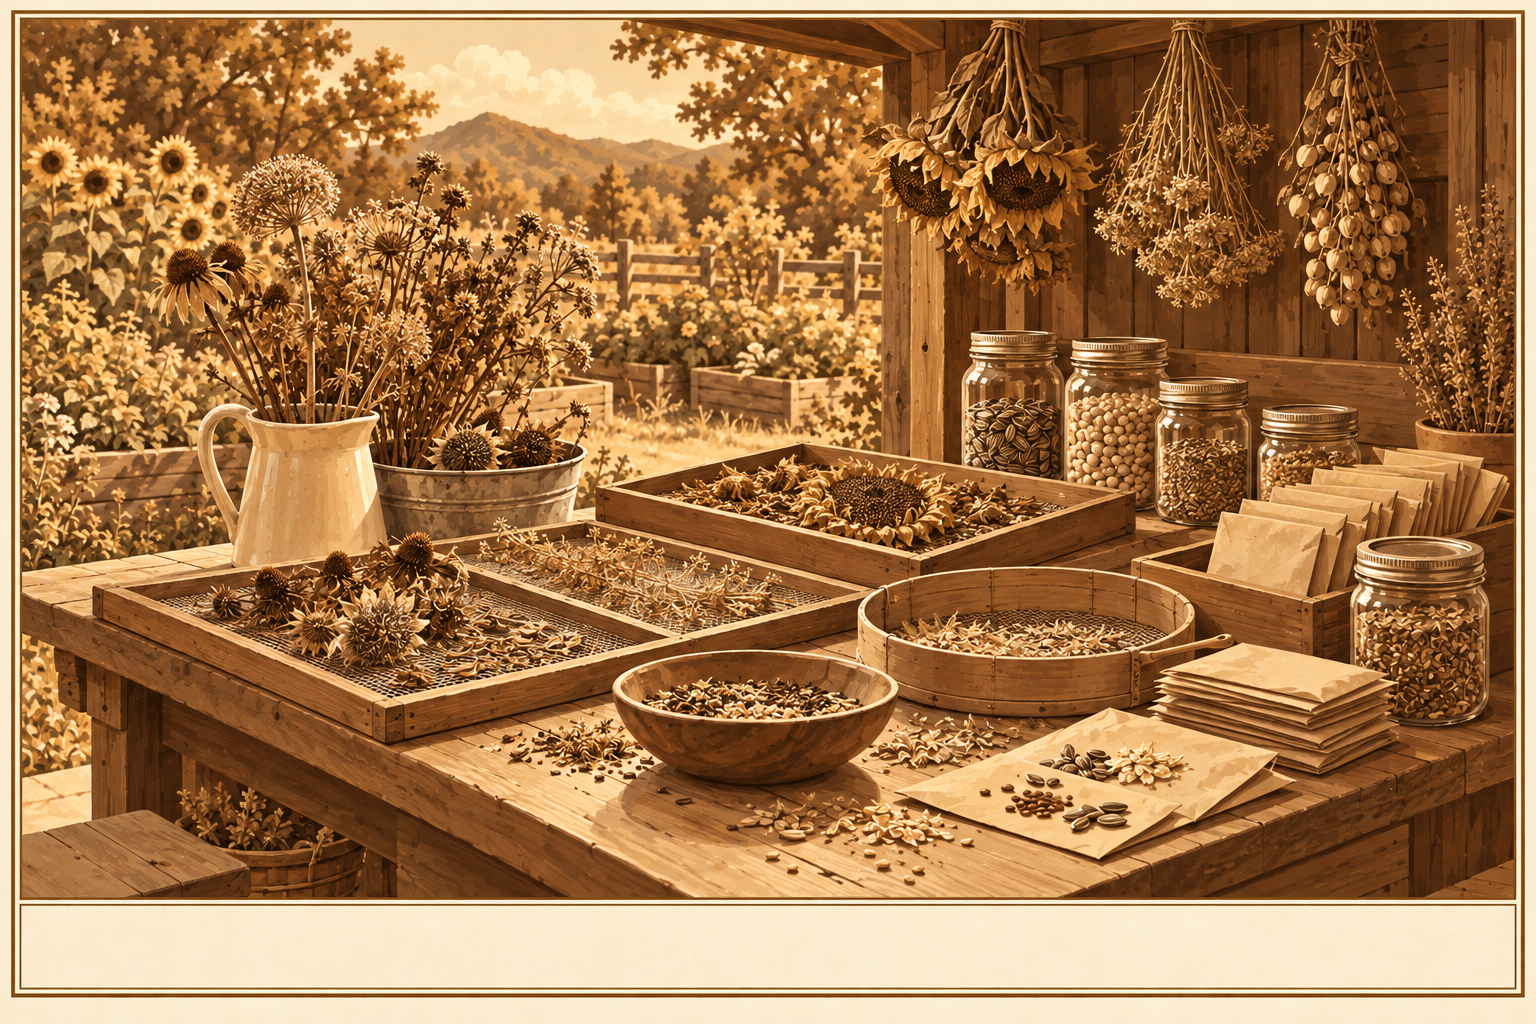
Store-bought seed is a yearly cost and a supply line that can break. Save your own from open-pollinated (not hybrid) plants and the garden renews itself for free, adapting a little more to your land every year.
Step by step
Grow open-pollinated or heirloom varieties (hybrids do not come true).
Let the best plants fully mature their seed; isolate crops that cross readily.
Dry, clean, and store seed cool, dark, and bone-dry in labeled, dated envelopes or jars.
Tips & variations Beans, peas, tomatoes, lettuce, and peppers are the easiest to start with (little crossing). A little silica or dry rice in the jar keeps seed dry.
Food · StorageLong-Term Dry Storage
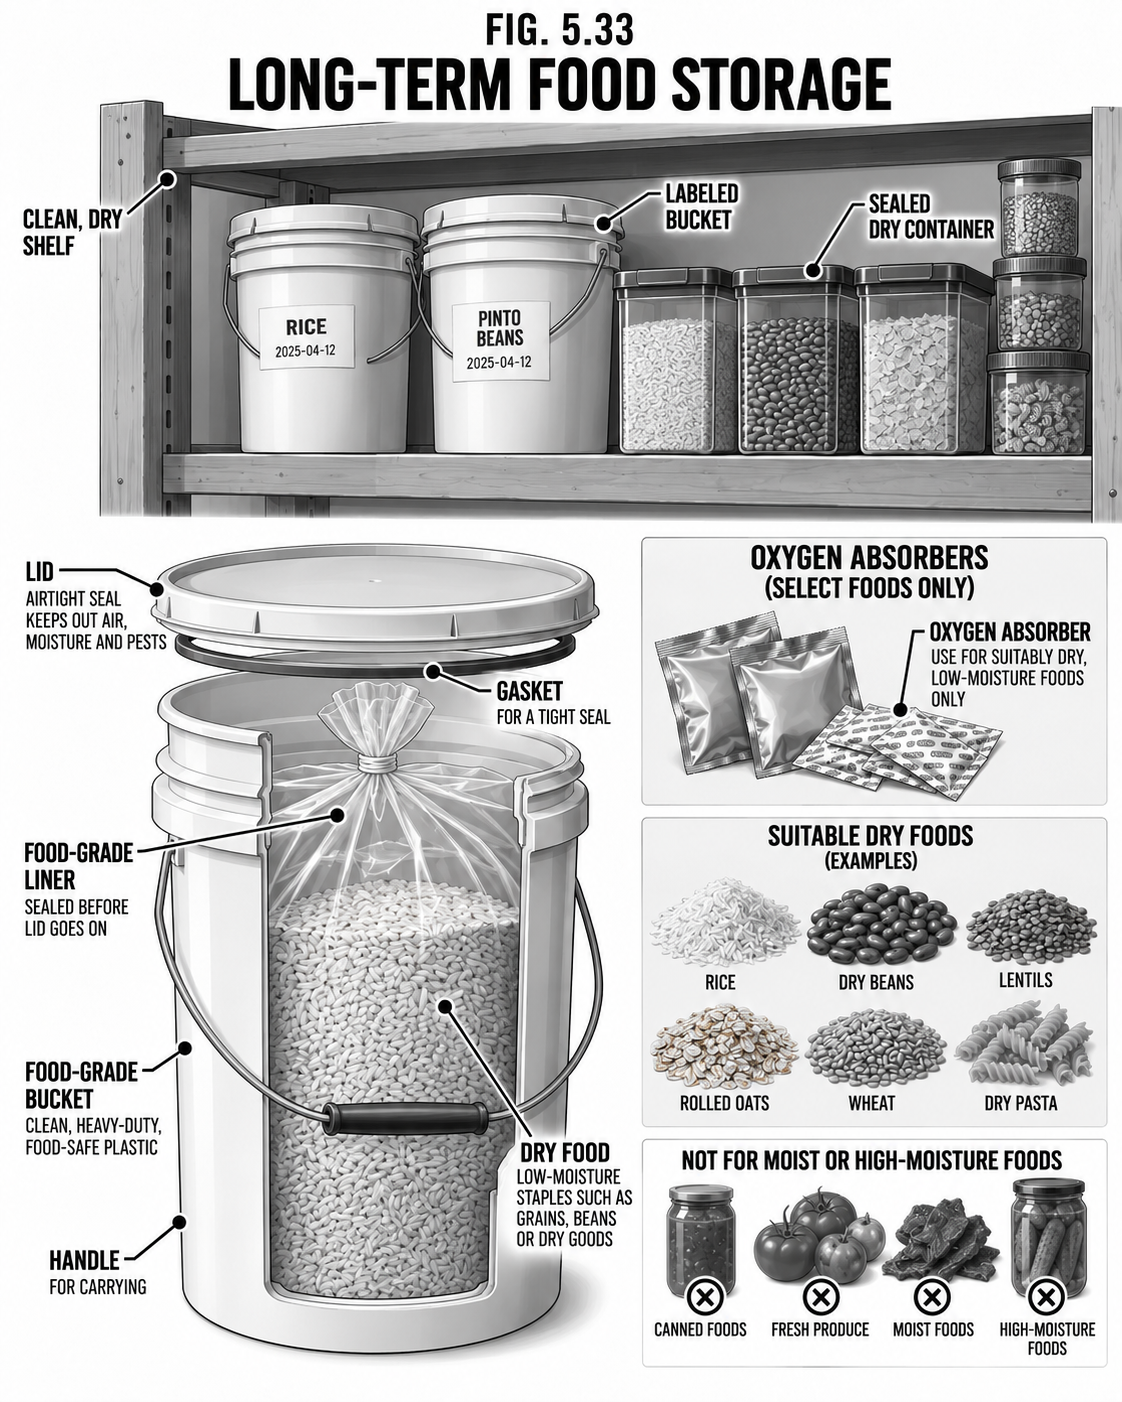
Long-Term Dry Food Storage
A pantry that measures in years, not weeks.
DifficultyBeginner
TimeHours
CostLow–Med
SkillsBasic
Why it is worth it
Staples like grain, beans, rice, and salt will keep for decades if you store them right: dry, cool, dark, and sealed away from oxygen and pests. This is the deep larder that carries a homestead through a failed harvest or a long winter.
Step by step
Start bone-dry; any moisture invites mold and spoilage.
Seal staples in food-grade buckets or Mylar bags with oxygen absorbers to stop insects and rancidity.
Keep it cool, dark, and dry; every 10 degrees cooler roughly doubles shelf life.
Label and date everything; rotate oldest-first (FIFO), eating and replacing as you go.
Safety & code Oxygen absorbers plus moisture can, in rare cases, let botulism grow in improperly dried low-moisture-but-not-dry foods, so only seal truly dry staples. Keep stores off concrete and away from fuel and chemical smells (food absorbs odors). Watch for rodent sign.
Tips & variations Store what you actually eat and eat what you store; a larder you rotate never goes to waste.
Food · StorageCaching
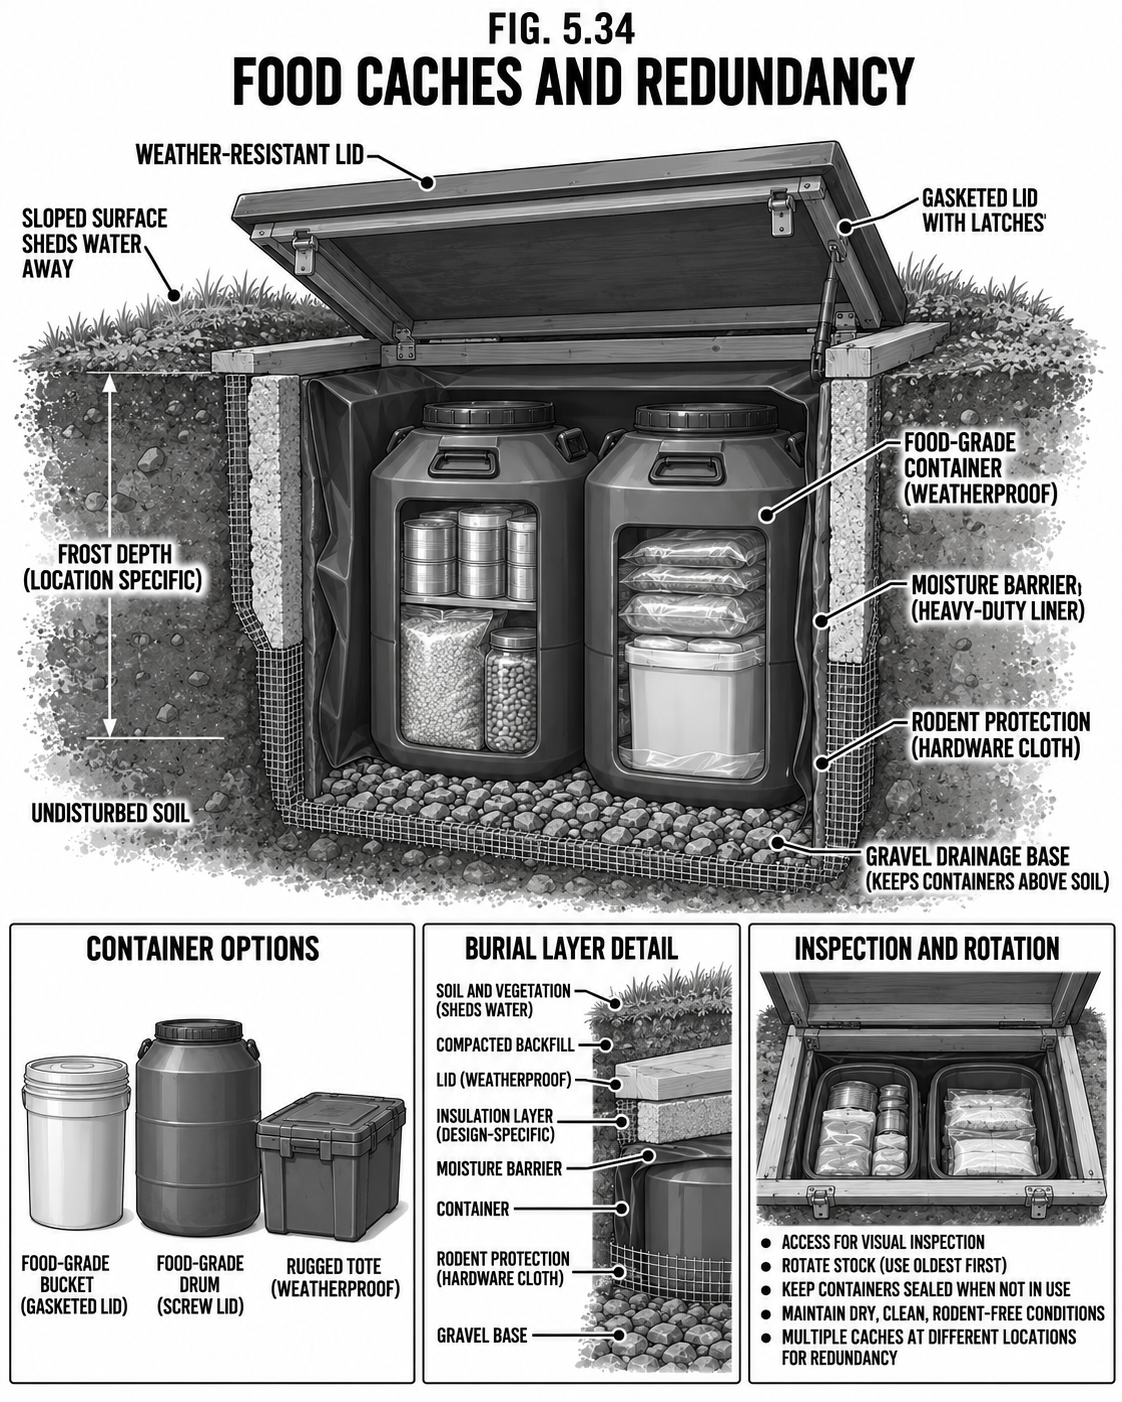
Caching & Hidden Stores
Don't keep every egg in one basket, or one building.
DifficultyBeginner
TimeHours
CostLow
SkillsBasic
Why it is worth it
A fire, a theft, or a flood can wipe out a single pantry. Redundant caches, some away from the house, mean a disaster never takes all your food at once. A cache is simply a sealed, protected store you can get to when you need it.
Step by step
Seal dry stores in a waterproof container (gasketed tube or bucket) with desiccant.
Bury below the frost line, somewhere drained, and mark the spot in a way only you understand.
Keep a second, separate store away from the main buildings.
Record your cache locations privately; check them periodically.
Safety & code Keep caches legal and on your own ground. Protect against moisture (the real enemy) and rodents. Do not cache anything perishable without rotation.
Tips & variations Spread water, food, tools, and a little cash across caches so any single one is a complete small kit. (Ties to Chapter 9 security.)