A roof over your head is the difference between living on the land and merely surviving it. This chapter is every honest way to build one, from a stick-framed cabin to walls of earth and log-ends, plus the foundations, roofs, and cellars that make a building last. Build with what the land gives you.
Shelter · FramingPlatform Frame
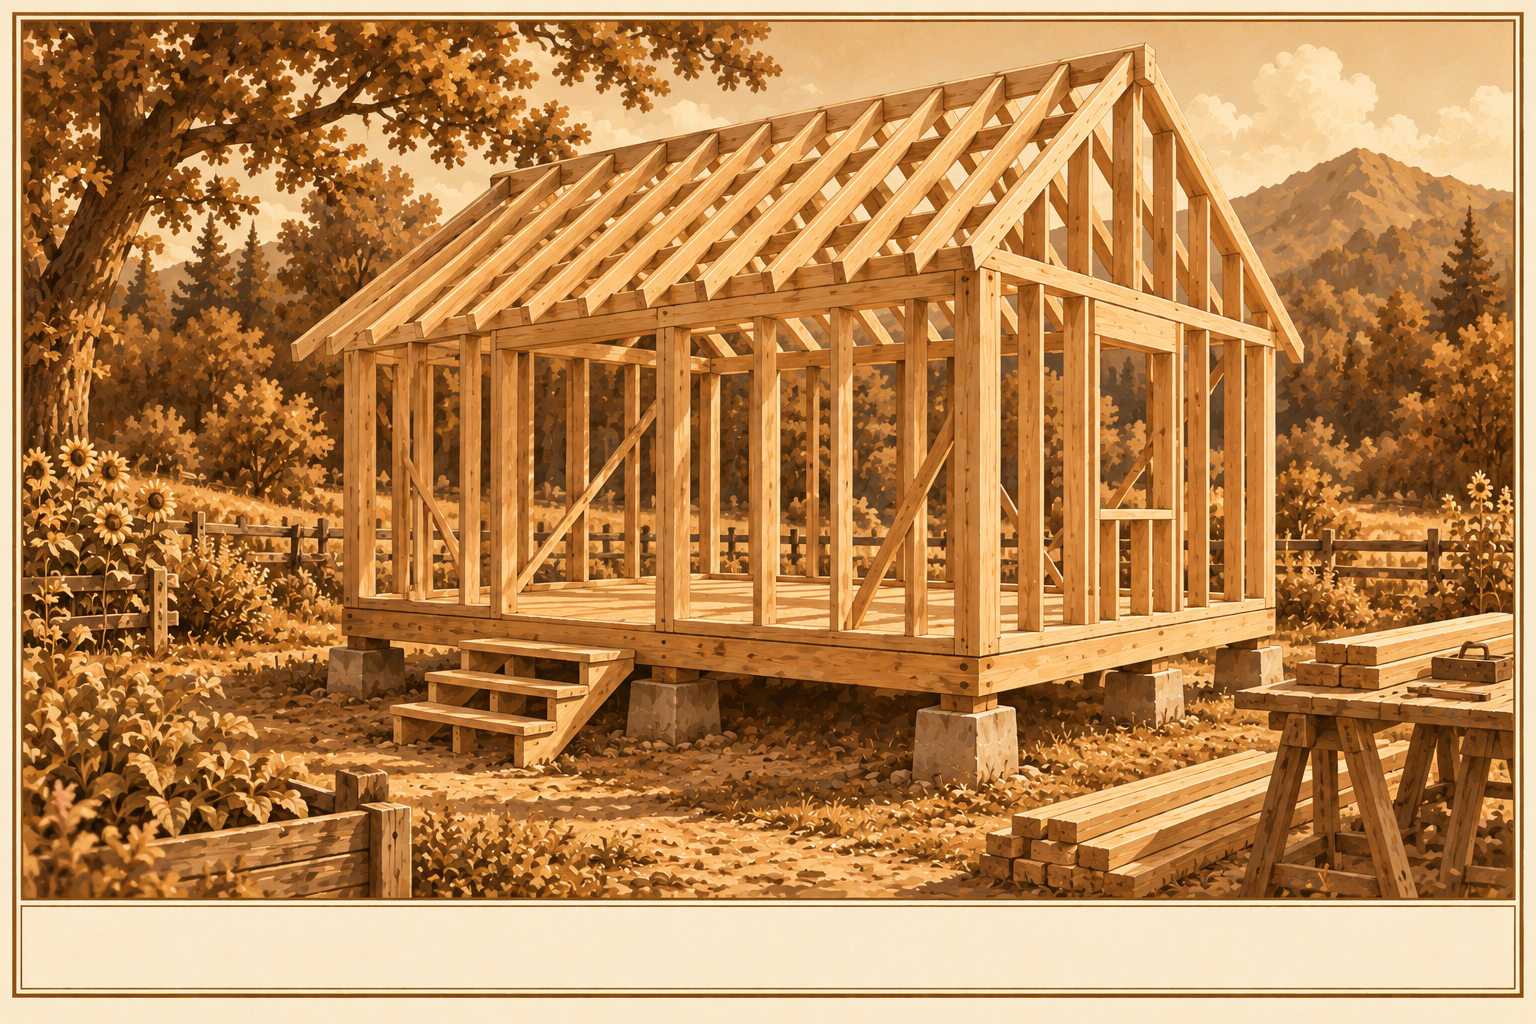
Platform (Stick) Frame
The standard American wall: fast, cheap, and anyone can learn it.
DifficultyBeginner-Intermediate
TimeWeeks
CostMed
SkillsCarpentry
Why it is worth it
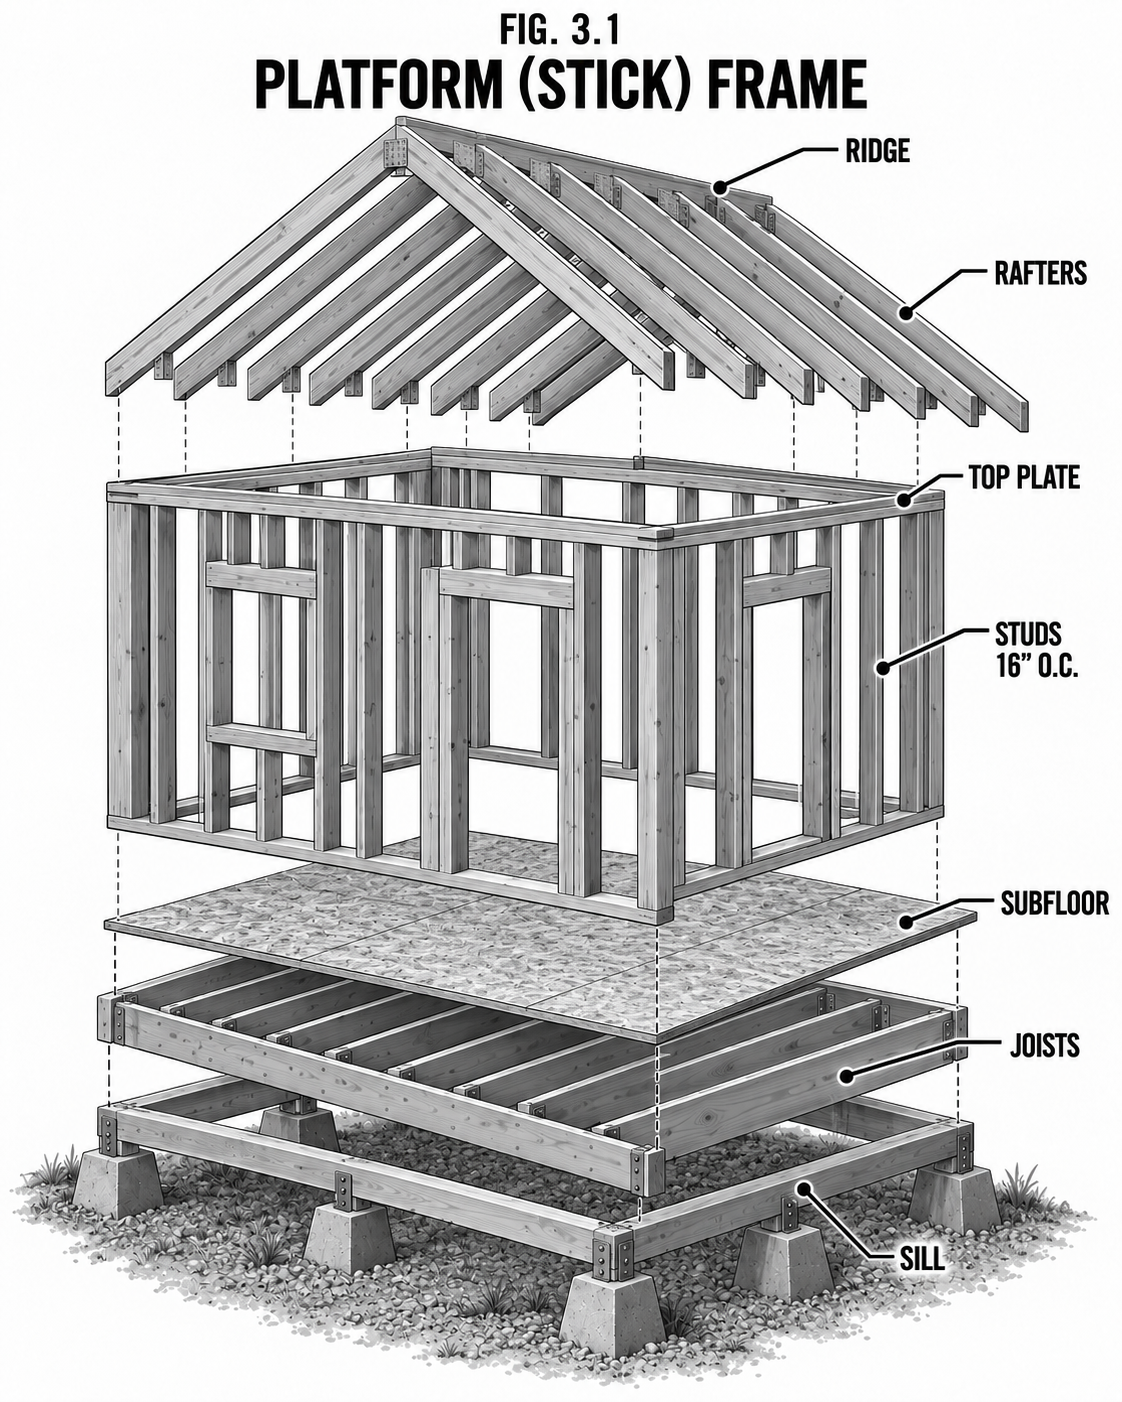
Dimensional lumber framed at 16 inches on center is the most documented building method on earth: materials everywhere, tools cheap, and a forgiving learning curve. Build a platform (floor), stand the walls on it, then the roof.
Step by step
Set a sill on the foundation; build a joisted, subfloored platform.
Frame stud walls flat on the deck (16 in O.C.), then tilt them up and brace.
Tie the walls with a double top plate; set rafters or trusses to a ridge.
Sheathe, roof, then insulate and finish.
Safety & code Framing is where loads and egress are decided: follow span tables, don't notch structure, and build to local snow/wind load and egress-window rules. Braced walls resist racking; don't skip the sheathing nailing schedule.
Tips & variations Advanced framing (24 in O.C., aligned studs) saves lumber and leaves more room for insulation.
Shelter · FramingTimber Frame
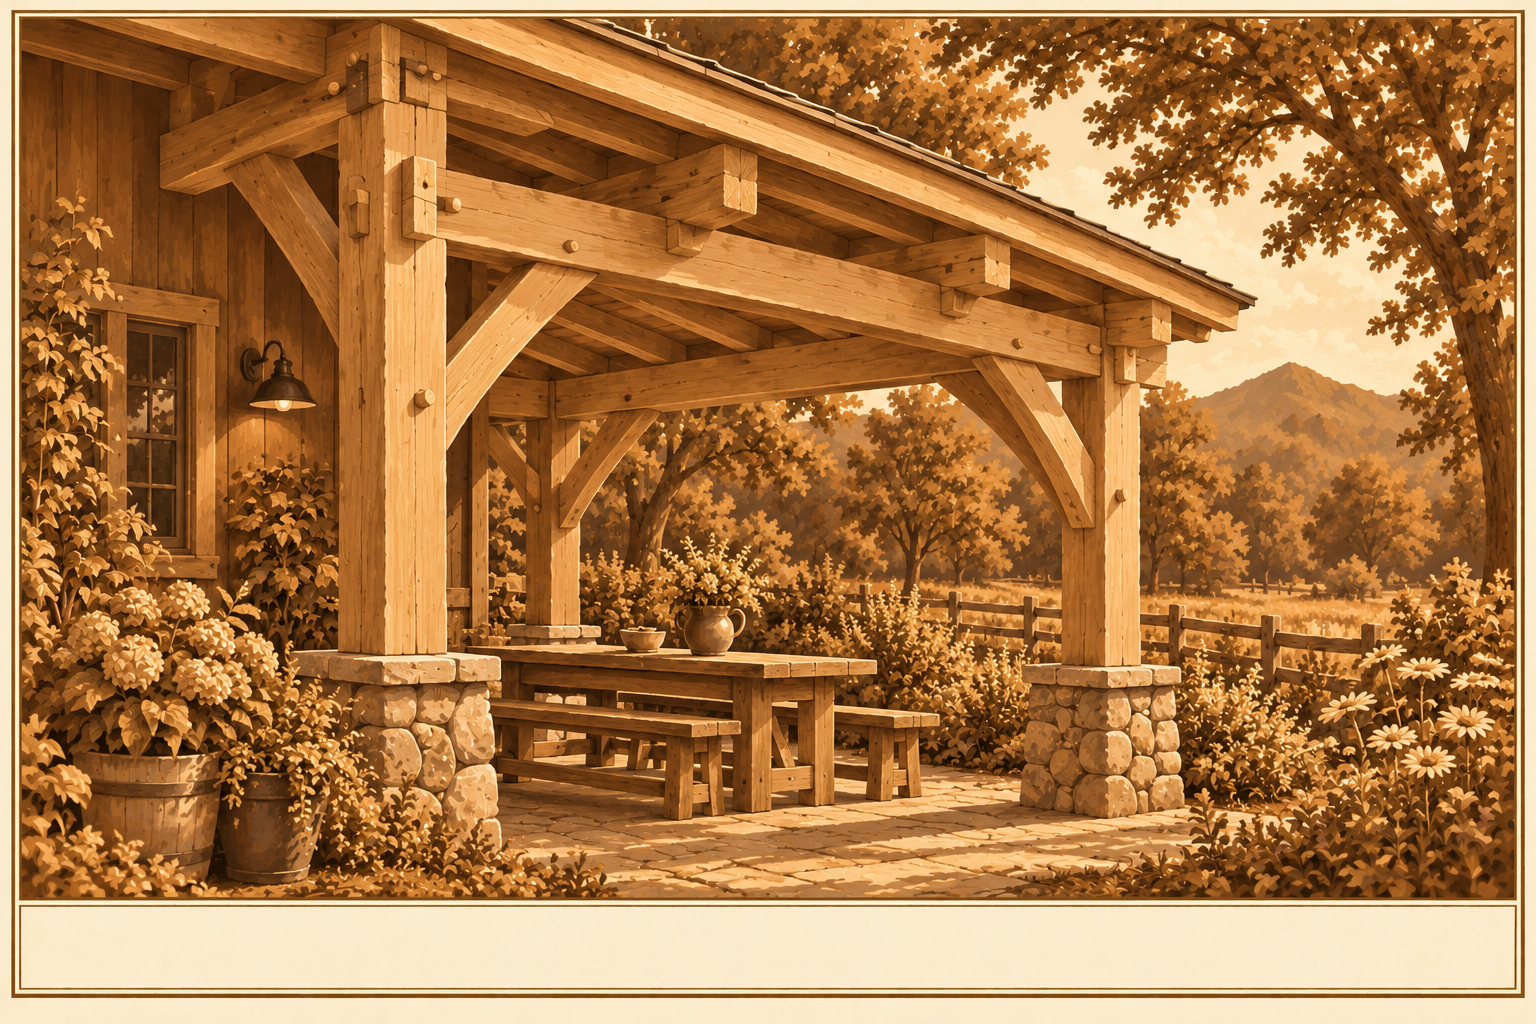
Timber Frame
Heavy posts and beams joined with wood, no nails, built to outlive you.
DifficultyAdvanced
TimeWeeks+
CostMed (your own timber)
SkillsJoinery
Why it is worth it
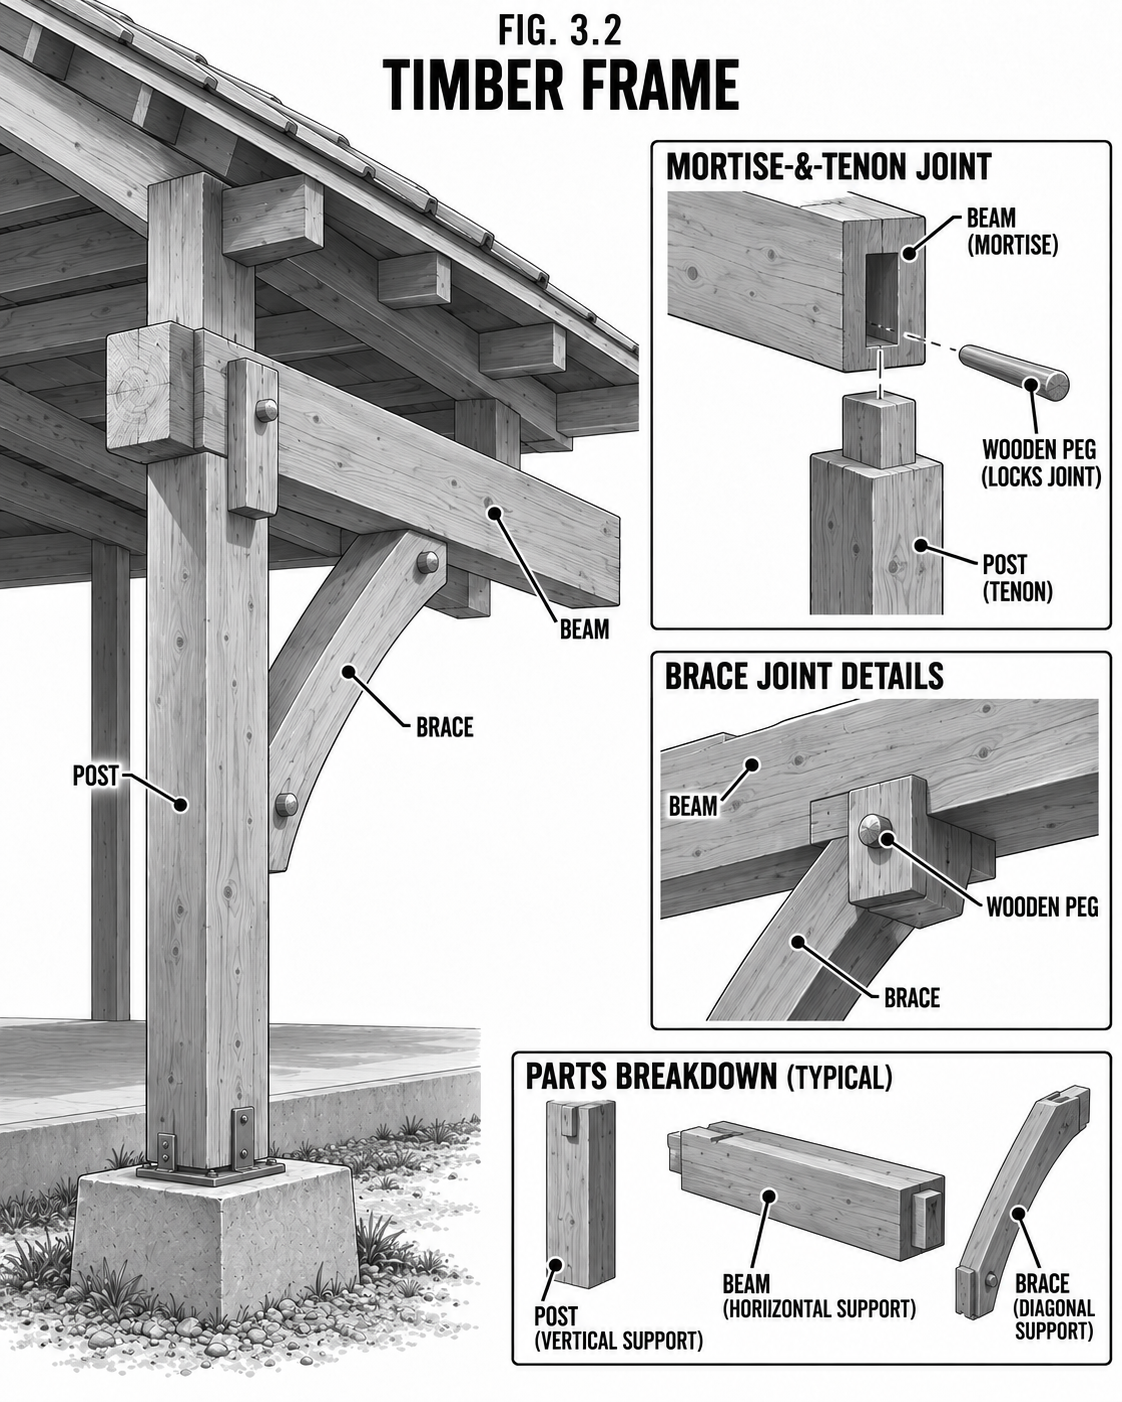
A timber frame carries its load on a few big members joined by mortise and tenon and locked with wooden pegs. From your own woodlot it is nearly free, lasts centuries, and leaves open interiors. The walls between the posts can be anything (straw bale, cordwood, framed infill).
Step by step
Cut posts and beams; lay out and chisel the mortise-and-tenon joints.
Assemble flat "bents" on the deck.
Raise the bents (a crew or a gin pole), connect with girts, peg the joints.
Enclose with your chosen wall infill and a roof.
Safety & code A raising is heavy and dangerous: rig it, brace every bent as it goes up, and keep crew clear of swinging timber. Engineered joinery matters; a sloppy tenon is a weak building.
Tips & variations Green (unseasoned) timber is easier to cut and tightens as it dries around the pegs.
Shelter · NaturalLog Cabin
Log Cabin
Stack the forest into walls. The oldest homestead shelter there is.
DifficultyAdvanced
TimeMonths
CostLow (your trees)
SkillsAxe/chainsaw, notching
Why it is worth it
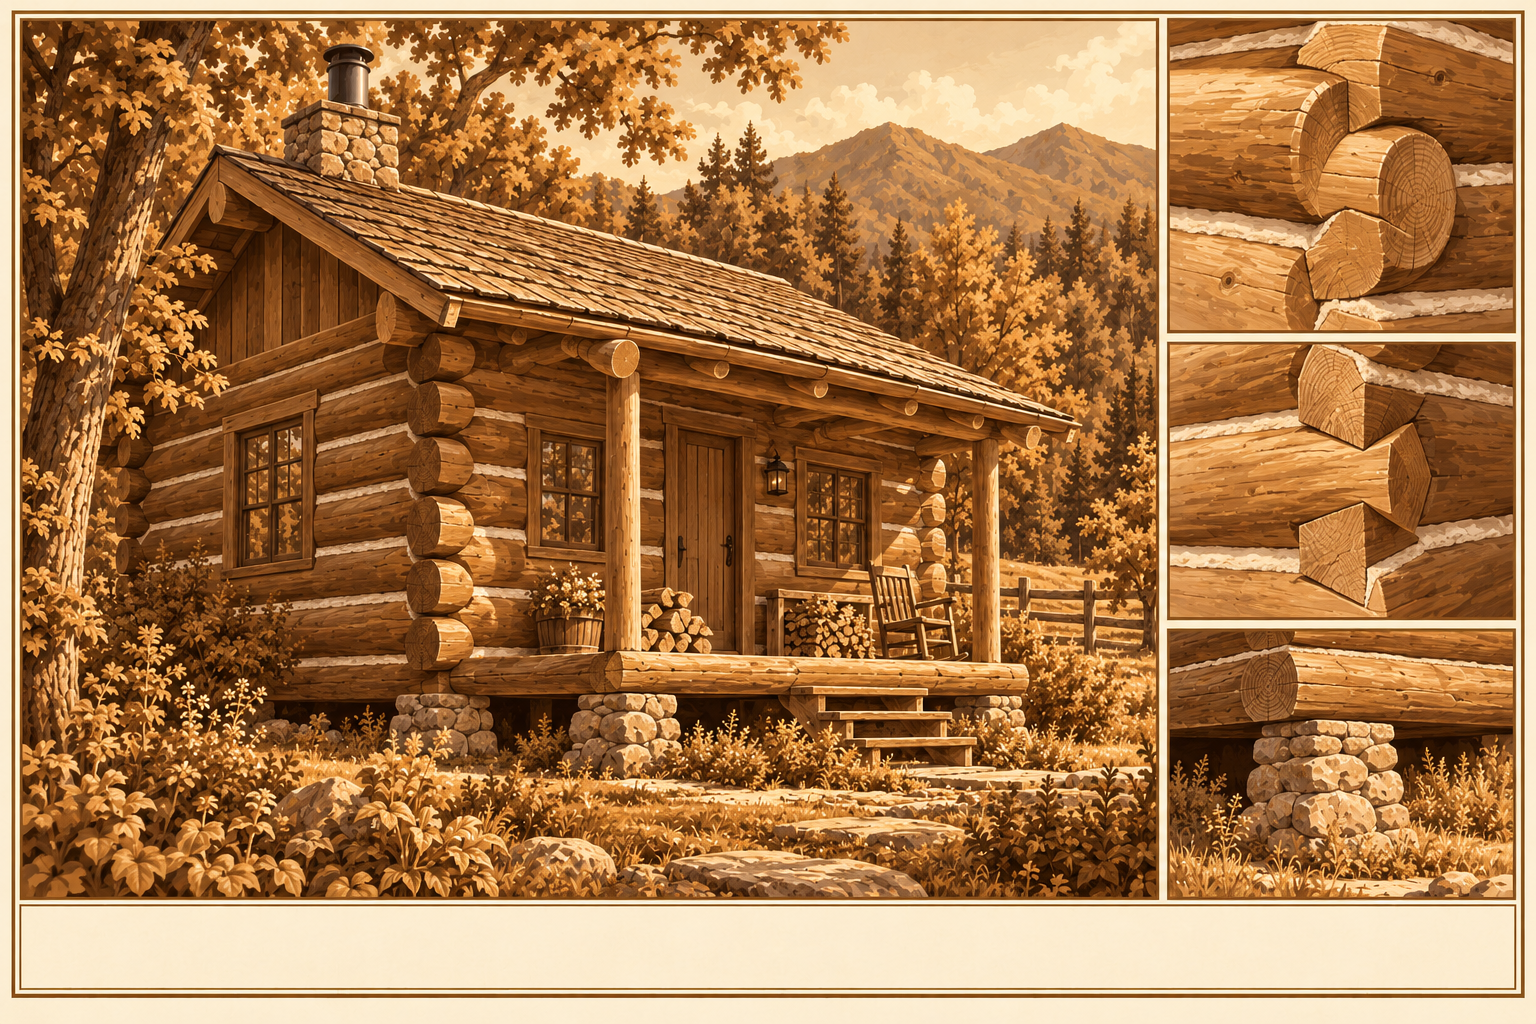
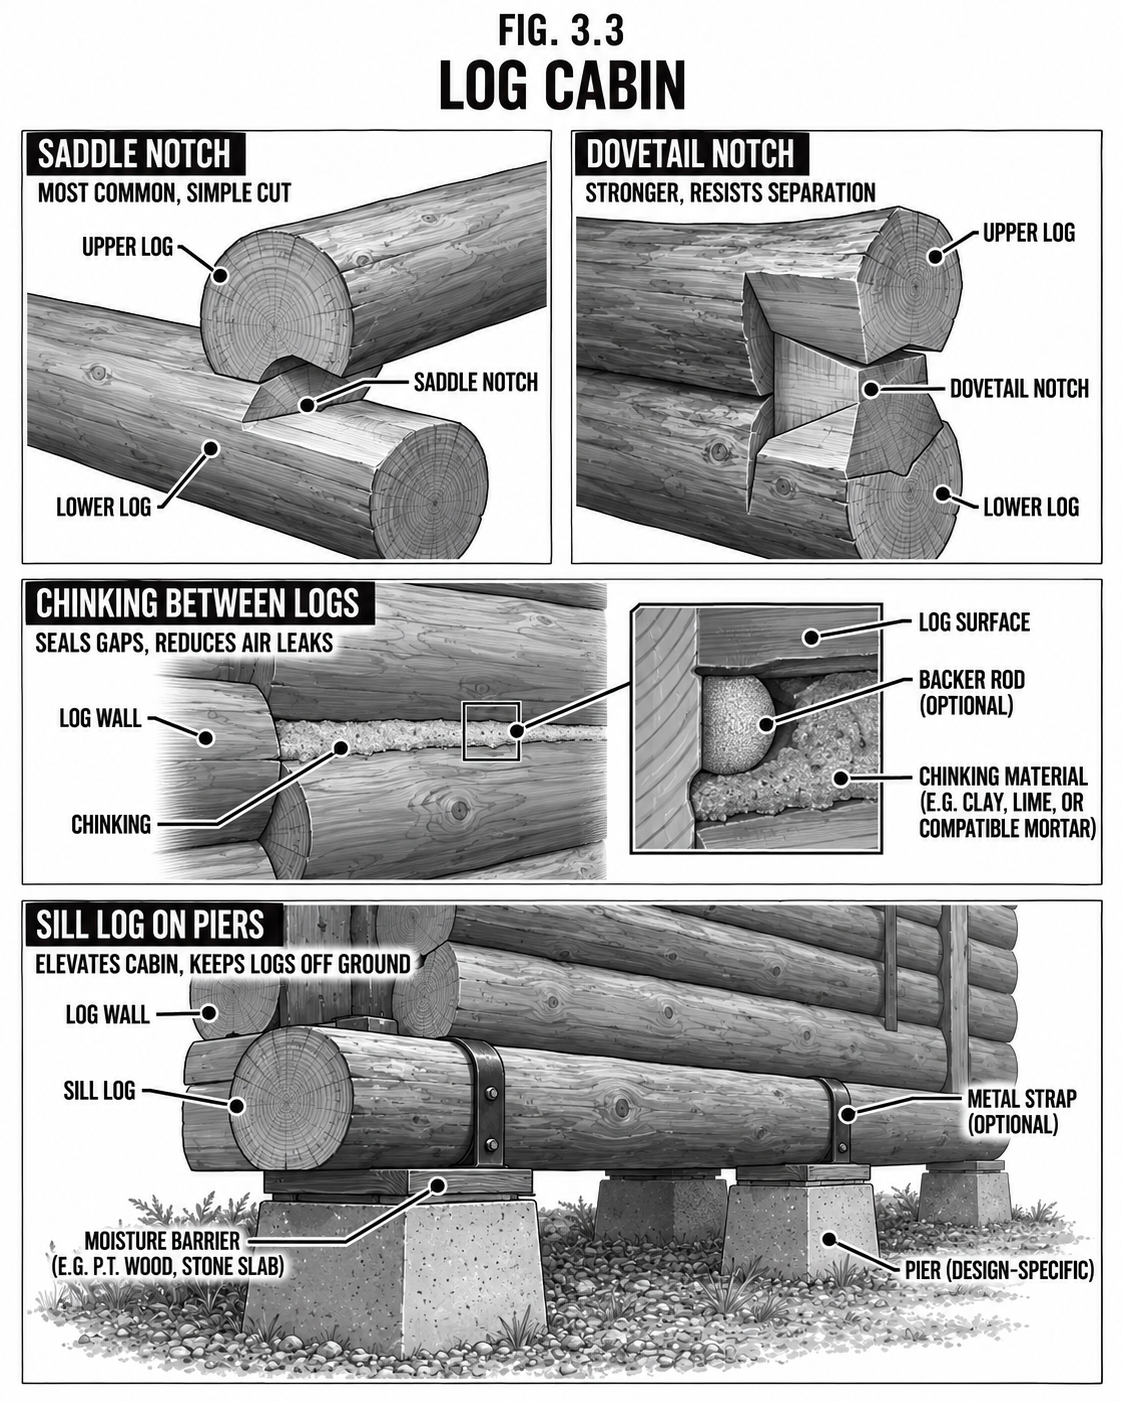
Logs are structure and insulation in one, straight off your own land. The craft is in the notches (saddle or dovetail) that lock the corners and shed water, and in the chinking that seals between courses.
Step by step
Fell, peel, and season straight logs.
Set a sill log on piers; notch and stack courses, scribing each to the one below.
Cut window and door openings; pin with splines so logs settle without binding.
Chink the gaps; roof it; let the walls settle before finishing.
Safety & code Logs settle for a year or more, so build settling allowance over doors and windows or they jam. Felling and lifting logs is serious work; never work alone under a rolling log.
Tips & variations A full-scribe fit needs almost no chinking but far more skill; chinked-gap style is the faster homestead route.
Shelter · NaturalCordwood
Cordwood Masonry
Firewood-length log-ends set in mortar: cheap, insulating, beautiful.
DifficultyIntermediate
TimeWeeks
CostLow
SkillsBasic masonry
Why it is worth it
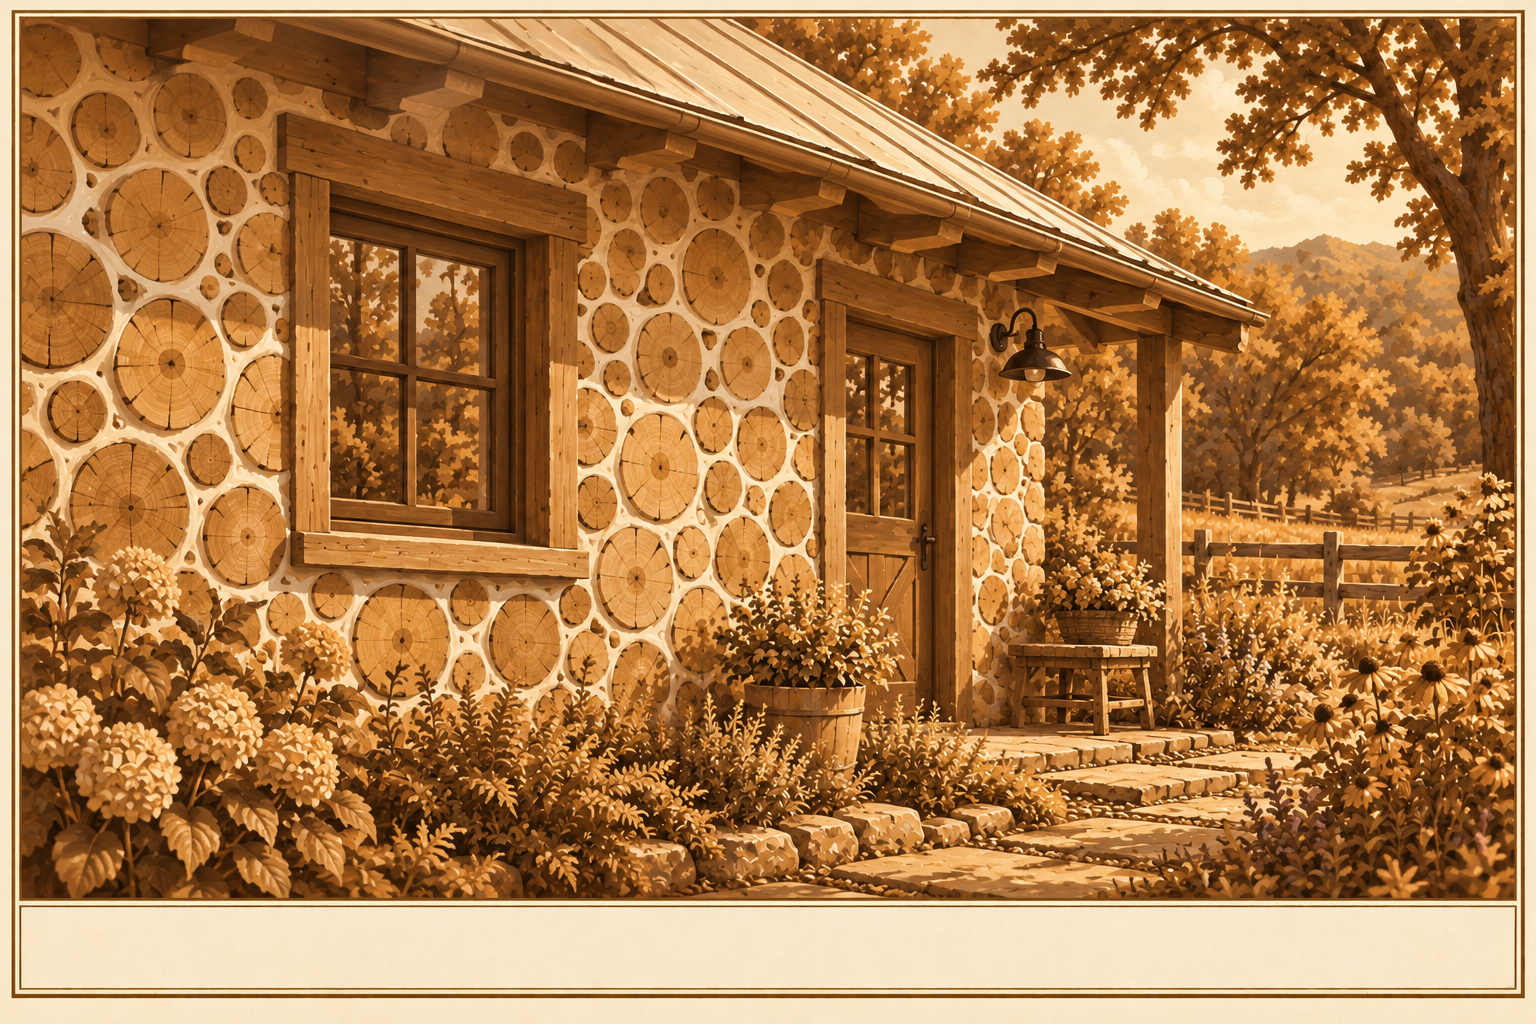
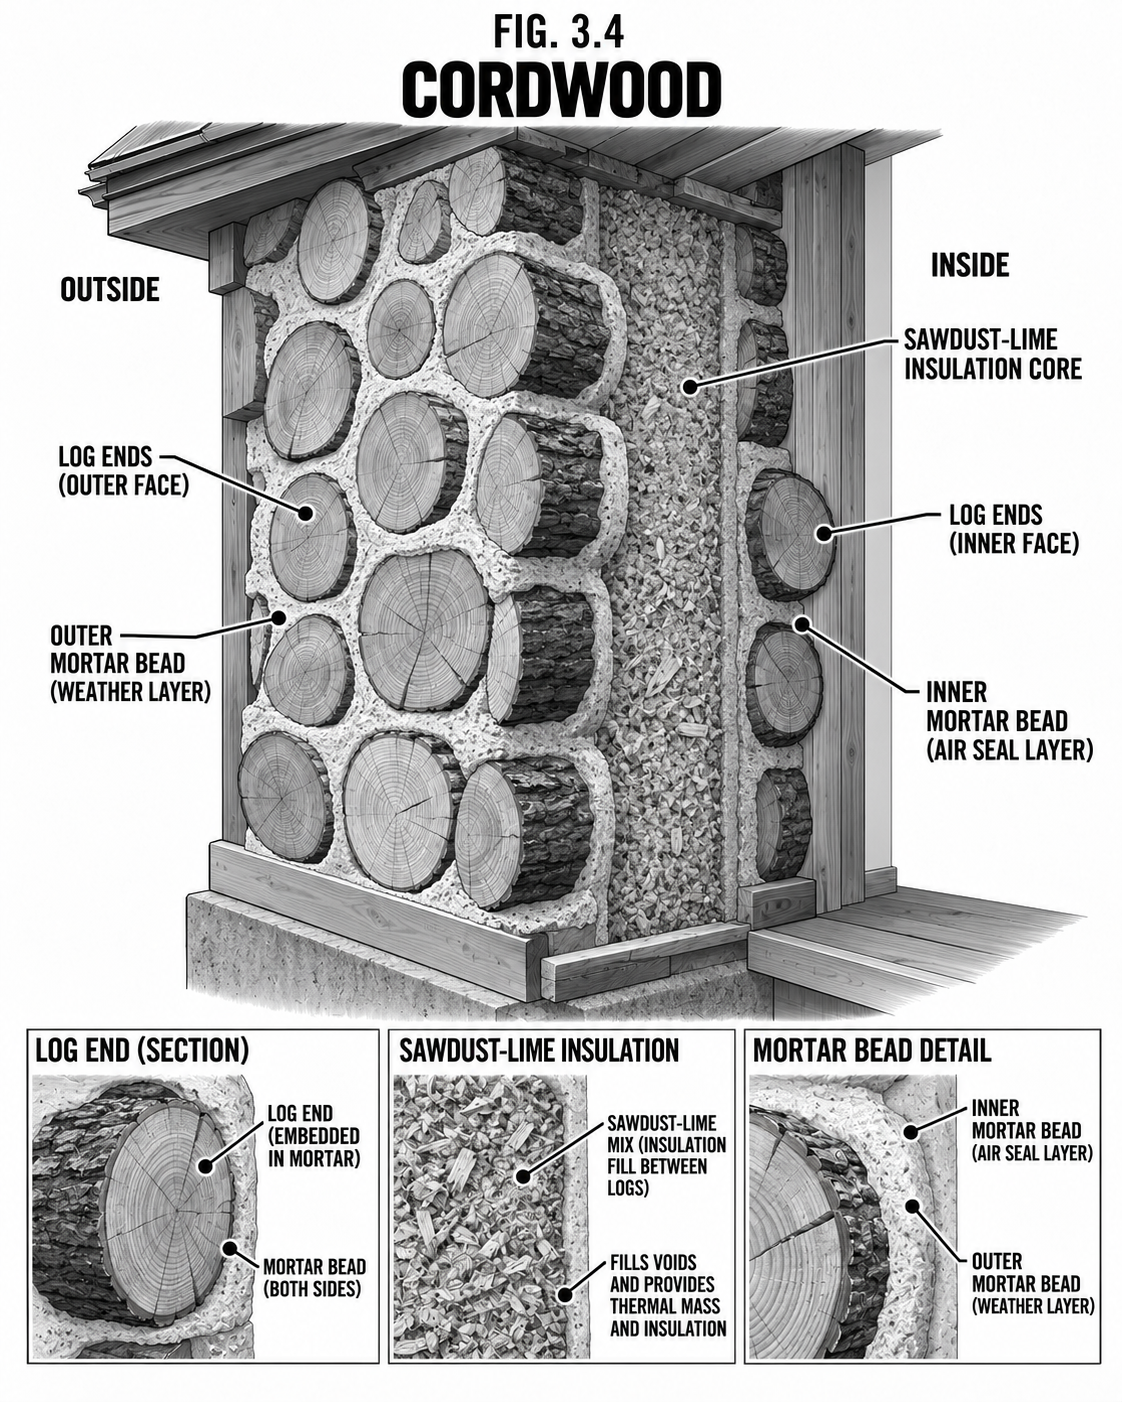
Cordwood walls lay short log-ends crosswise in two beads of mortar with an insulating sawdust-lime core between. It uses odd and scrap wood, insulates well, and needs no fancy tools. Within a post-and-beam or framed structure it is a forgiving infill.
Step by step
Season uniform log-ends well (dry wood won't shrink loose later).
Lay them crosswise in an inner and an outer mortar bead.
Fill the cavity between beads with sawdust-lime insulation.
Point the mortar; protect the wall with good roof overhangs.
Safety & code Use well-seasoned wood or the ends shrink and the wall loosens. Big roof overhangs and a raised base keep the wood dry; wet cordwood rots.
Tips & variations Bottle-ends and glass set in the wall throw colored light; a classic cordwood touch.
Shelter · NaturalEarthbag
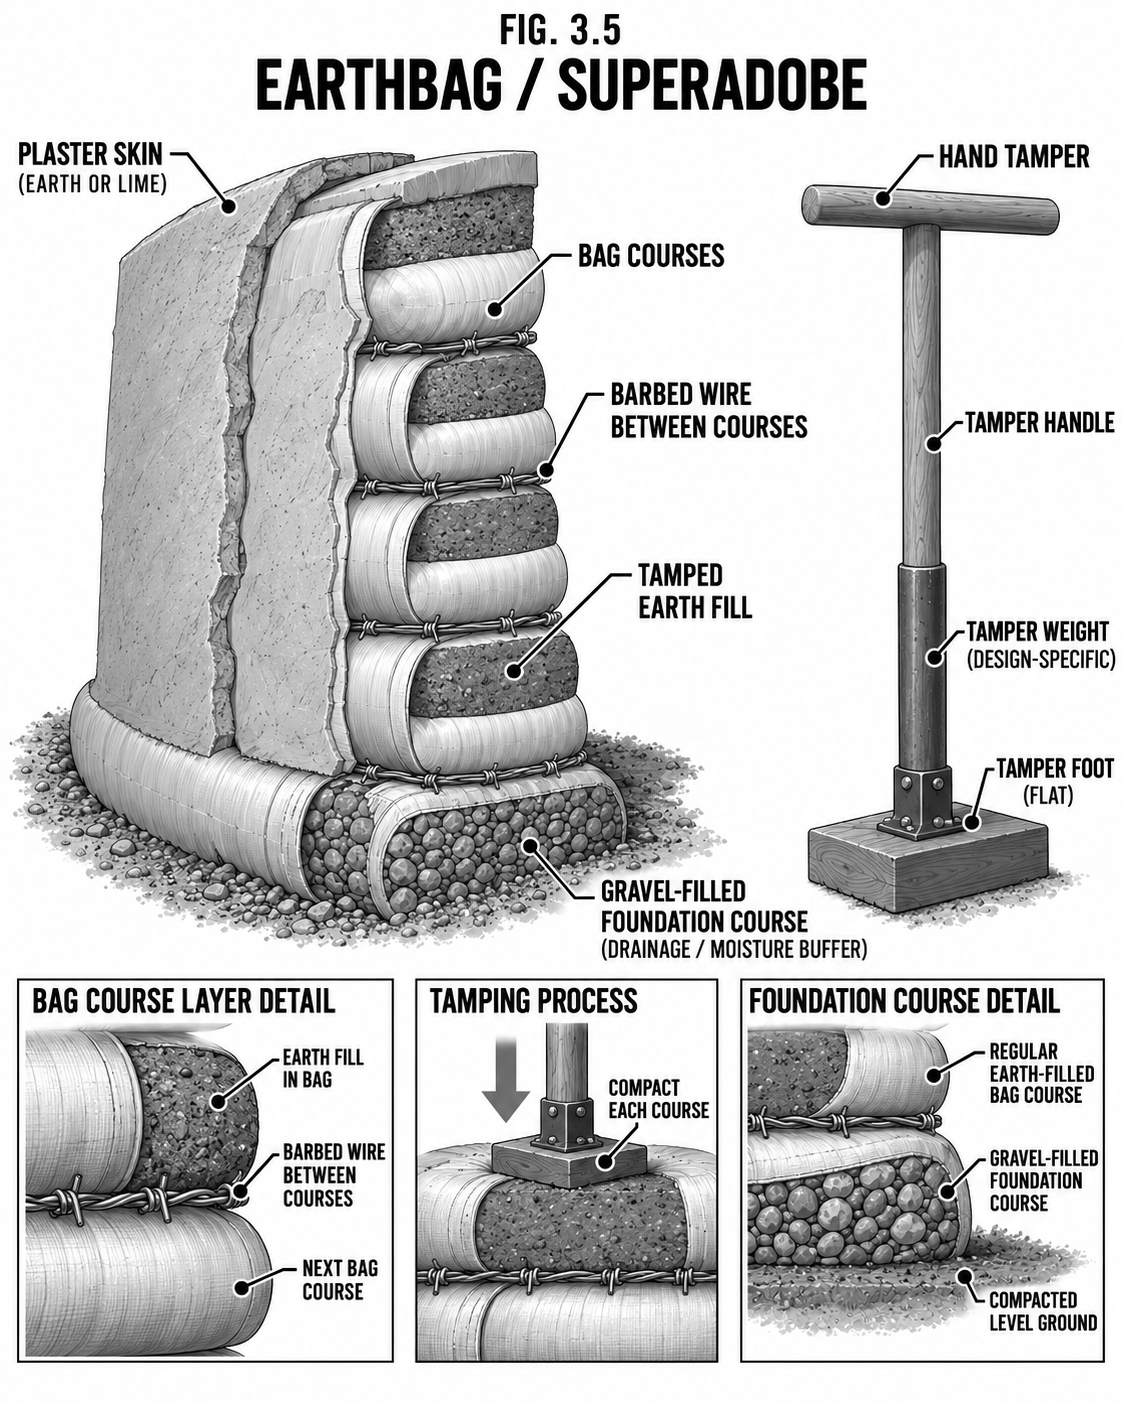
Earthbag (Superadobe)
Fill bags with the dirt under your feet and stack a wall that stops bullets.
DifficultyIntermediate
TimeWeeks
CostVery low
SkillsLabor
Why it is worth it
Polypropylene bags or tubes filled with moist subsoil, tamped and stacked with barbed wire between courses, make massive, cheap, fireproof, and remarkably strong walls. Curved or domed, they need almost no wood and ride out storms and quakes well when built right.
Step by step
Lay a gravel-bag foundation course on a rubble trench.
Fill, place, and tamp each bag course; lay two strands of barbed wire between courses for grip.
Step or taper for a dome, or build straight walls within a bond beam.
Plaster inside and out to protect the bags from sun.
Safety & code UV destroys bare bags fast, so plaster promptly. A proper foundation and a bond beam at the top are essential; engineer domes and tall walls. Earthen walls are heavy; build the base to carry them.
Tips & variations Continuous tube ("superadobe") goes up faster than individual bags.
Shelter · NaturalCob
Cob
Sculpt a house out of clay, sand, and straw with your bare hands.
DifficultyIntermediate
TimeSeason
CostVery low
SkillsLabor, feel
Why it is worth it
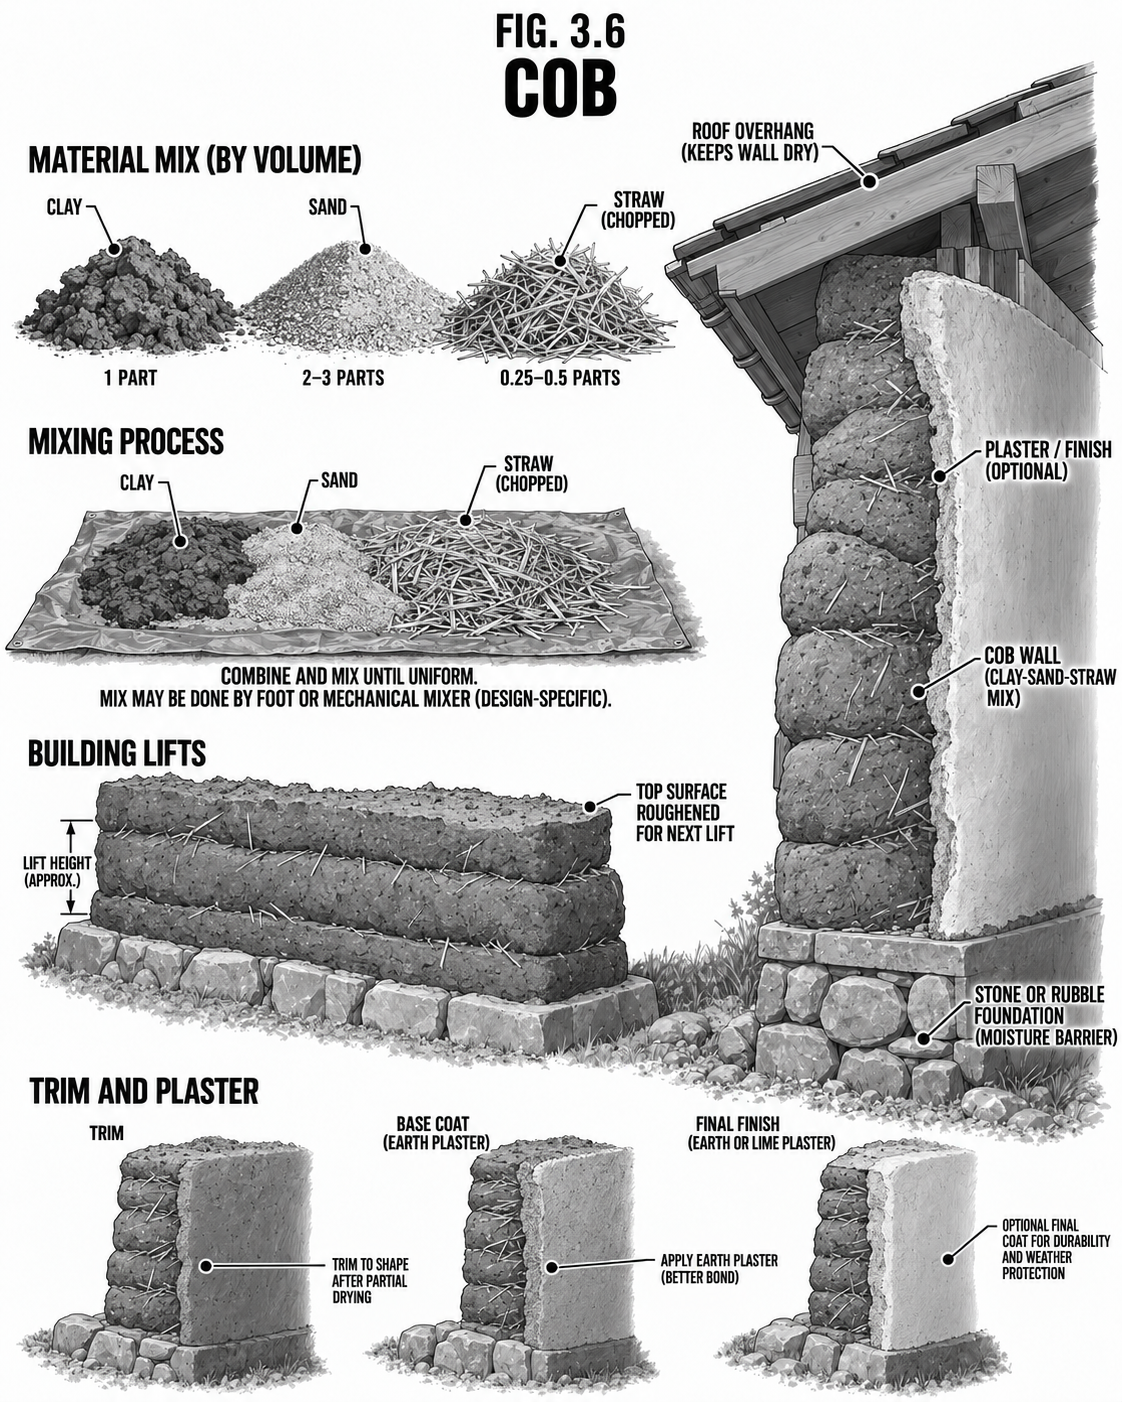
Cob is a stiff mud of clay, sand, and straw built up in monolithic lifts, needing no forms and no bricks. It sculpts into curves, benches, and shelves, stores heat, and is nearly free. It is slow, hands-on, and deeply satisfying.
Step by step
Test your soil for the right clay-to-sand ratio; add straw for tensile strength.
Build on a stem wall above splash height.
Apply in lifts, letting each firm up before the next so it doesn't slump.
Trim, then finish with an earthen or lime plaster.
Safety & code Cob must sit on a moisture-proof stem wall under a generous roof ("good boots and a good hat") or it slumps and erodes. Thick walls are heavy; foundation accordingly.
Tips & variations Cob pairs perfectly with a timber frame and with built-in rocket mass heaters (Chapter 4).
Shelter · NaturalStraw Bale
Straw Bale
Walls of stacked straw under plaster: warm as a parka, cheap as dirt.
DifficultyIntermediate
TimeWeeks
CostLow
SkillsBasic
Why it is worth it
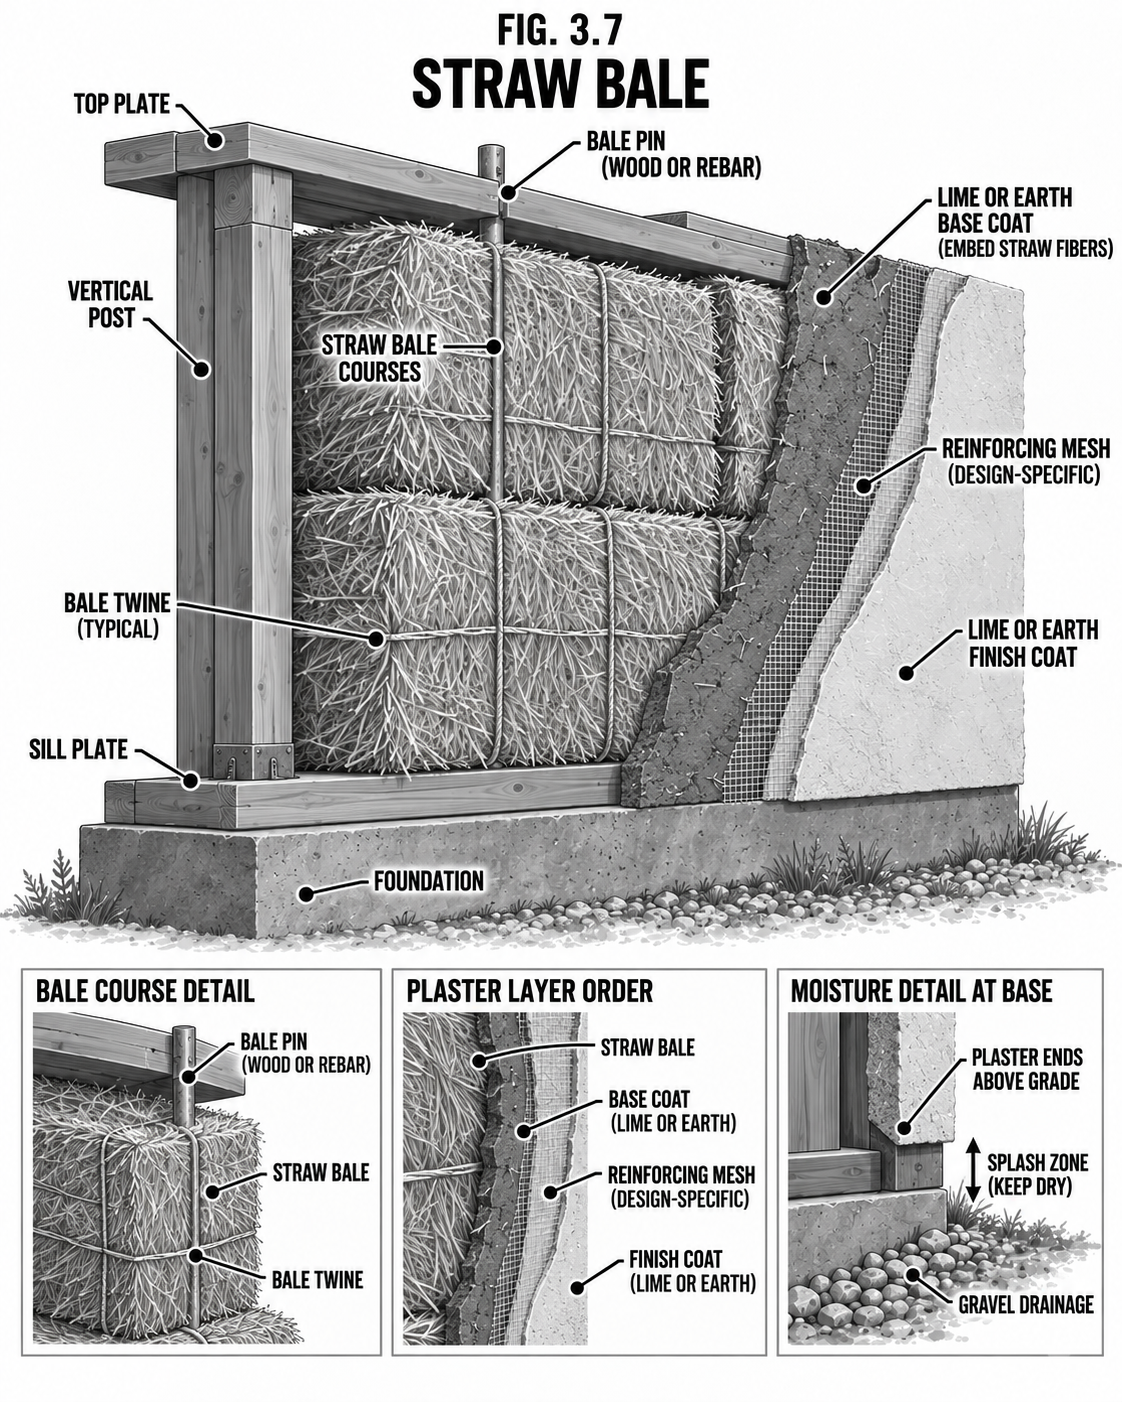
Agricultural straw bales stacked like giant bricks and plastered both sides give superb insulation (thick, breathable walls) for very little money. Load-bearing or as infill in a frame, they turn a waste product into a cozy, fire-resistant wall.
Step by step
Keep bales bone-dry; build on a raised, moisture-proof base.
Stack and pin the courses (internal stakes or external mesh).
Compress under a top plate.
Render both faces with lime or earth plaster so the wall can breathe.
Safety & code Moisture is the only enemy: a wet bale rots and molds inside the wall, so keep bales dry during build, raise them off the ground, and use breathable (not cement) plaster so trapped water can escape.
Tips & variations Plastered straw bale is far more fire-resistant than bare straw; the render is the shield.
Shelter · NaturalRammed Earth & Adobe
Rammed Earth & Adobe Brick
Two ancient ways to turn plain dirt into stone-hard walls.
DifficultyAdvanced / Intermediate
TimeWeeks
CostVery low
SkillsLabor
Why it is worth it
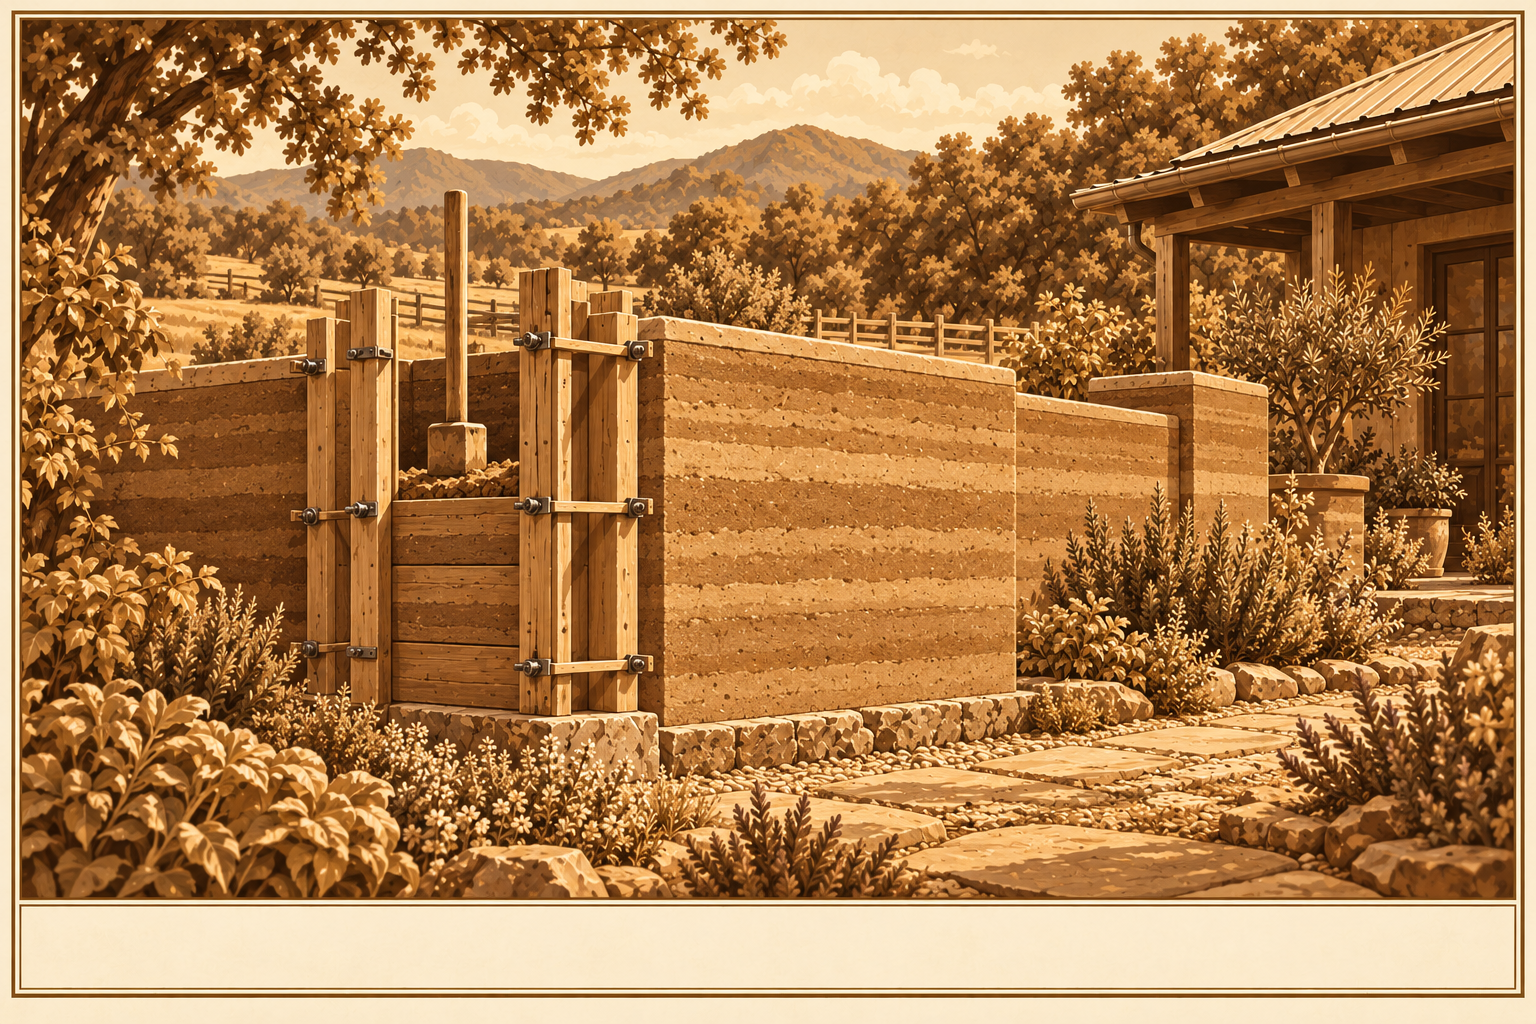
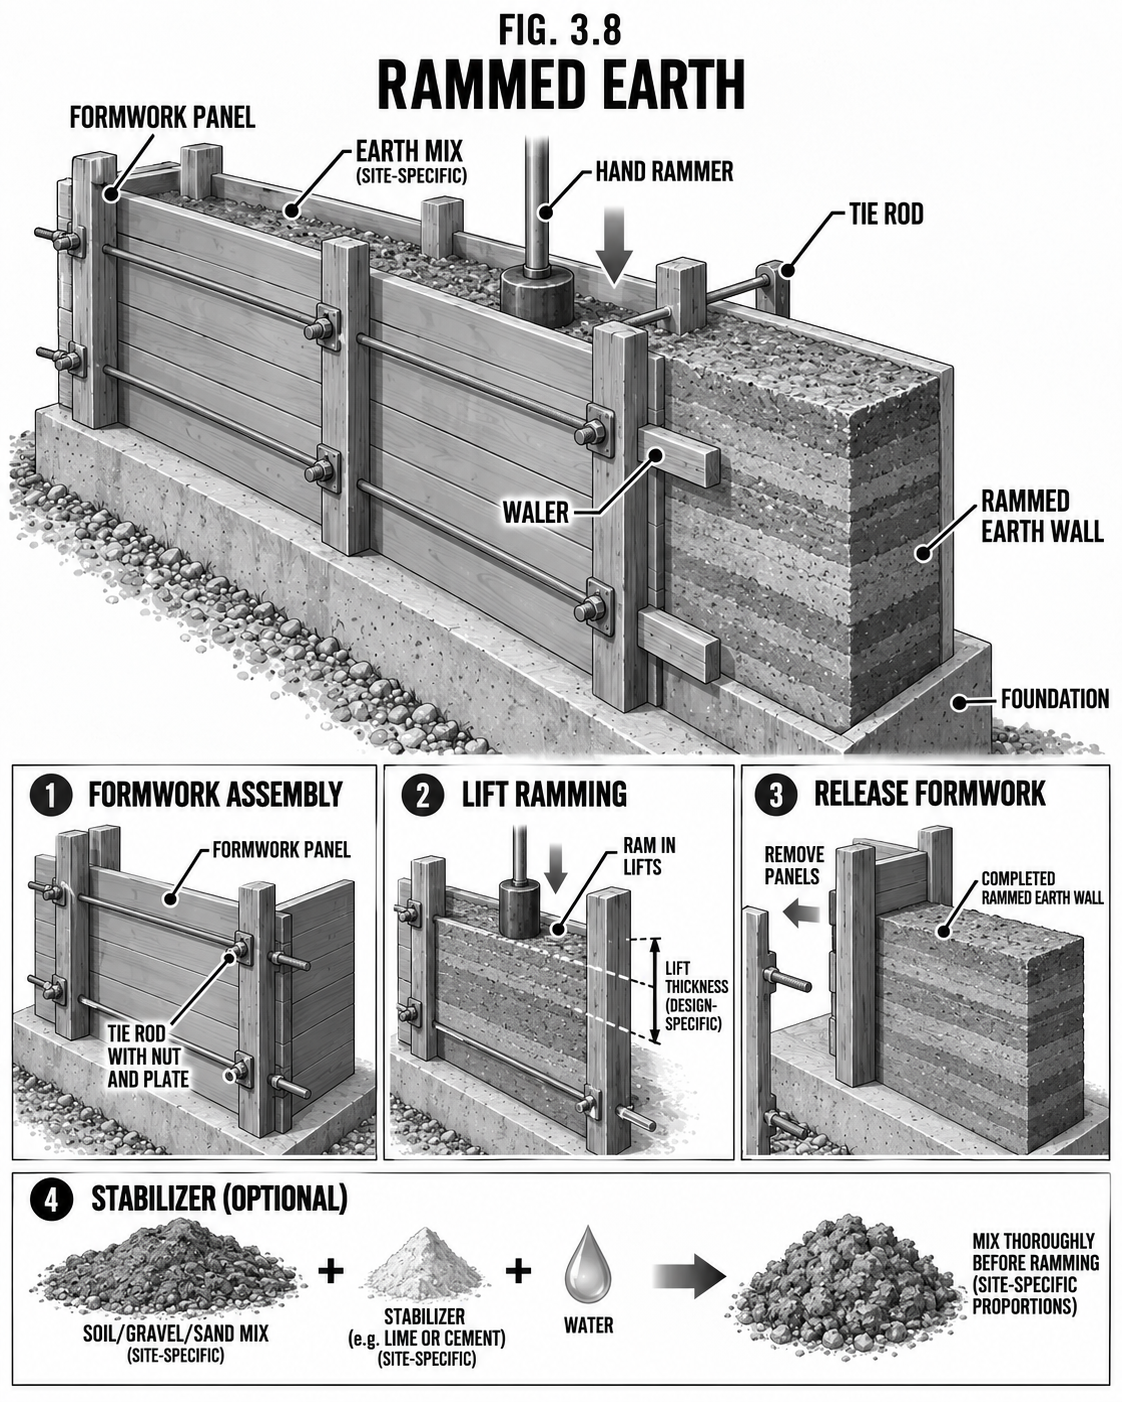
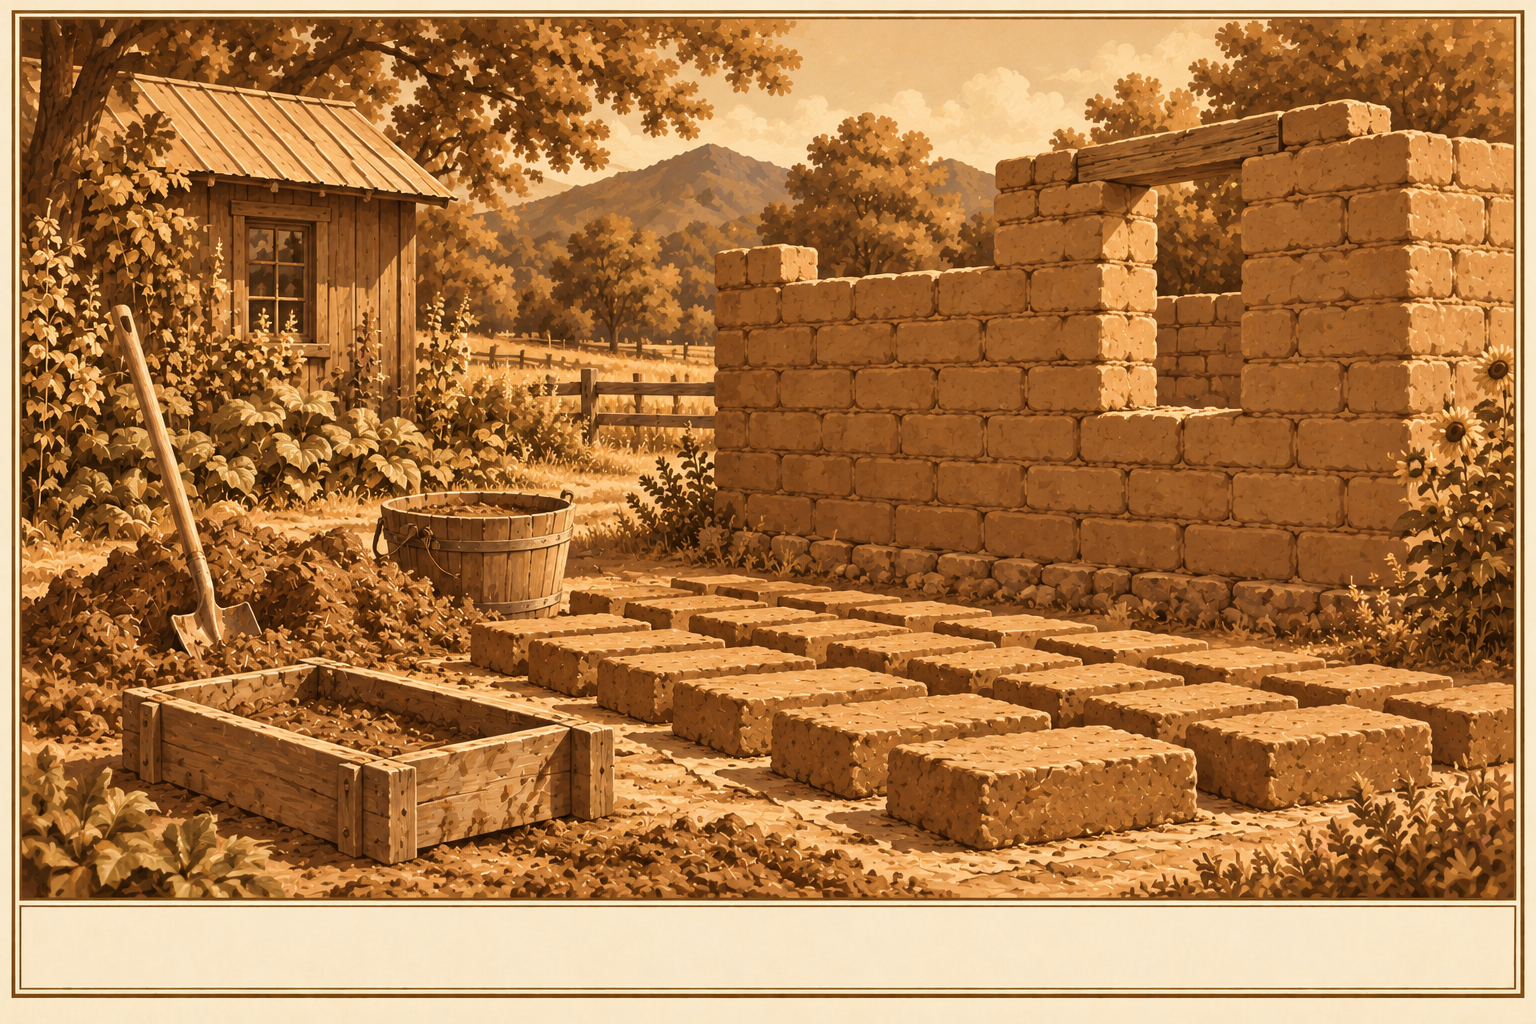
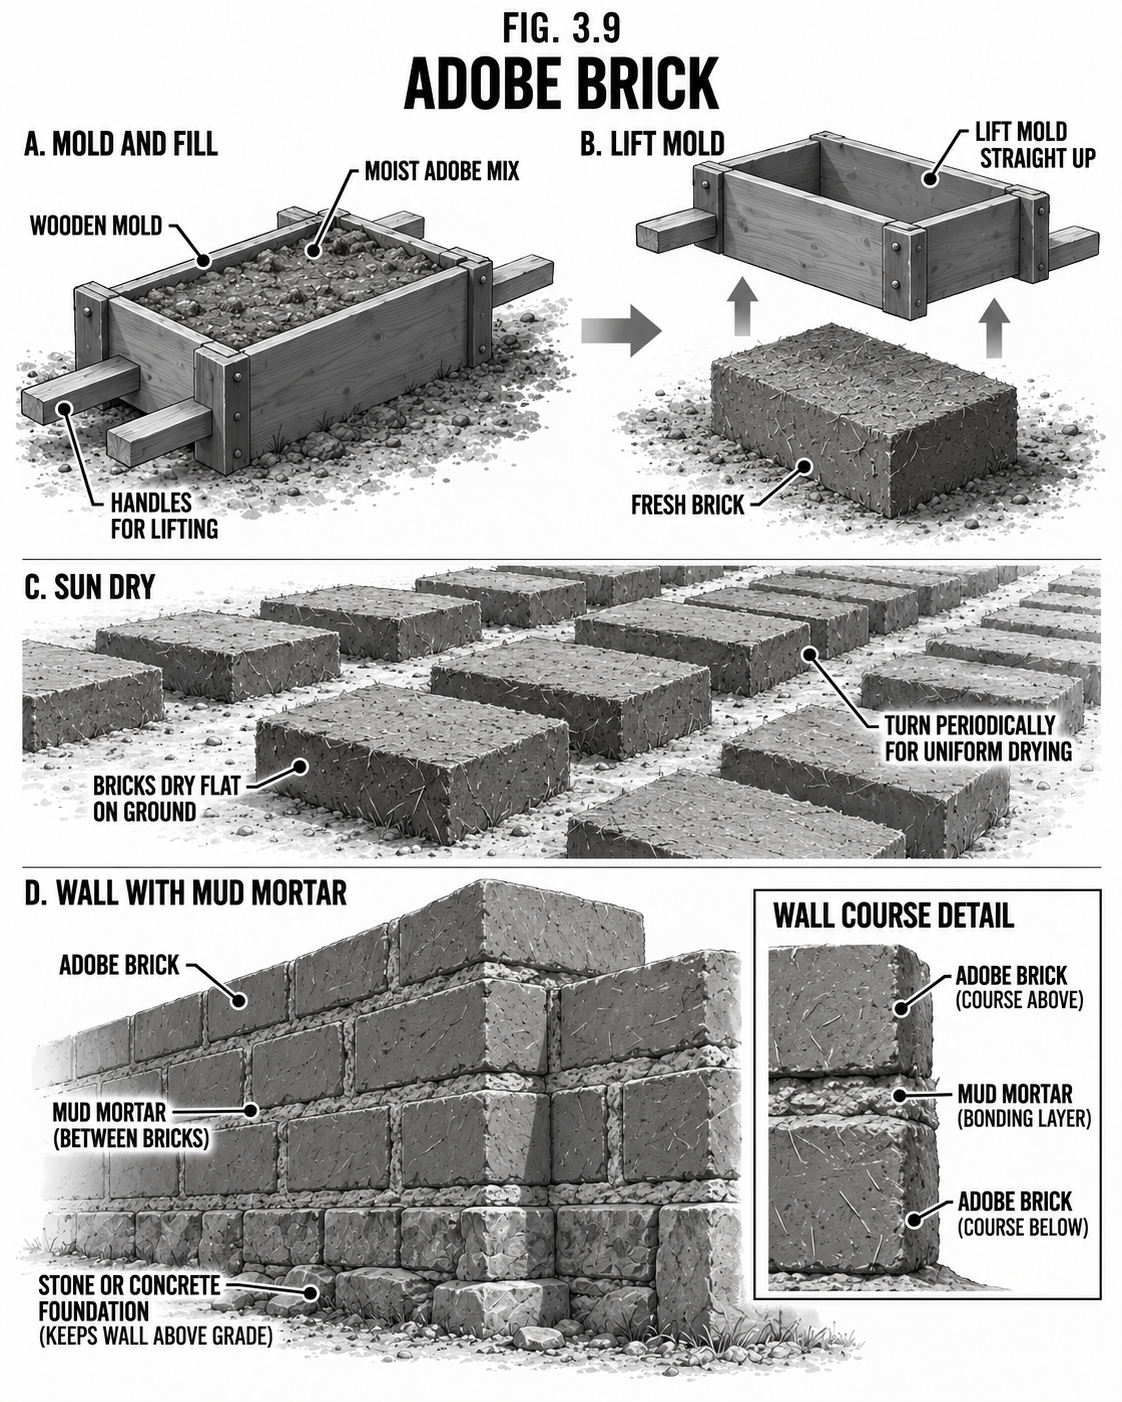
Rammed earth tamps damp earth in layers inside stout formwork into dense, striped, stone-like walls. Adobe molds the same earth into sun-dried bricks laid in mud mortar. Both give massive thermal-mass walls from the cheapest material there is: the ground.
Step by step
Find the soil mix (sand, silt, clay) that compacts hard; a little stabilizer adds durability.
Rammed earth: build strong forms, fill and tamp in thin lifts, strike the forms, repeat.
Adobe: mold bricks, sun-dry them, then lay up in mud mortar.
Protect both with roof overhangs and a plaster or a stabilized surface.
Safety & code Rammed-earth forms take enormous pressure, so build them strong or they blow out. Earthen walls need protection from rain at the top and base. These are heavy; design the footing for the mass.
Tips & variations Both excel in climates with big day-night temperature swings, soaking up day heat and releasing it at night.
Shelter · NaturalEarth-Sheltered
Earth-Sheltered / Bermed
Let the hillside be three of your walls and most of your heating bill.
DifficultyAdvanced
TimeProject
CostMed-High
SkillsStructure + waterproofing
Why it is worth it
Banking earth against the walls and over the roof wraps the home in the ground's stable temperature, so it stays cool in summer and needs little heat in winter. It is quiet, storm-proof, and nearly invisible on the land.
Step by step
Build a structure strong enough to carry tons of earth (engineered).
Waterproof the buried surfaces thoroughly and insulate outside the waterproofing.
Drain relentlessly: footing drains, a drainage layer, and grading that sheds water away.
Berm and plant the earth cover.
Safety & code Water and structural load are make-or-break: a buried building that leaks or is under-built is a catastrophe. This is the one chapter method to engineer and permit properly, not eyeball.
Tips & variations Even a partial berm on the cold north/windward side gives much of the benefit for far less work.
Shelter · EnvelopeFoundations & Roofs
Foundations & Roof Systems
What the building stands on and what sheds the weather: get these right or nothing else matters.
DifficultyIntermediate
TimeDays
CostVaries
SkillsEarthwork, carpentry
Foundations
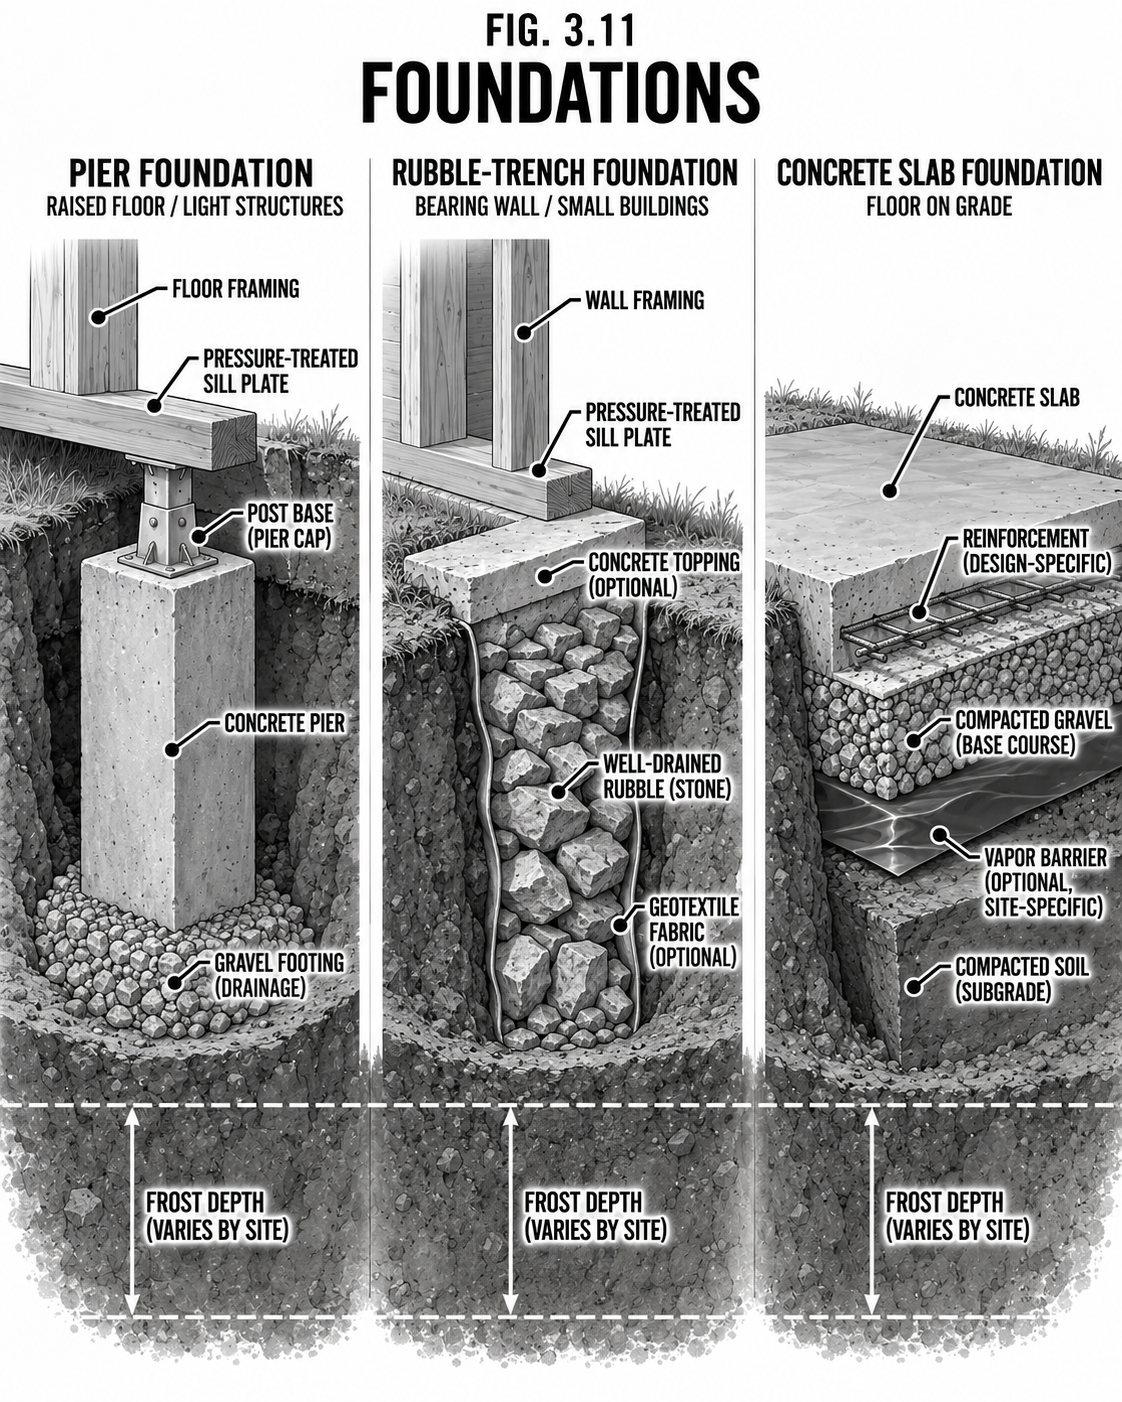
Piers (posts on footings) are cheap and good on slopes; a rubble trench drains and lifts earthen walls off the wet; a slab gives a floor and thermal mass. All must reach below your frost line so winter heave doesn't crack the building.
Roofs
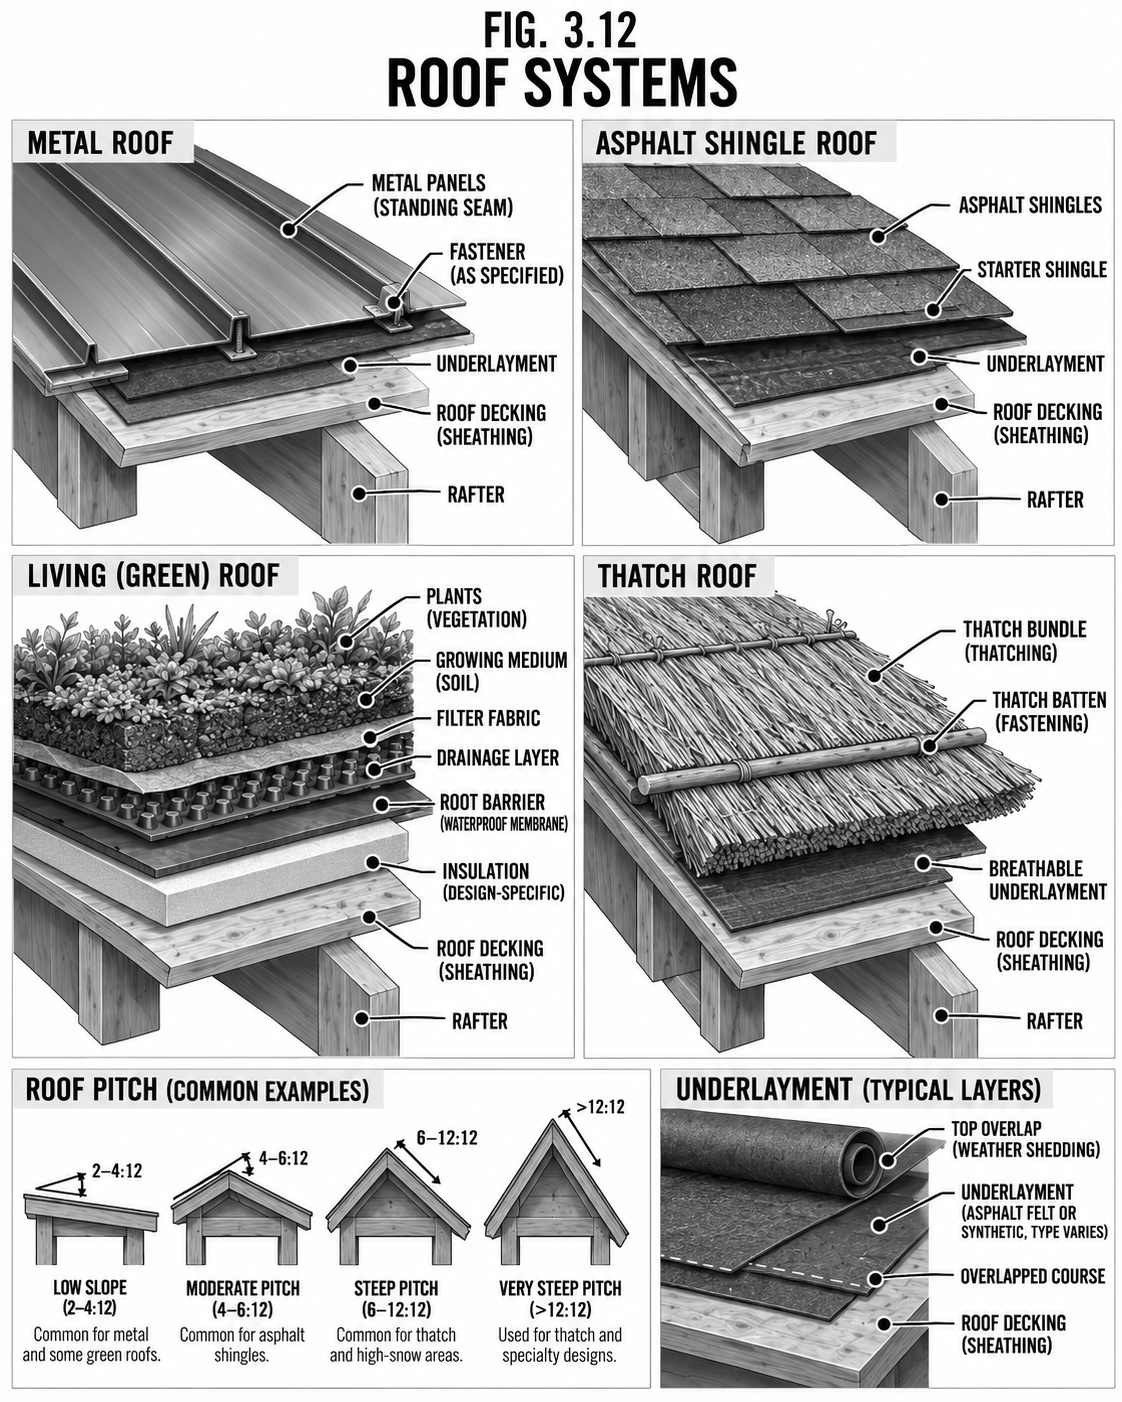
Metal is the homestead default: sheds snow, catches clean rainwater, lasts decades. Shingles are cheap and common. A living (green) roof insulates and hides the building. Thatch is traditional where reed is plentiful. Pitch the roof for your snow load and give it big overhangs to protect the walls.
Safety & code Frost depth and snow load are not suggestions; build the foundation below frost and the roof for your heaviest winter. A metal roof plus proper flashing is the lowest-maintenance, cleanest-water choice.
Tips & variations A steep metal roof sheds snow itself; a low one needs it designed for the full snow load sitting on it.
Shelter · EnvelopeInsulation & Vapor
Insulation & Vapor Control
The invisible layer that decides whether your home is cozy or a mold farm.
DifficultyIntermediate
TimeWith the build
CostMed
SkillsDetailing
Why it is worth it
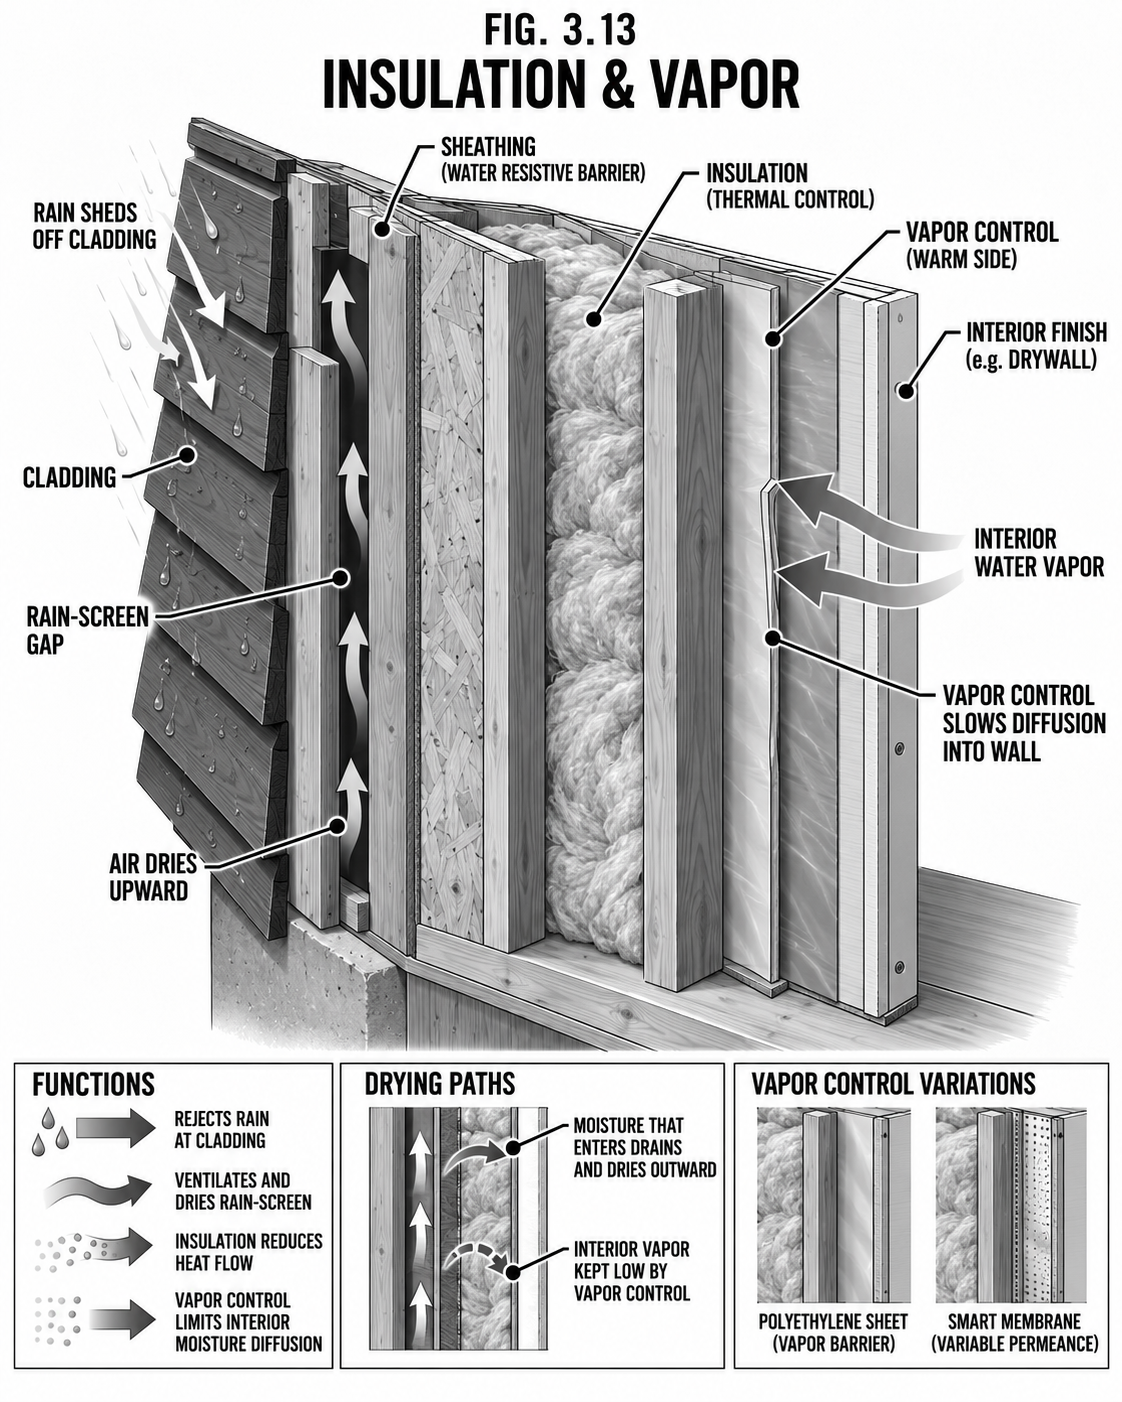
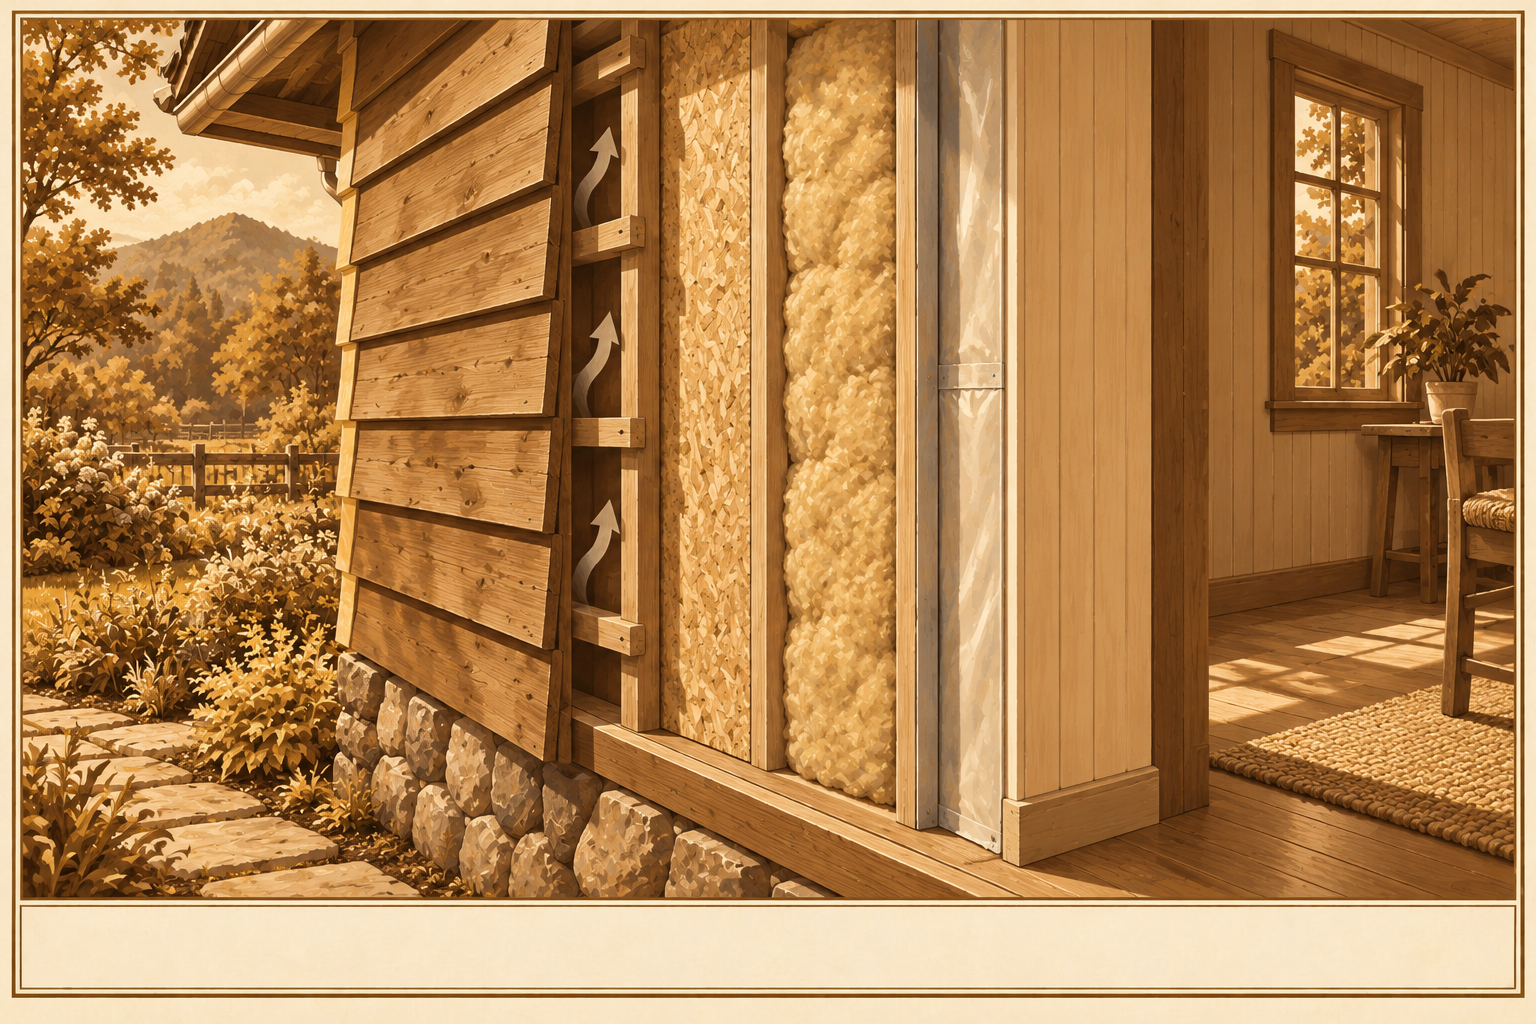
Insulation keeps the heat you worked for; vapor control keeps that heat from turning into hidden moisture inside your walls. Get the layering right, outside to inside: cladding, a drainage gap, sheathing, insulation, the vapor control on the warm side, then your interior finish.
Safety & code The cardinal rule: let walls dry. A vapor barrier on the wrong (cold) side traps moisture and rots the wall. Know which side is warm in your climate and detail accordingly; air-seal before you insulate.
Tips & variations Natural walls (straw, cob) want breathable layers, no plastic vapor barriers; they manage moisture by drying both ways.
Shelter · StorageRoot Cellar
Root Cellar
A refrigerator that runs on dirt and keeps your harvest till spring.
DifficultyIntermediate
TimeDays
CostLow-Med
SkillsDigging, masonry
Why it is worth it
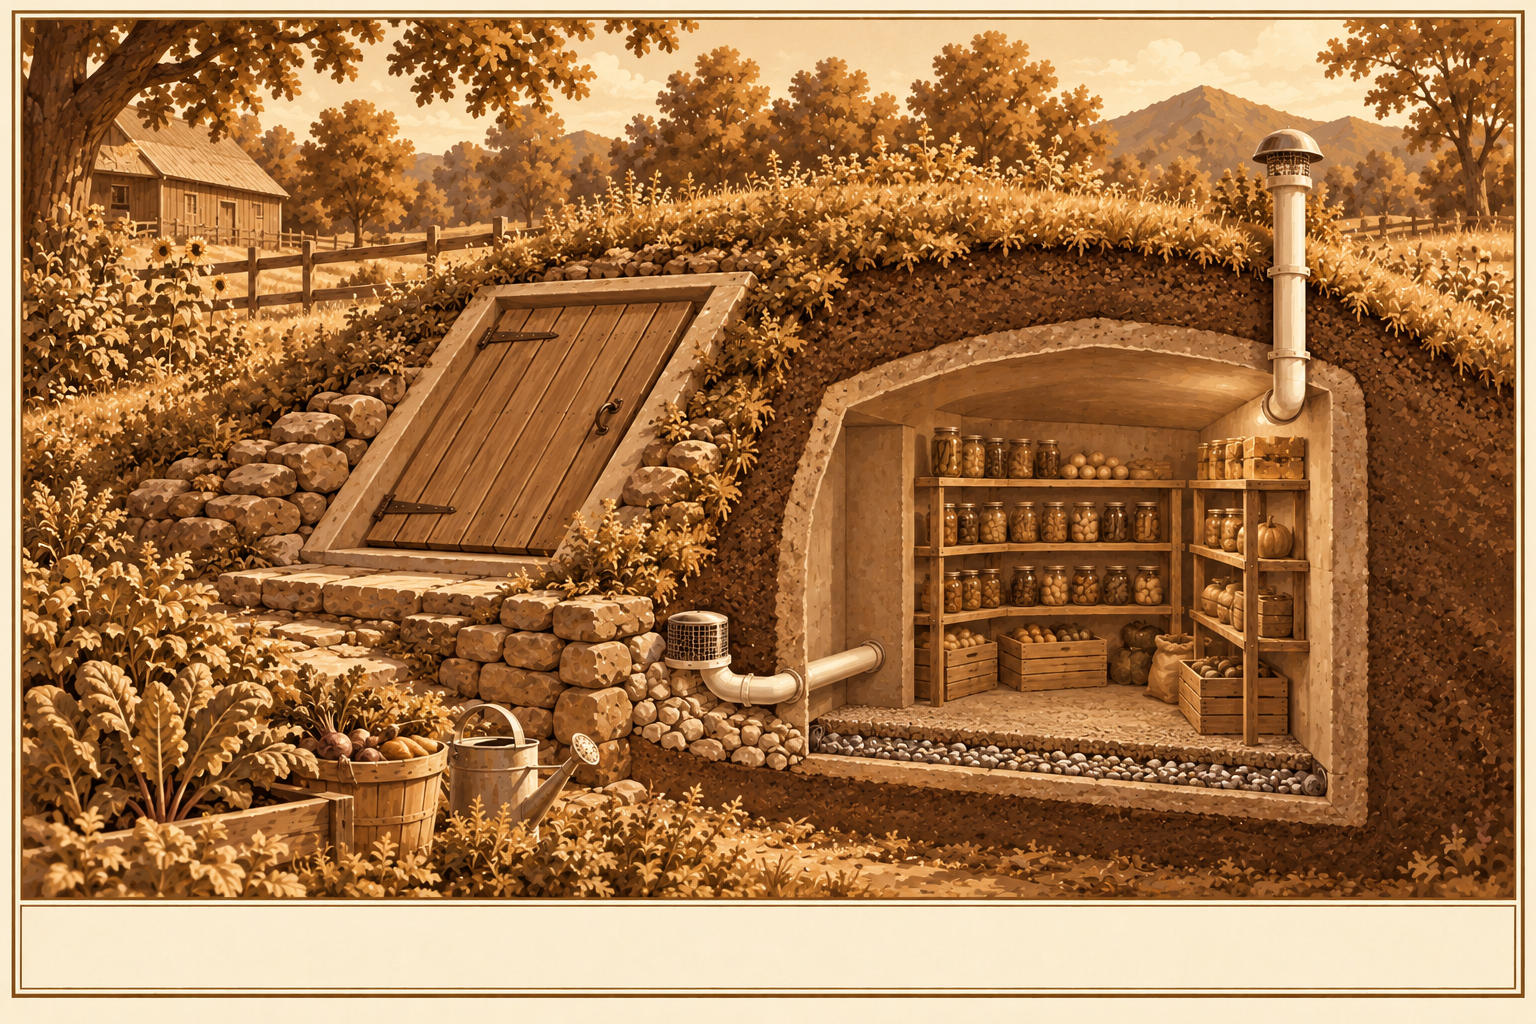
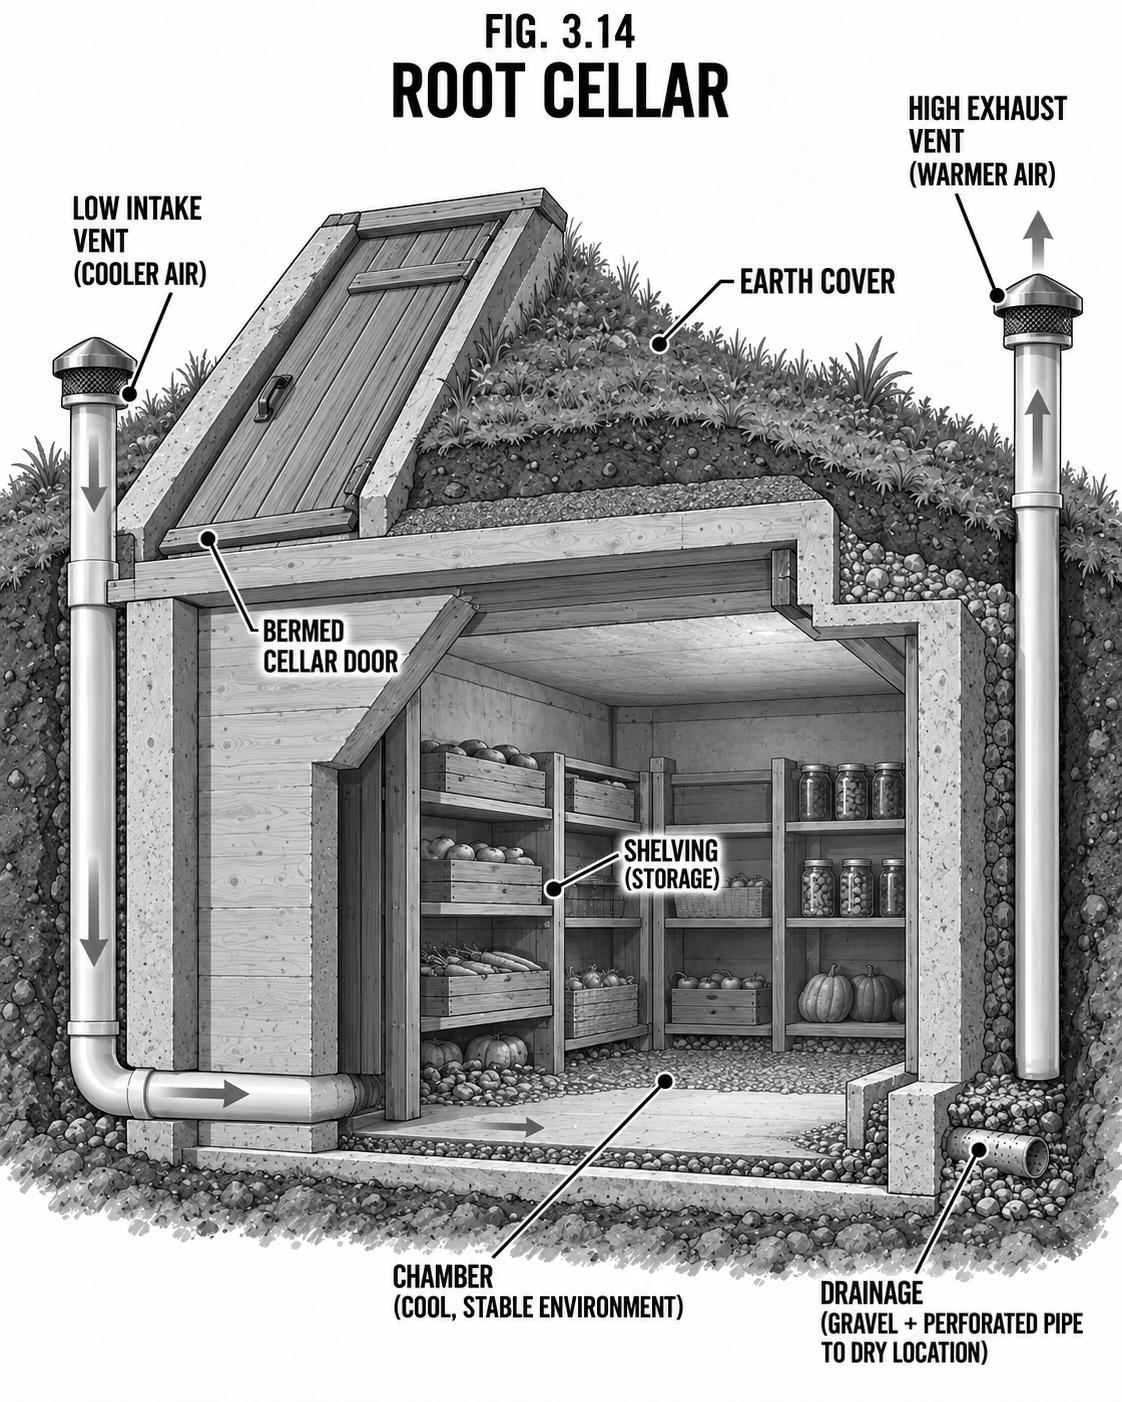
Below the frost line the earth holds a steady cool temperature year-round. A buried, vented chamber uses that to store potatoes, carrots, apples, and canned goods for months with no electricity. It is the companion to everything you grow and put up in Chapter 5.
Step by step
Dig into a hillside or down, below the frost line, where it drains.
Build a strong, insulated chamber (earth over the top).
Fit a LOW intake vent and a HIGH exhaust vent so cool damp air circulates.
Shelve it, and keep a thermometer and hygrometer inside.
Safety & code Ventilation prevents stale air and rot; an unvented cellar spoils its contents and can collect bad air. Keep it dark and drained. If sealed and used by people, be mindful of oxygen and radon; vent it well.
Tips & variations Different crops want different spots: humid and cold for roots, dry and cool for onions and squash.
Shelter · OutbuildingsWoodshed & Cold Frame
Woodshed & Cold Frame
Two small builds that pay you back every single season.
DifficultyBeginner
TimeA weekend each
CostLow
SkillsBasic
Why they are worth it
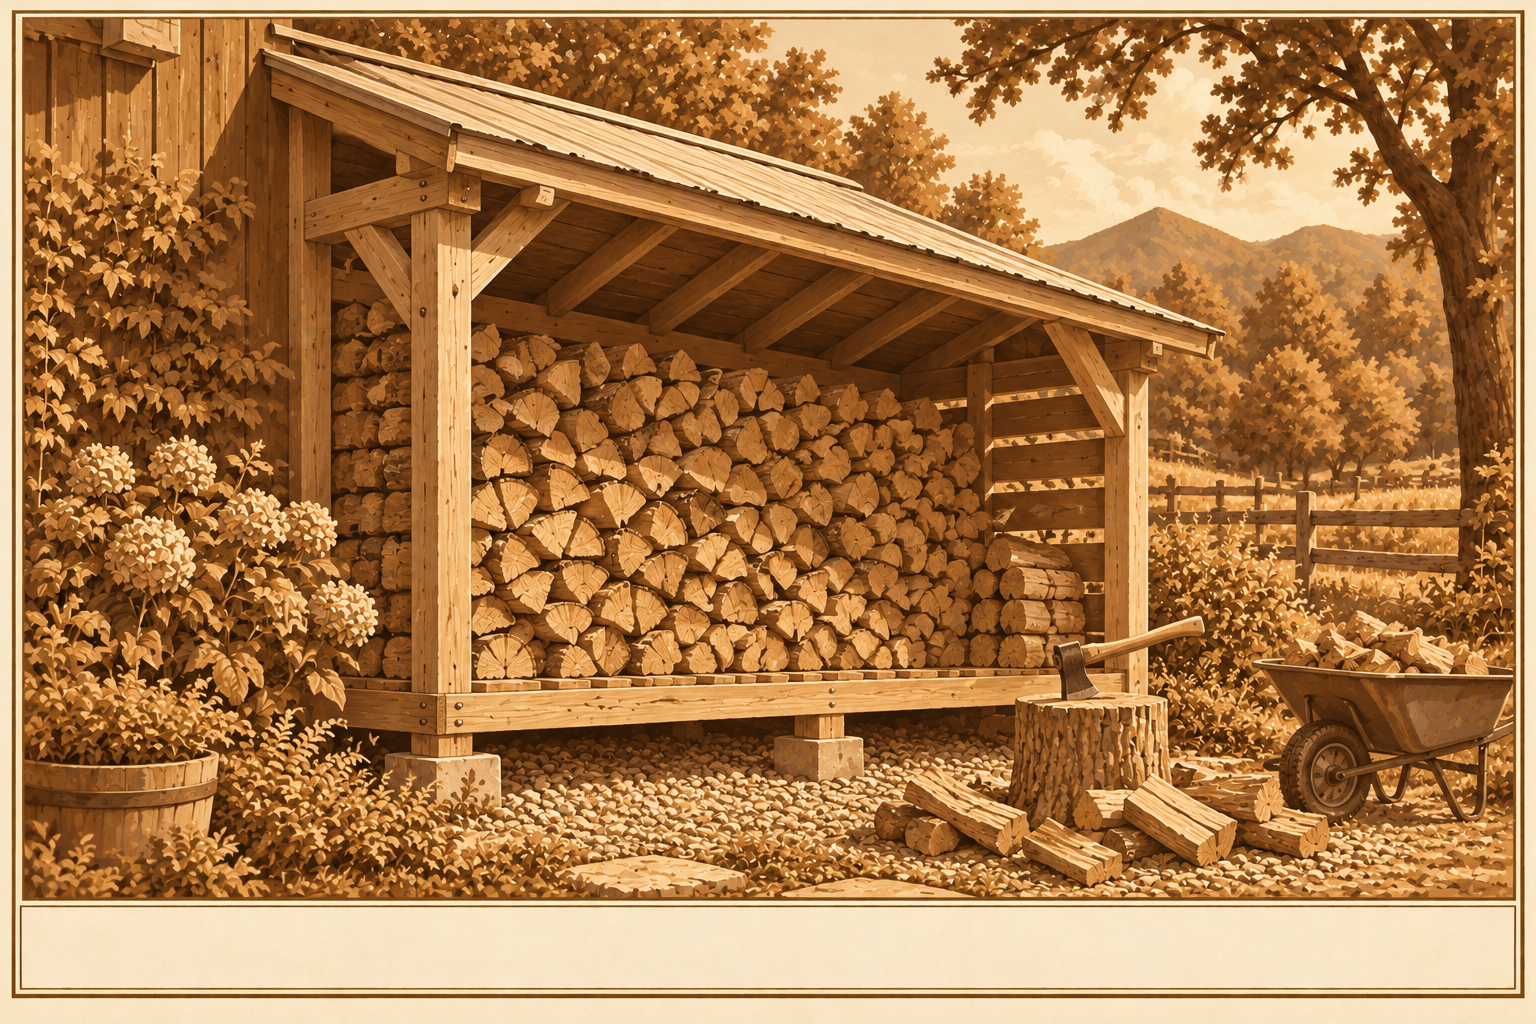
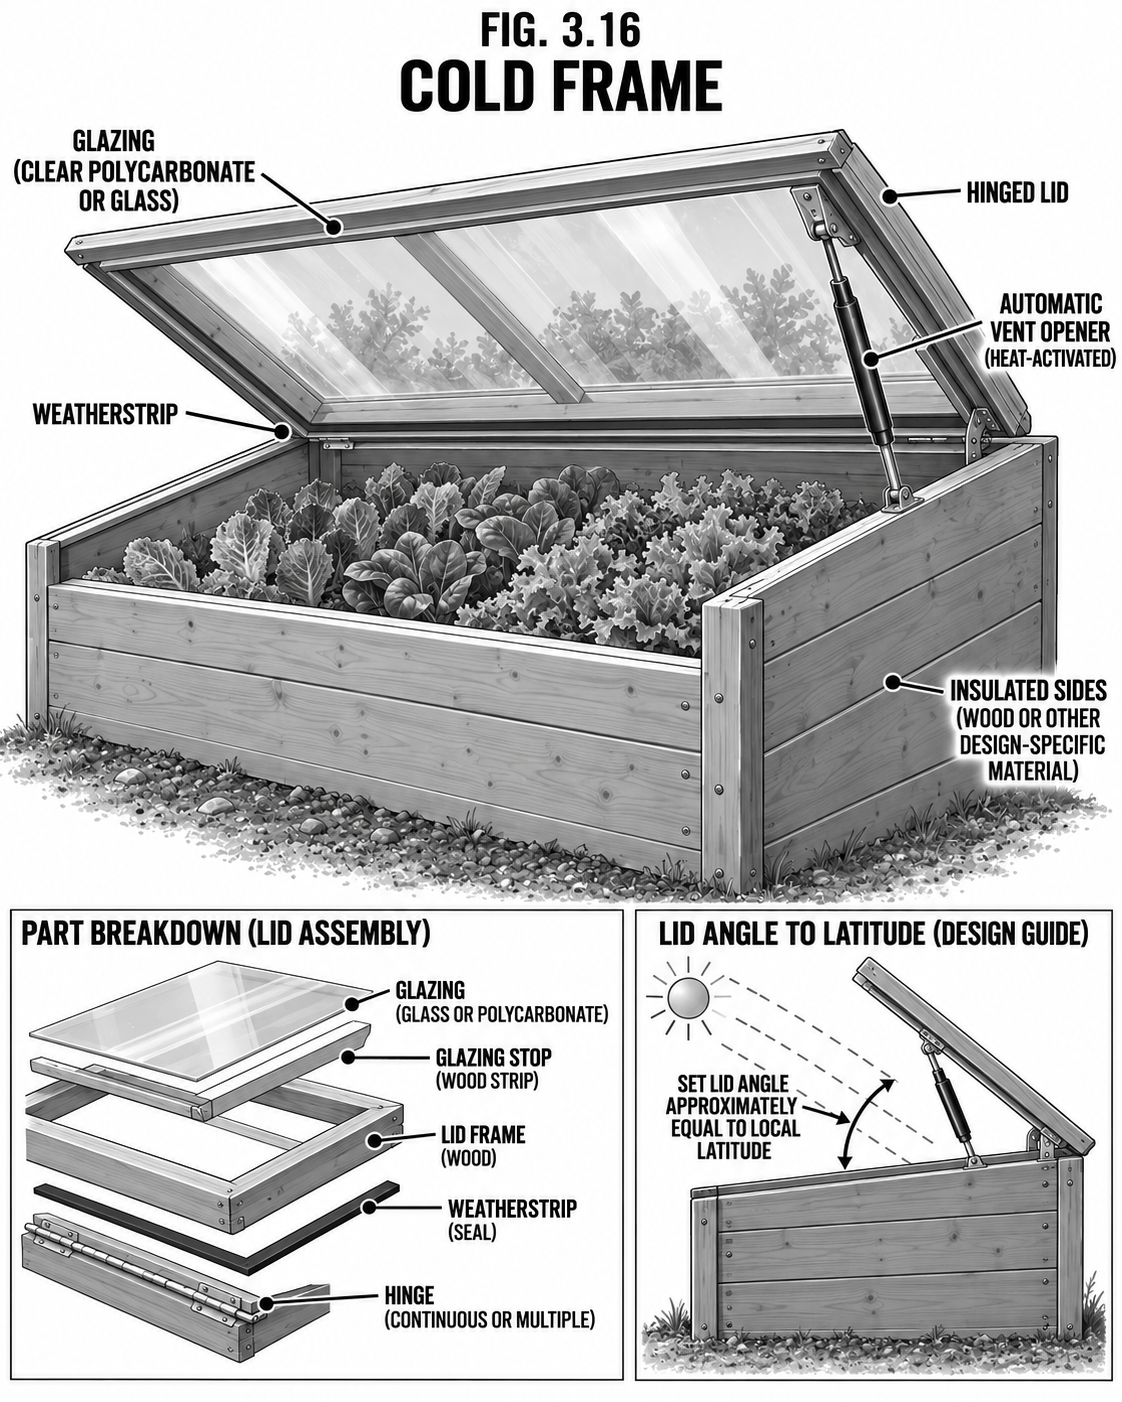
A woodshed is the difference between dry, ready firewood and a wet, smoky winter: an open-faced, roofed, raised structure that seasons and stores your wood. A cold frame is a glazed box that extends your growing season weeks on each end and hardens off seedlings.
Build notes
Woodshed: roof it, open the sunny/windward face for airflow, raise the floor off the ground so the bottom row stays dry.
Cold frame: slope the glazing toward the sun at about your latitude; hinge the top to vent.
Safety & code A closed cold frame cooks plants on a sunny day; add an auto-vent or prop it. Stack firewood stable and not too high; a toppling woodpile hurts.
Tips & variations Size the woodshed for a full season plus one, so you always burn wood that seasoned a year or more.